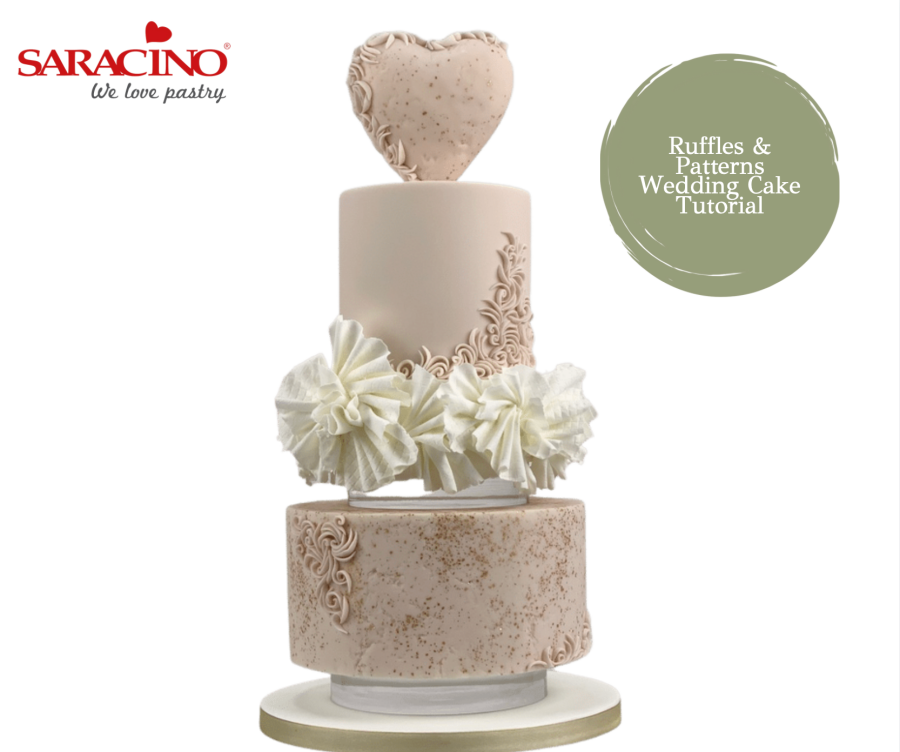
You will need:
- Pink, brown and white Pasta Top
- White Pasta Model
- Tsp of royal icing
- Cool boiled water
- Saracino Gold glitter
- Trex
- Icing sugar
- 5 x 5” deep dummy cake
- 6 x 2” dummy separator
- 9 x 4” dummy cake
- 4” polystyrene Heart
- Spare dummy cake (at least 4” wide)
- 12” pre covered cake drum
- 5 & 7” 30mm Acrylic spacers – Prop Options
- 18 gauge flower wire
- Cake pop stick
- 6 – 8cm round cutter
- Medium and large rolling pin
- Long sharp needle
- Knife
- Sharp edge smoother
- Flexi smoother
- Scissors
- Tiny palette knife
- Modelling knife
- PME 3 in 1 wheel – serrated part
- Dresden tool
- Small and thick brush
- Medium flower pick
- Pasta Roller
- Hessian mat or any lace mat
- Foam drying sponge and some cut off pieces
- Stone & Textile texture mat – The Old Piping Bag
Step 1
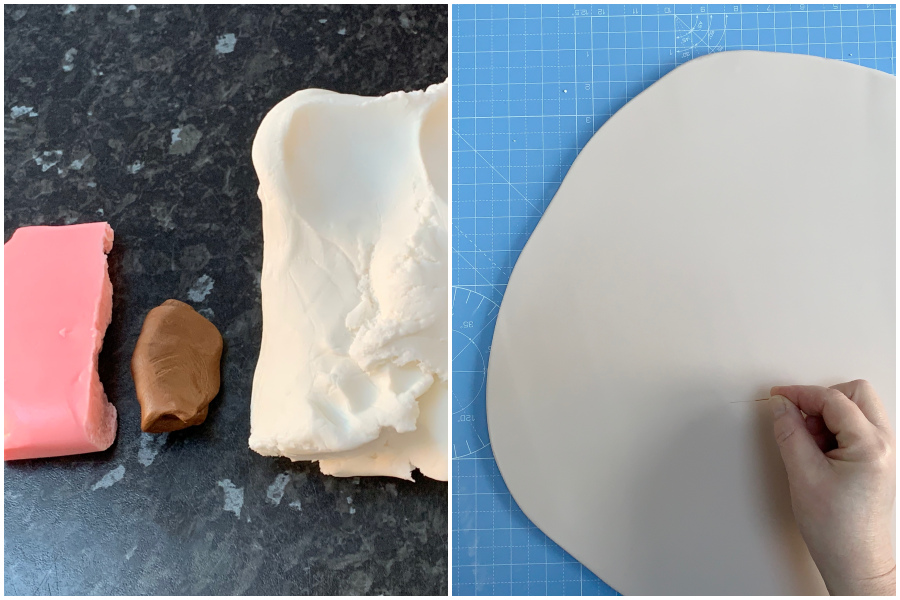
Mix the brown, pink and white together making sure you combine the colours well making a light blush pink. Lightly dust your work top and start to roll your paste out, keeping it round and roll to around 7mm thick. Use the needle to pop any bubbles if you have any.

Step 2
Lightly sprinkle the Gold glitter over the paste and using the palm of your hand gently press it into the paste. Roll the paste a little more, you will notice most of the glitter will stick to the sugarpaste.

Step 3
Using some Trex completely cover the side and the top of the largest dummy. Put the dummy cake onto the smaller acrylic plate with a weight behind the dummy cake (this will stop it from moving whilst you cover the cake). Place the paste over the dummy and then remove the weight. Using the palm of your hand gently press the paste onto the dummy making sure you remove any air bubbles by lifting the side of the paste.

Step 4
Using your palms of both hands gently press the top edge of the paste to the cake, being careful not to press too hard which may leave finger prints. Work your way down the cake gently lifting the paste and moving it around so it’s secure to the cake.

Step 5
Trim the sugarpaste, don’t go right to the cake you want to leave around 5mm. Lightly dust the top of the cake with some icing sugar and place the larger acrylic plate on top with one hand directly under the cake and the other above. Flip the cake over so it is now upside down.

Step 6
Secure the paste to the side of the cake to prevent it from falling down. Place the sharp edge smoother on the acrylic plate making sure it is touching the cake as well as the acrylic base. The smoother is kept on the plate at all times.

Step 7
Holding the smoother at the bottom with one hand whilst your spare hand is gently holding the cake in place. Be careful not to put too much pressure on the cake as this will create a lip. Gently push the smoother into the cake at the same time moving the smoother forward then pull the smoother back so that you are dragging the paste back (like a rocking movement).

Step 8
If you get an air bubble, gently peel the paste away from the top and using the palm of your hand gently move the air bubble up so it can escape at the top. If needed use the smoother to smooth the paste back.

Step 9
You should now see that the sugarpaste is now in contact with the acrylic plate, this means that you have a perfect sharp edge.

Step 10
Use the stone/textile mat making sure that it is touching the plate (so you don’t get a line from when you press in) gently press in to the paste, turning the mat as you go around the cake.

Step 11
You should be able to see that you have perfect sharp edges as well as a lovely texture on your cake. If you have pressed in too much, go round the cake with the smoother a little.

Step 12
Trim the excess with a knife going into the centre (this will make sure the paste is sealed nicely to the cake). Place the other acrylic plate on top and flip the cake over (again making sure that your hands are placed in the middle of the cake to stop it from slipping). Using a large soft brush remove any icing sugar.

Step 13
Cover the 5” dummy in the blush pink paste and use the smoother to get the sharp edges. Using some white Pasta Top, cover the 6” dummy again use the smoother to achieve sharp edges.

Step 14
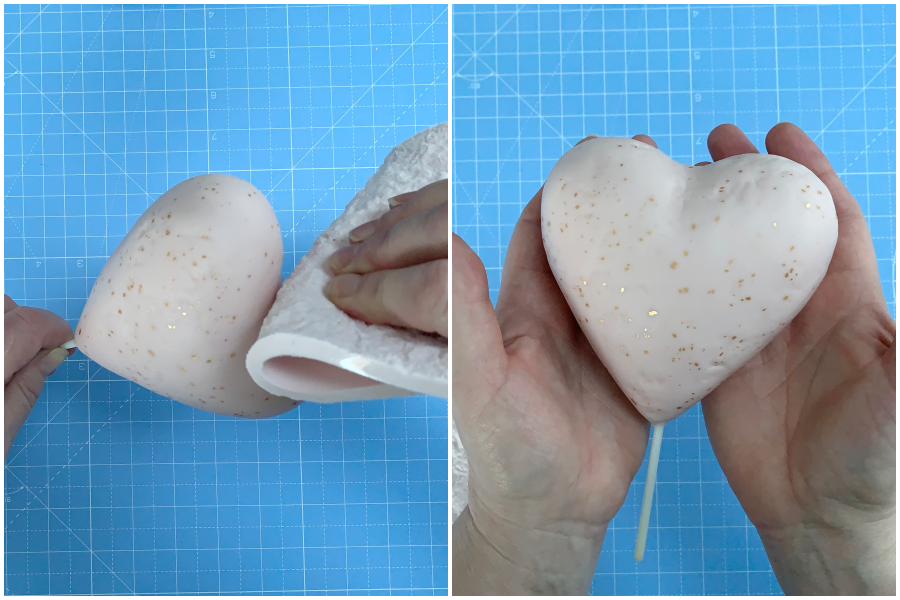
Hold the polystyrene heart and the 18 gauge flower wire so you can see how far you need to insert. Keeping your fingers in that position gently push the wire into the heart making sure it is straight and not at an angle (or when you come to place the heart on the top of the cake it wont look straight). Push the cake pop stick over the wire into the heart. With a tiny amount of paste place it at the bottom of the heart and leave to set, this will stop the wire and cake pop stick from moving.

Step 15
Cover the heart with Trex and place it onto the round cutter. This will prevent the heart from moving when you place the paste on for fixing. Roll out the paste (I used some of the trimmings from the first cake which has the glitter on). It only needs to be rolled to around 2-3mm thickness.

Step 16
Place over the heart and using the palm of your hands shape the paste around the heart, be careful not to press too hard. Trim the paste at the bottom.

Step 17
Use scissors to trim off the excess and then smooth and blend to remove any lines or joints. Make sure that the paste is neatly tucked in at the bottom of the heart.

Step 18
Remove any air bubbles with the needle. Use a flexi smoother or the palm of your hand to smooth out any creases.
Step 19
With the textile mat gently press into the heart here and there so it matches the bottom tier of the cake. Place the heart into a spare dummy and leave to dry for 12 – 24hrs.
Step 20
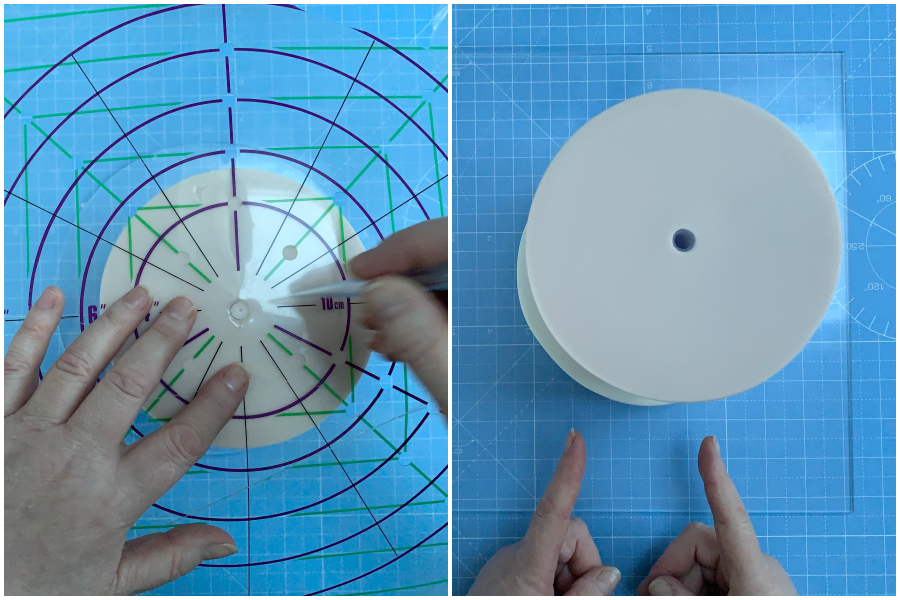
Mark the centre of the smaller pink tier and push in the flower pick, making sure its pushed in and not sticking out. Put a little bit of royal icing onto the white cake and place the top tier on top making sure it is central.
Step 21
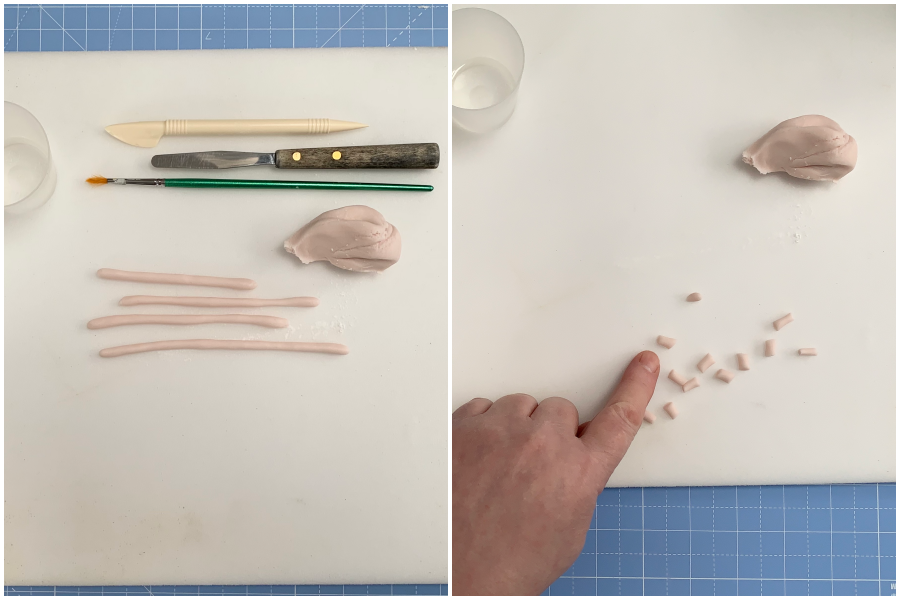
Roll out some of the blush pink paste into thin sausages (not the trimmings that have the glitter on) and cut into small pieces.
Step 22
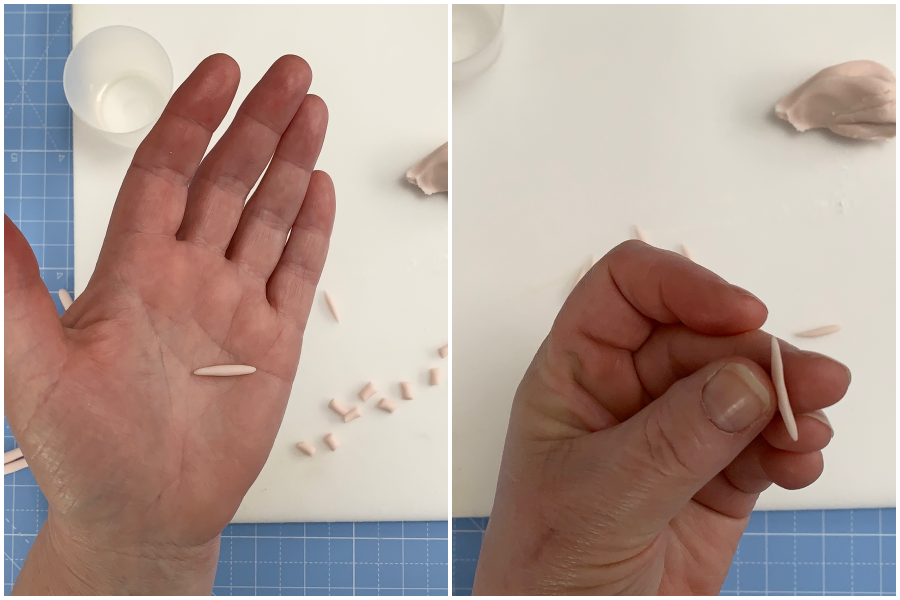
Roll the paste in the palm of your hand making sure that both ends are pointed (not too pointed though). Using the side of your finger to gently flatten one side so that you have a flat side and a wider side. You can make around 15-20 of these before attaching them to the heart.
Step 23
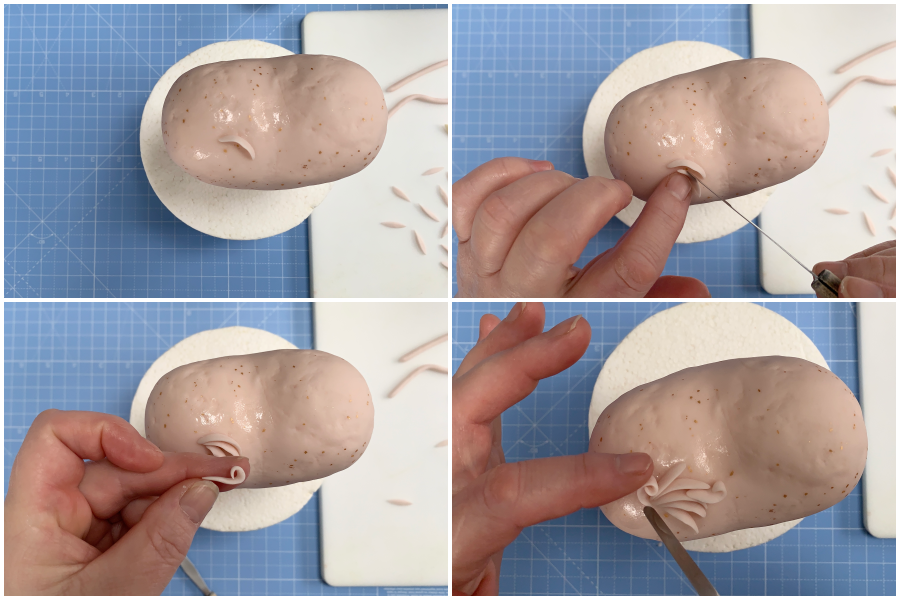
Brush the top of the heart with some cool boiled water. The wider part of the paste is placed on to the heart and you can now start making a scroll pattern, using the tiny palette knife to curl the paste into position. Gently rolling one end and tucking it in then you can add to your pattern.
Step 24
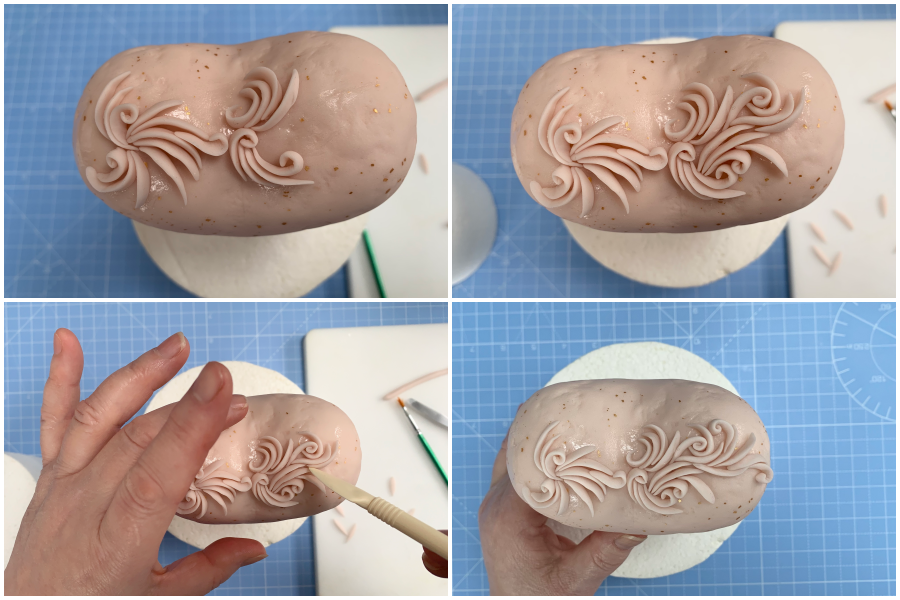
Keep applying the pieces of paste making sure that they don’t get too big as you want them to look delicate. Continue the pattern across the top of the heart.
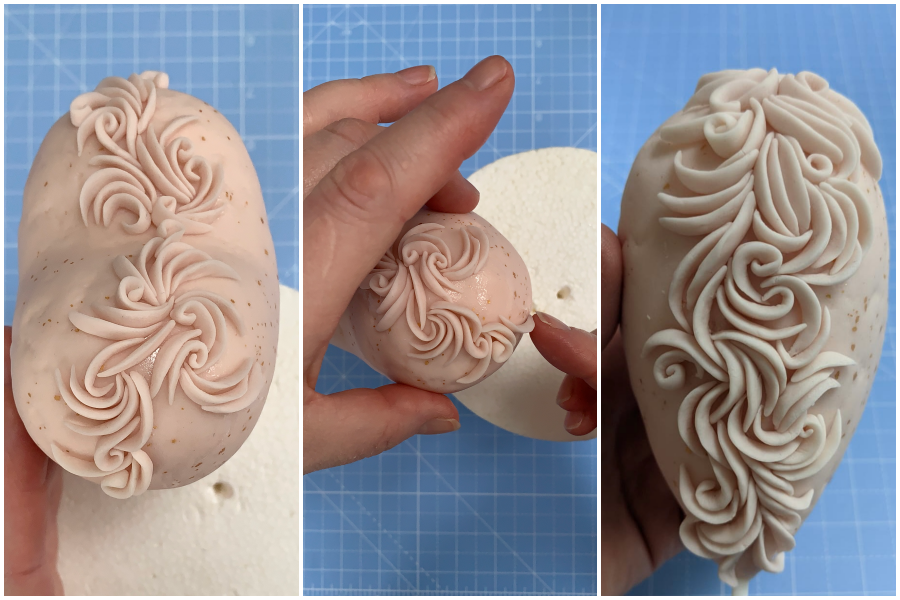
Step 25
Start working down one side of the heart, you may need to place the heart at an angle so it makes it easier to apply the pieces. When you get to the bottom you may need to place the heart on its side. Use some cut out sponge pieces or rolled kitchen paper to stop the heart moving.
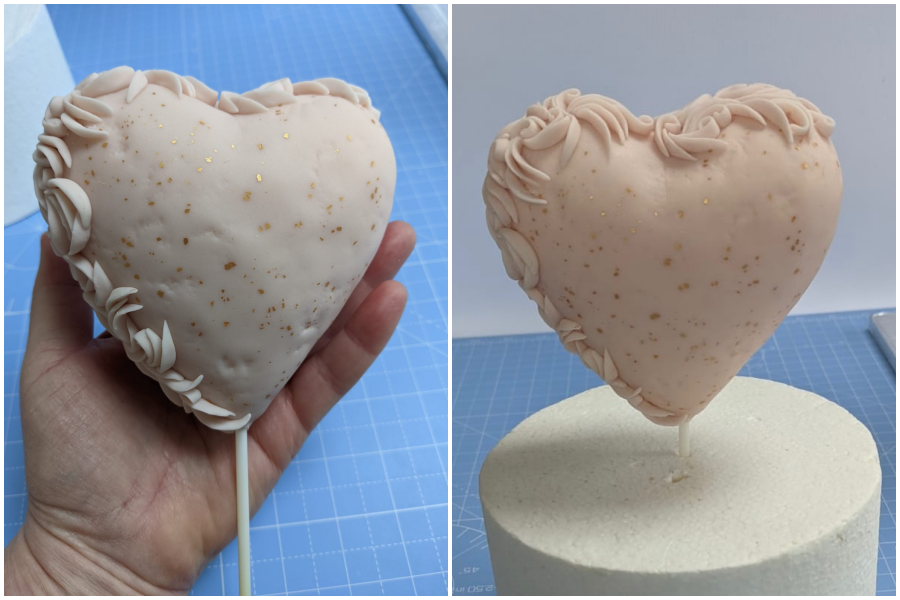
Step 26
Apply the pattern all the way down the side of the heart bringing some of the scrolls around to the front (and a little around the back too). Place the heart back into the cake dummy to dry.
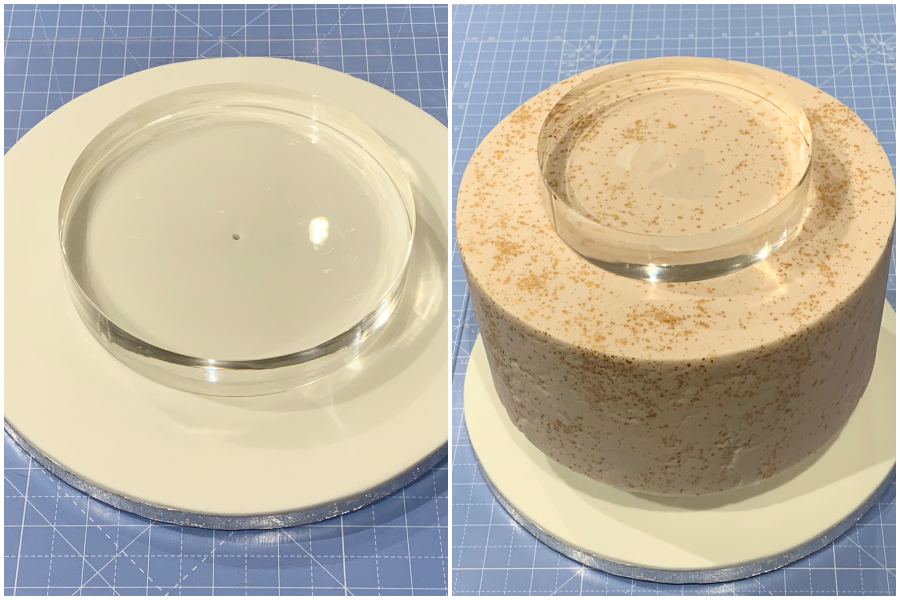
Step 27
Place the larger acrylic spacer onto the pre covered board making sure it is central (put a little royal icing in the middle and press down so it doesn’t move). Repeat with the largest pink tier and then place the smaller spacer on top again using a tiny amount of royal icing to keep them in place.
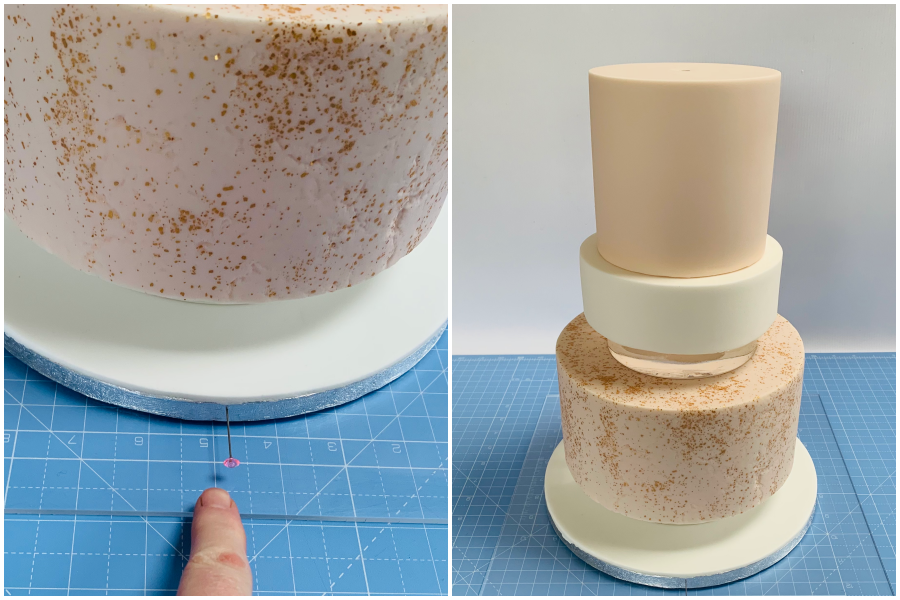
Step 28
Put a pin in the board so we remember which is the front of the cake. Now place the top tier attaching it with a small amount of royal icing.
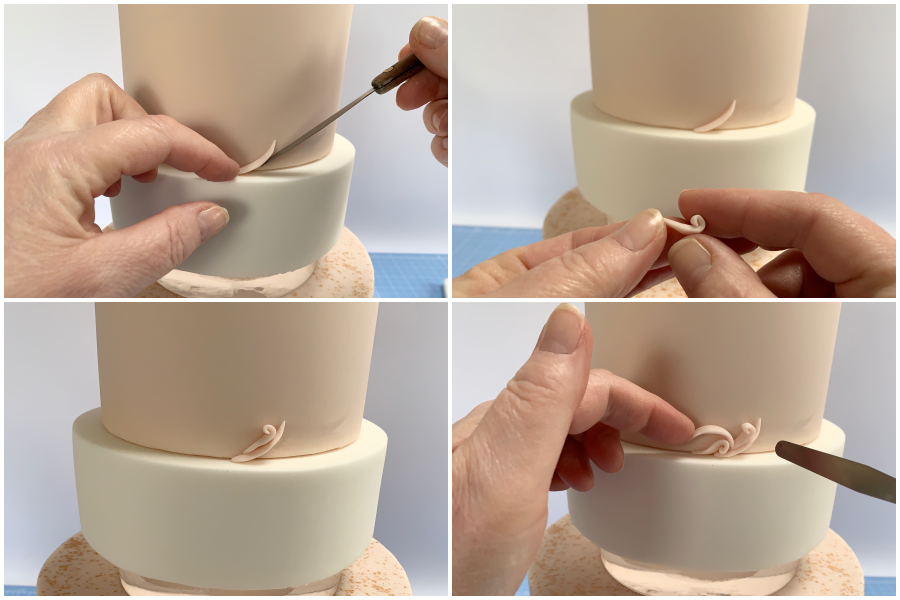
Step 29
Add the first scroll not quite centrally. Use the palette knife to move into position. You can now add more curls shaping them in different ways. Remember to keep them delicate so that the pattern isnt too bulky.
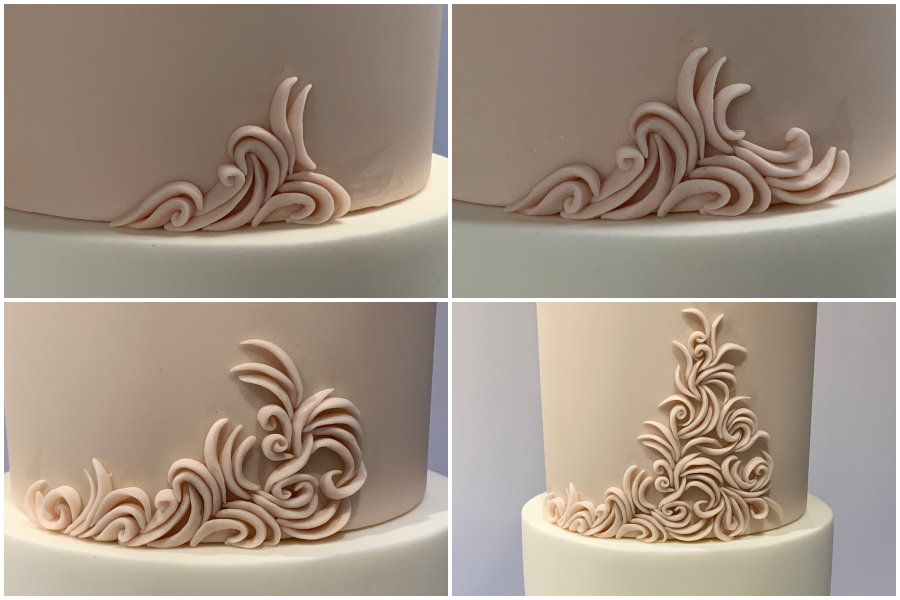
Step 30
As you add more of the scrolls take the pattern up the cake and towards the right hand side. Try not to push them in too tight as you won’t get the same effect as shown in the pictures.
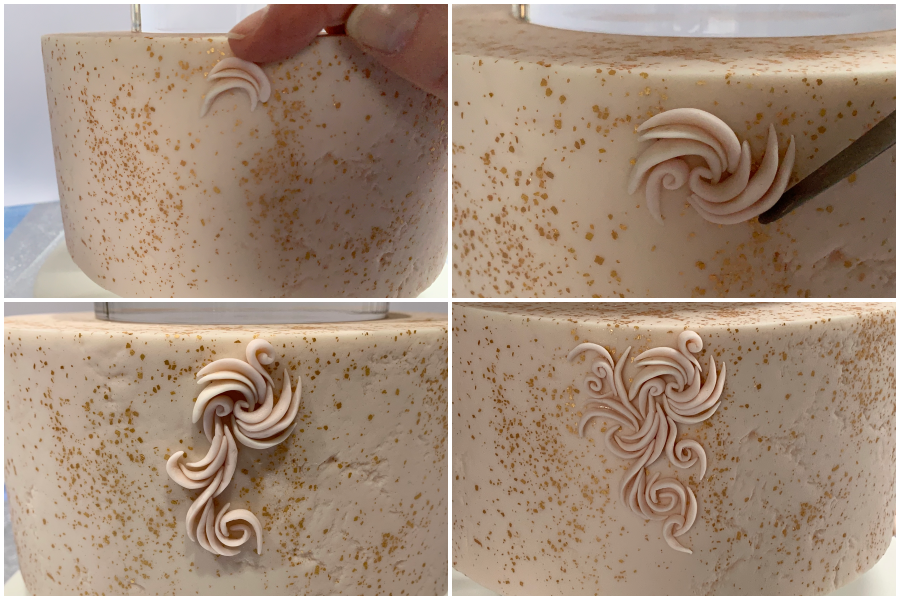
Step 31
Now you can start adding the scrolls onto the lower tier, keeping the pattern small this time. You only need to have around 3 -4 of these patterns here and there on this bottom tier.
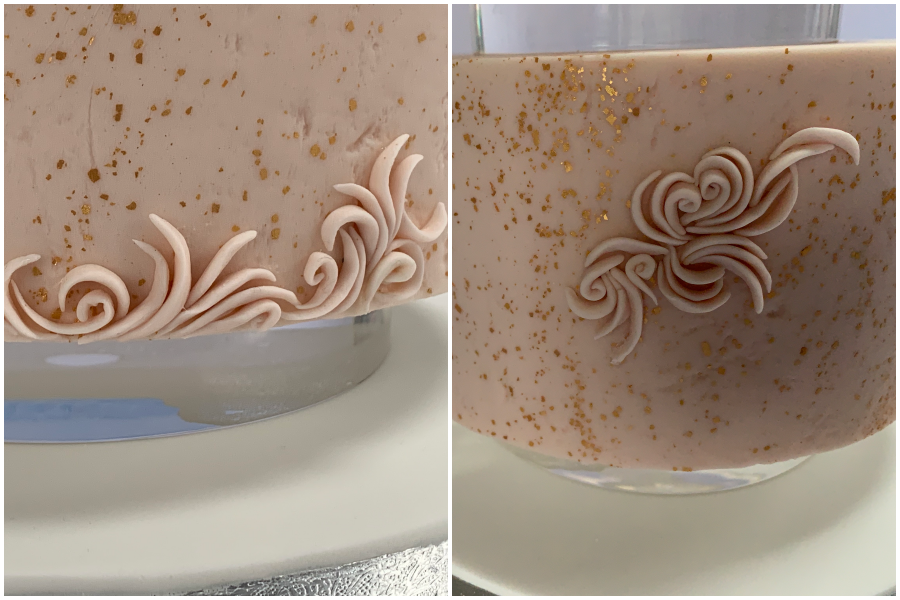
Step 32
When placing them near the bottom of the tier try not to let them hang over, you want them to be flush with the bottom edge. Add the scroll pattern to the back of the cake.
Step 33
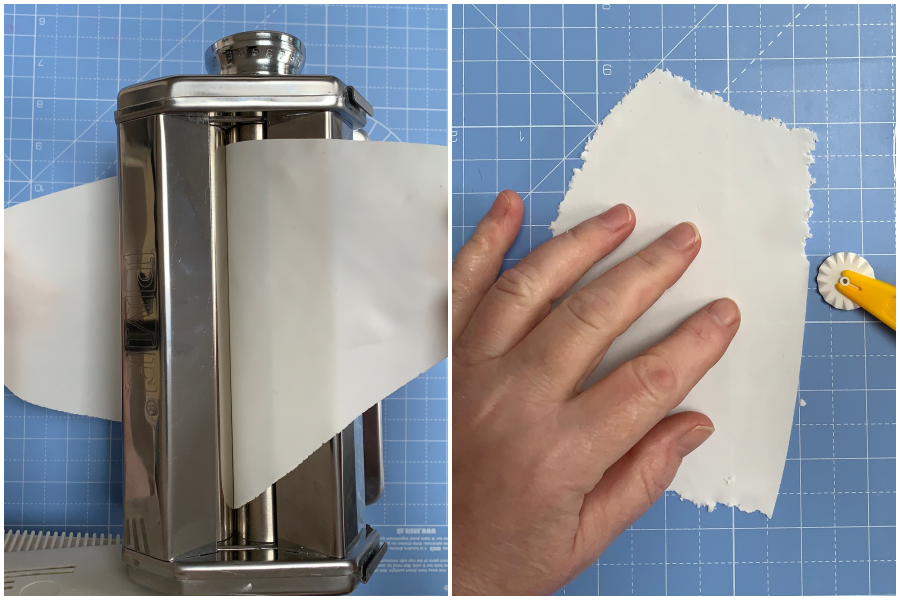
Using the pasta roller and some white modelling paste, take it through until the paste is thin enough so you can just see your fingers underneath. Place the rolled out paste onto some clingfilm and cover each piece with cling film to stop it drying out. Leave for around 4-6 hours. Cut the paste to approximately 8cm x 16cm (it doesn’t matter if slightly smaller or bigger) and holding it at an angle use the serrated part of the wheel to gently place it on the very edge of the paste and pull so you’re making it look like the paste has rough edges.
Step 34
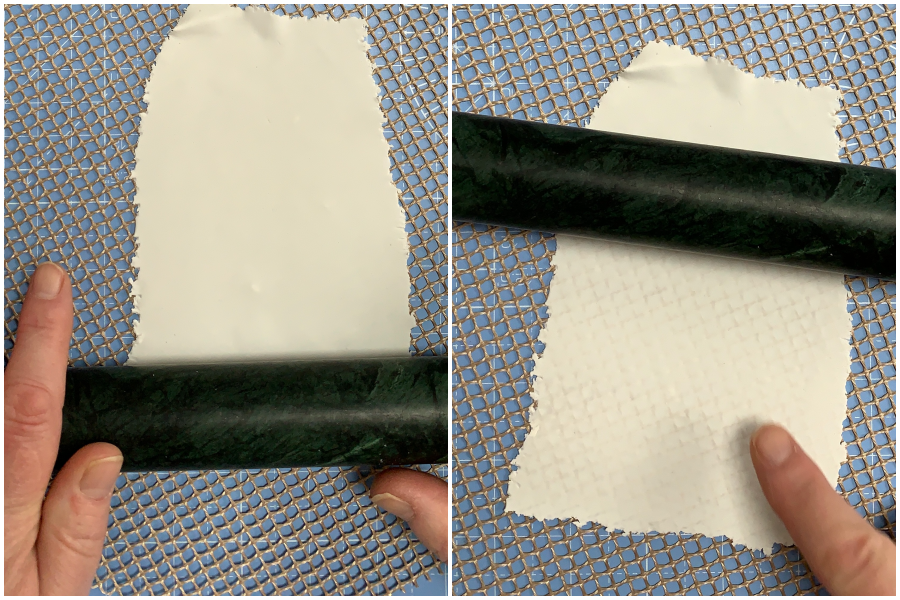
Place the paste onto a hessian mat (or you can use any lace mat for a bit of texture) and take the rolling pin over it so it makes an impression.
Step 35
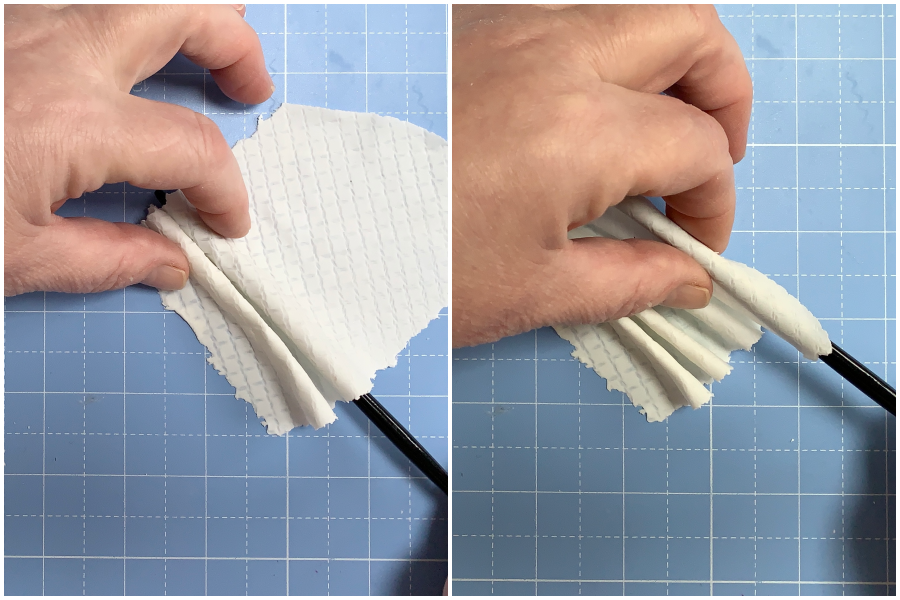
Using the handle of the smaller brush make some folds, they dont have to be perfect.
Step 36
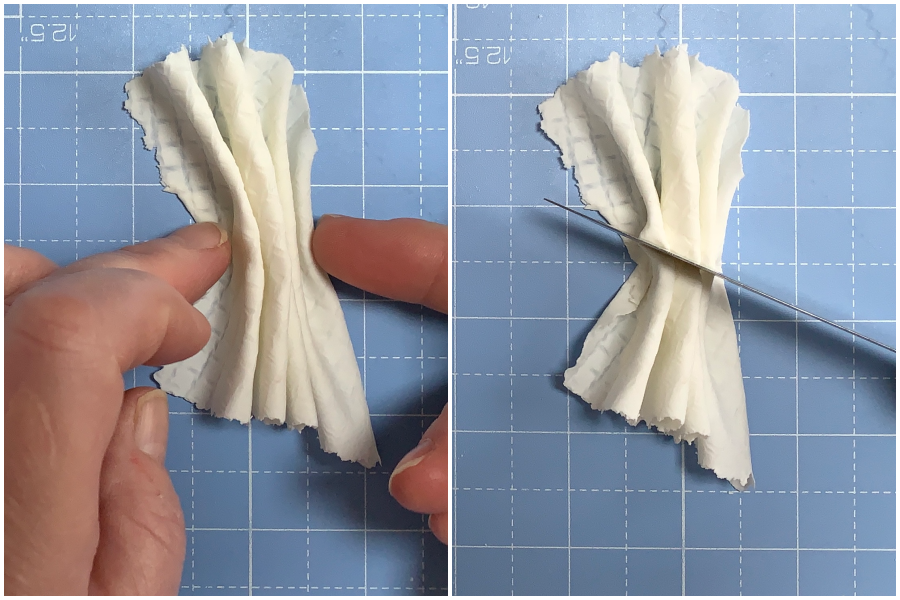
Gently push the folds together in the middle and then with a knife cut. You can cut it straight or at an angle.
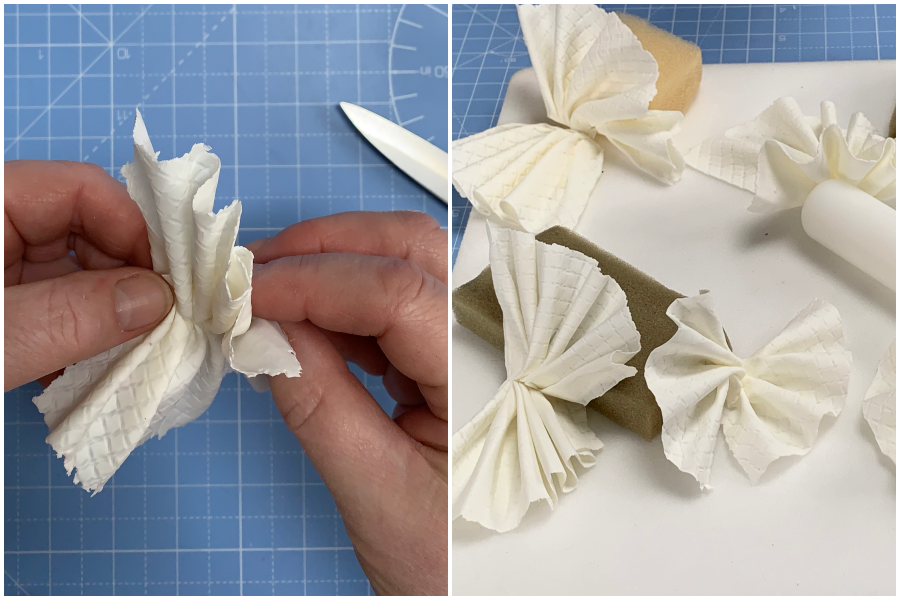
Step 37
Some of them you can leave and gently twist.Leave to set for 10 mins, resting on some pieces of sponge or a rolling pin.
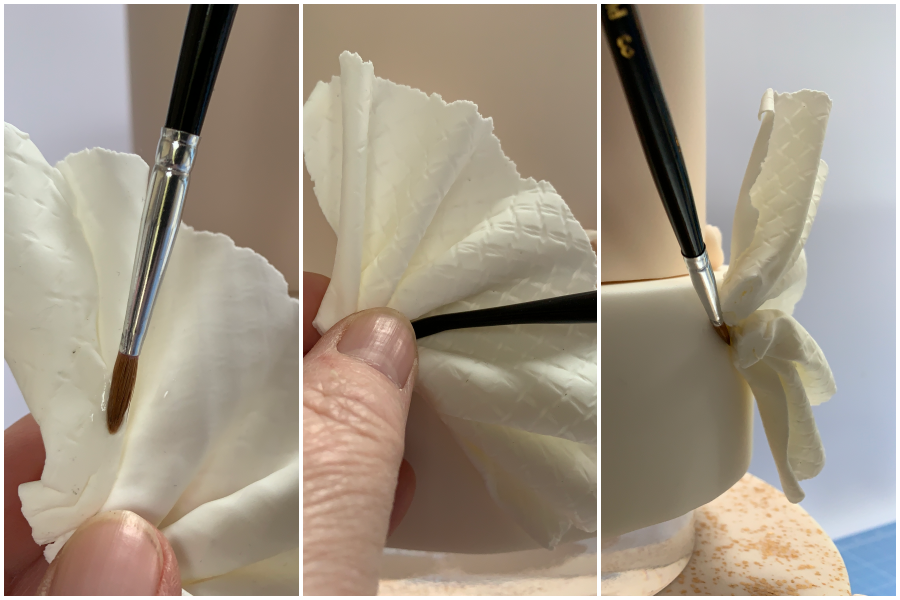
Step 38
Add a little water behind the ruffle and fix onto the white tier using the Dresden tool, making sure its nice and secure. You can see that the first ruffle is placed higher than the rest.
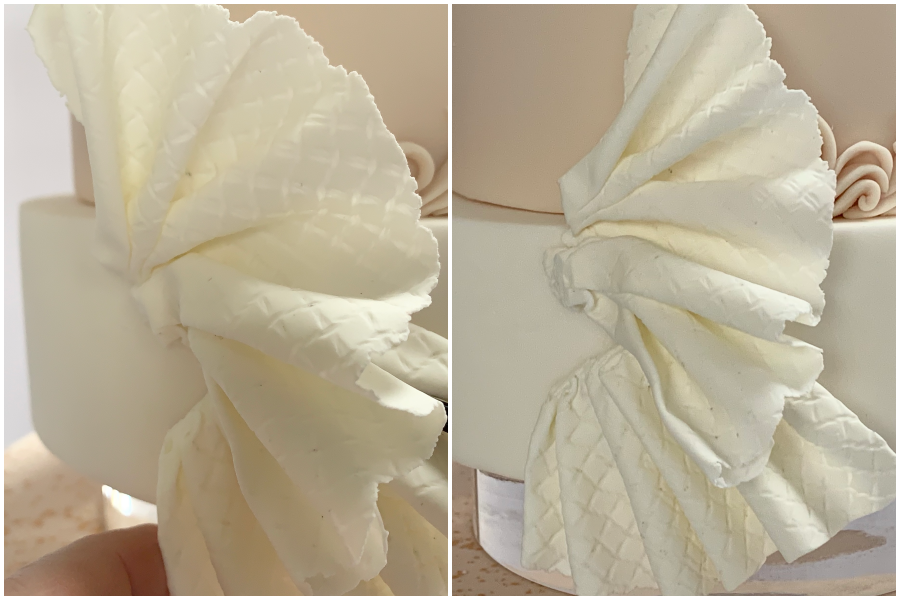
Step 39
You can now start adding some more gently tucking them under or over the other ruffles.
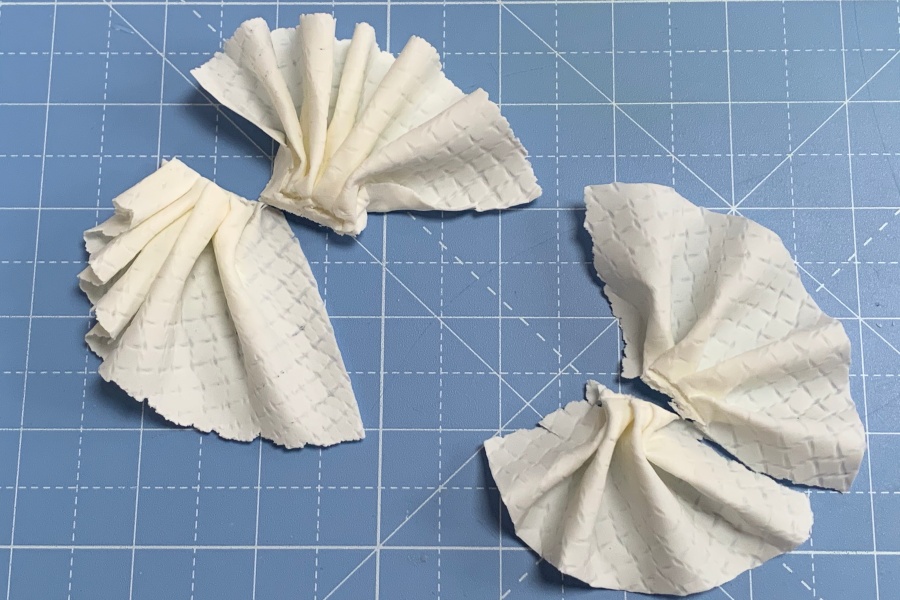
Step 40
Make various shaped ruffles.
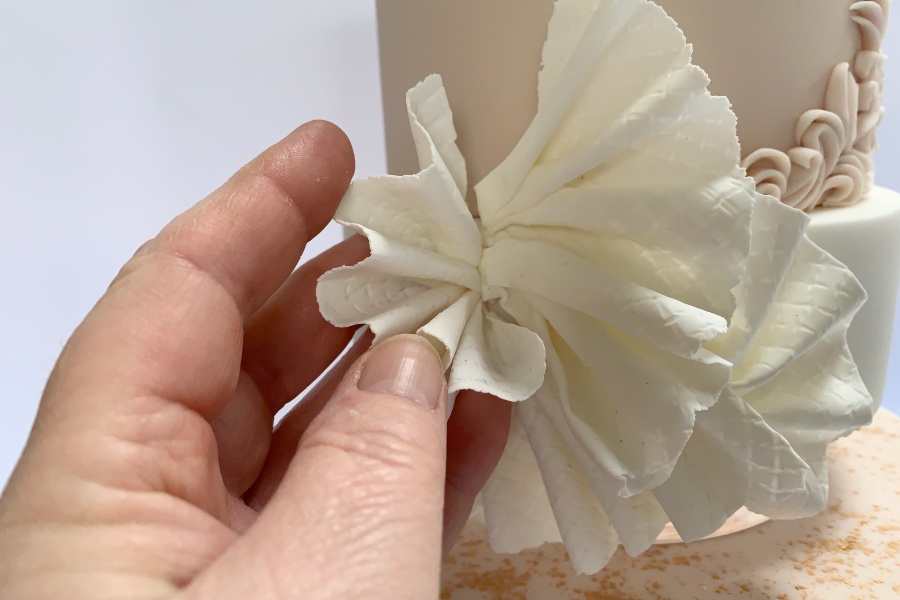
Step 41
Try not to place them in a pattern, you want it to look random.
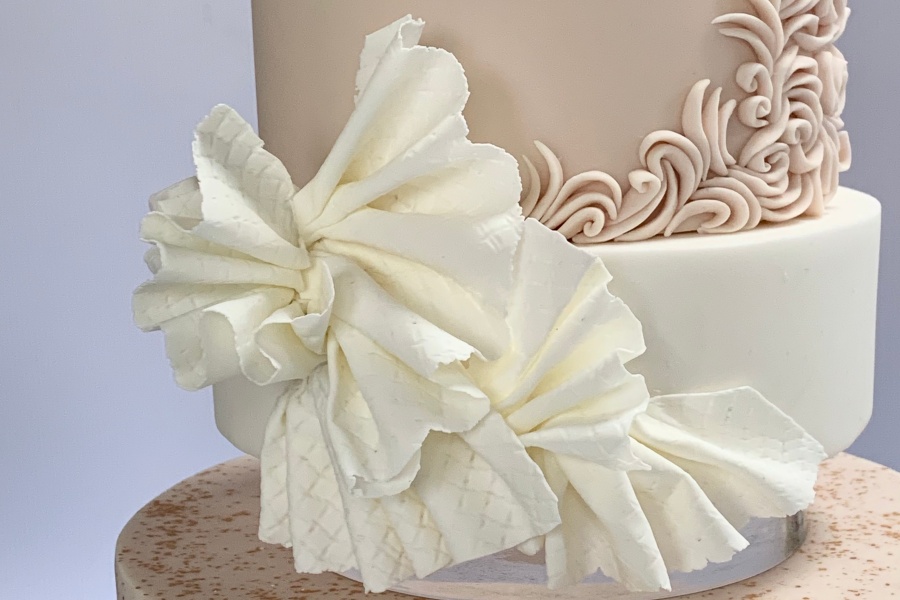
Step 42
Go all the way round the white tier, placing some a bit lower than the tier so they look like they are hanging.
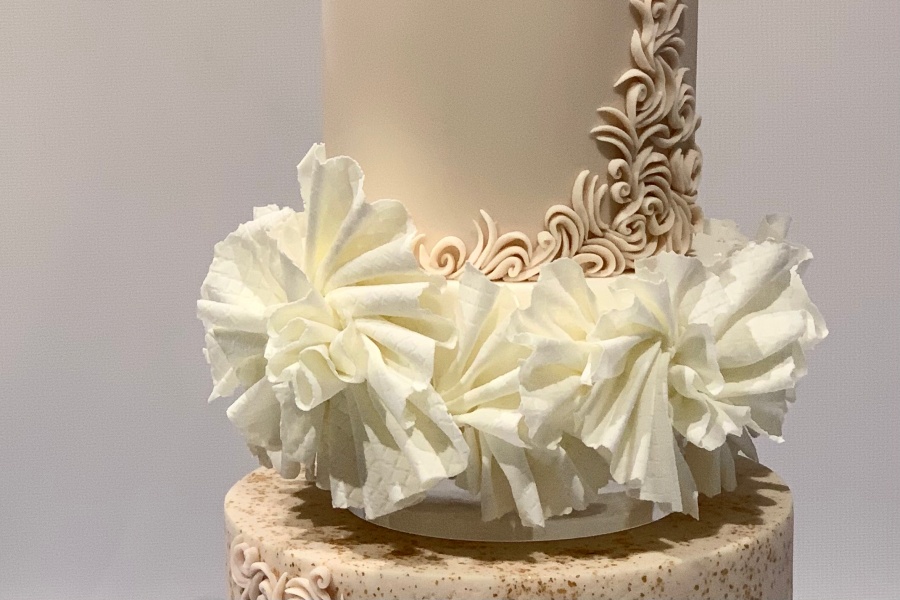
Step 43
Again making sure they are stuck on well so that they don’t move.
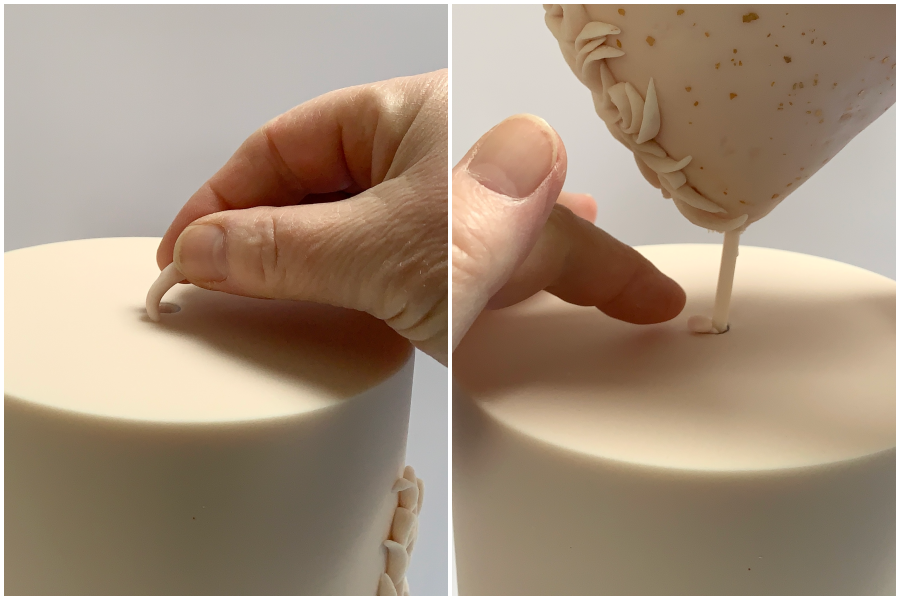
Step 44
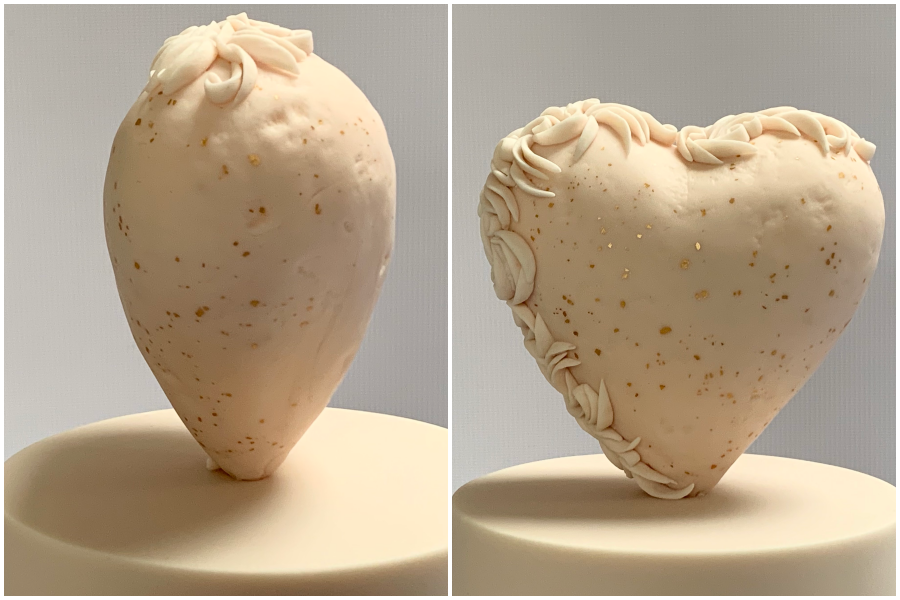
Place a tiny amount of paste into the flower pic so that when you put the heart in, the paste will prevent it from moving. You may require more once the heart is in.
Step 45
You will need to make sure that the heart is in straight and not leaning to the side, so stand back a little and you will see if it needs adjusting. Look at the heart from the side too as again you don’t want it leaning forward or back.
Step 46
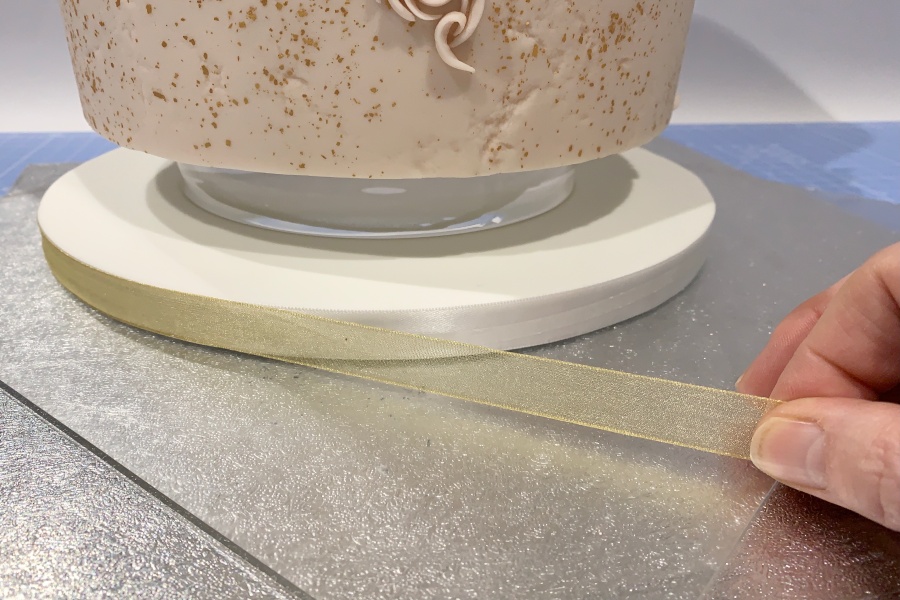
Add the ribbon, I have used white and then a gold organza as a gold satin was too bright.


