
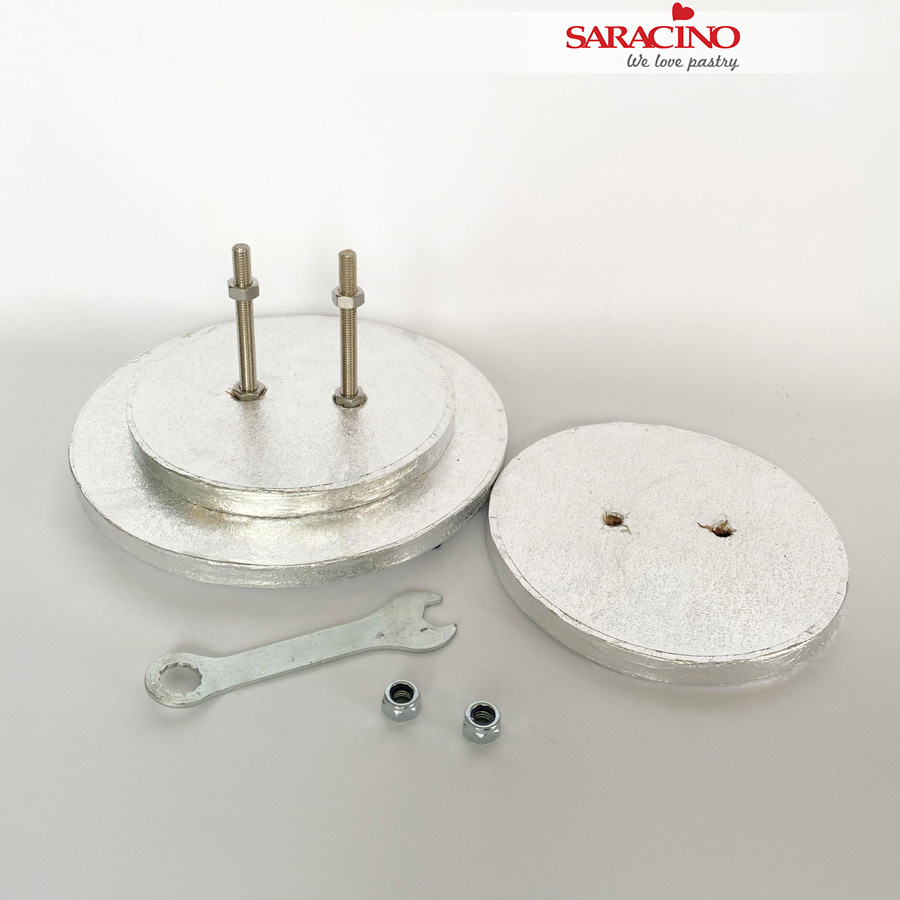
You will need:
Threaded bar 8mm diameter x 12cm long. You will need two.
Hex nut 8mm x 8
Drums 6” x 2
Drum 8”
Drill with 8mm bit
Wrench 8mm
Saracino Pasta Top
Saracino modelling paste red
Saracino modelling paste white
Saracino gel colour green, white and brown
Strip cutter
Round cutter 6 cm
Calyx cutter
Rolling pin
Palet knife
Ribbon green
Winter wreath mould Karen Davies
Ball tool
Cake/Ganache or dummy
Paper towel
Foam pad
Cut off hard brush
Cone bud
Bendable wire
Bamboo / wooden skewer
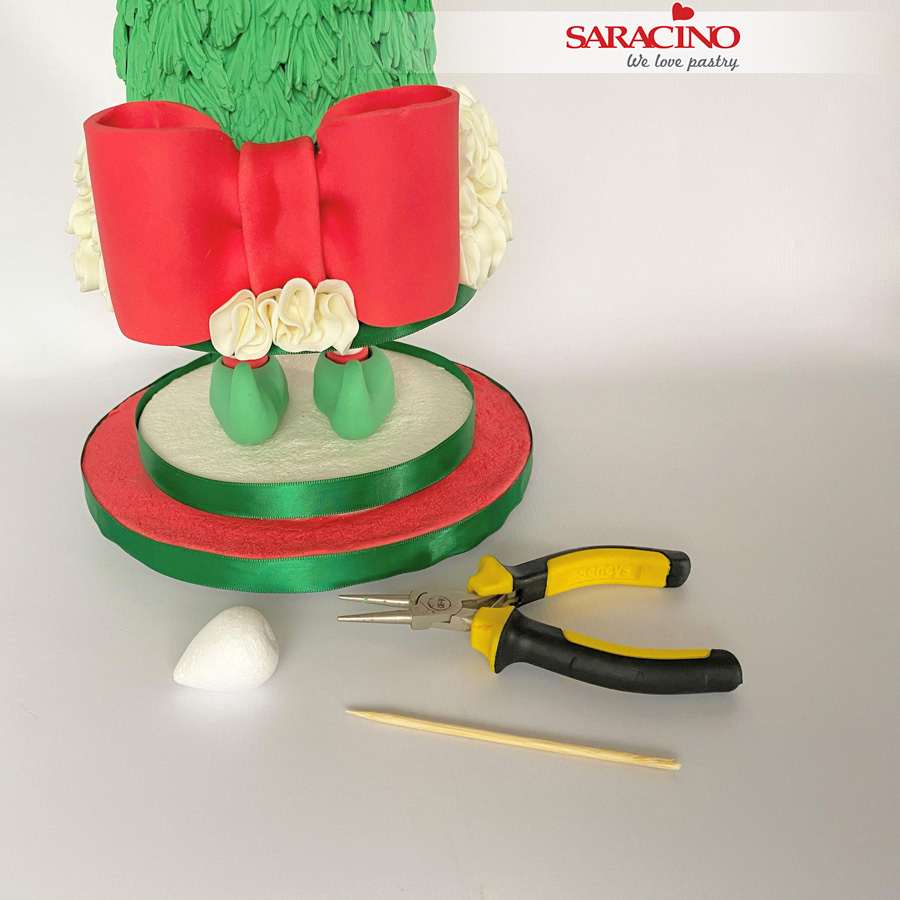
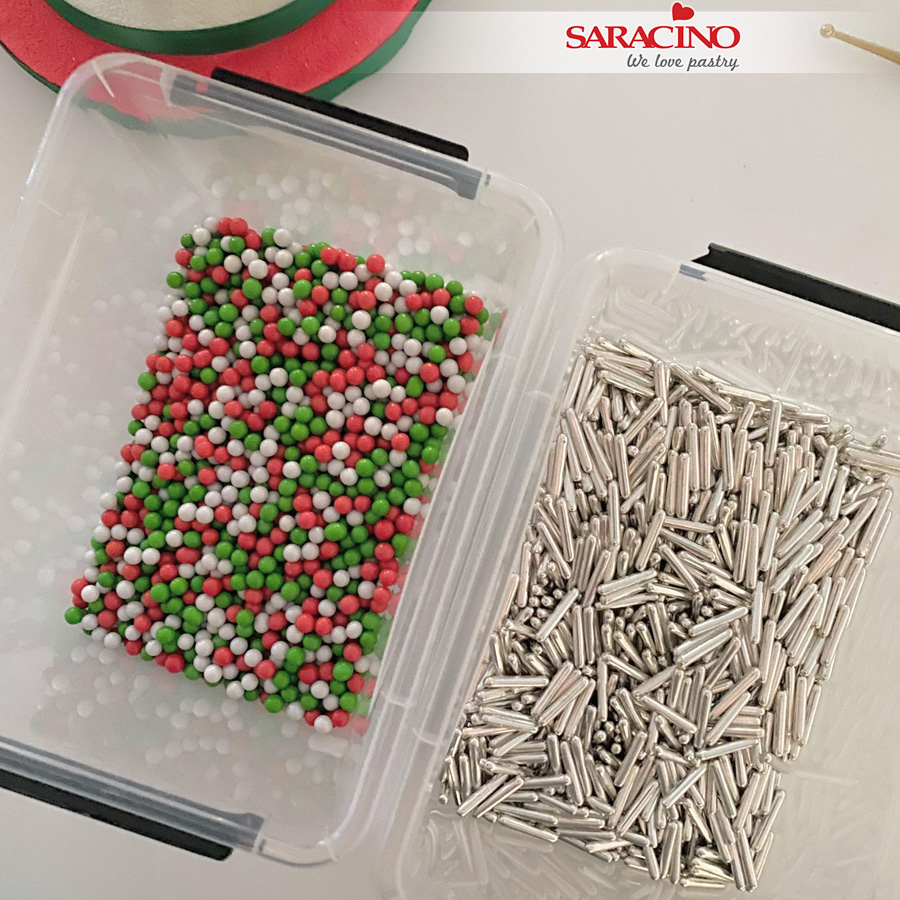
Sprinkles metallic (silver rods)
Sprinkles red and white balls
Edible glue
Brush
Step 1
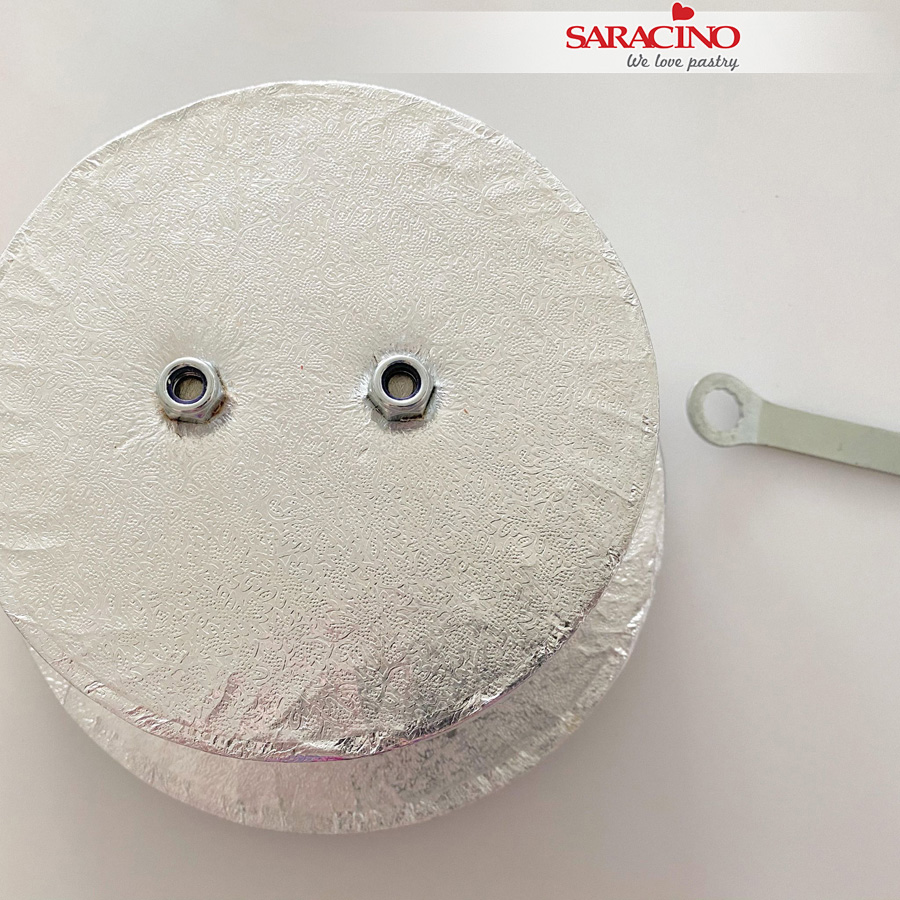
On one of the small drums mark the position where you want fix the two legs. Put the three drums on top of each other and drill two 8mm holes through the three drums at the same time (so the holes will be at the same position on all three boards). Lay one small drum aside. Put the two threaded rods through the 6” and 8” drums and put hex nuts at the bottom of each rod beneath the 8” drum. Fix two other hex nuts on top of the 6” drum to create a firm base. Use the spanner to tighten the hex nuts to form a firm base structure.
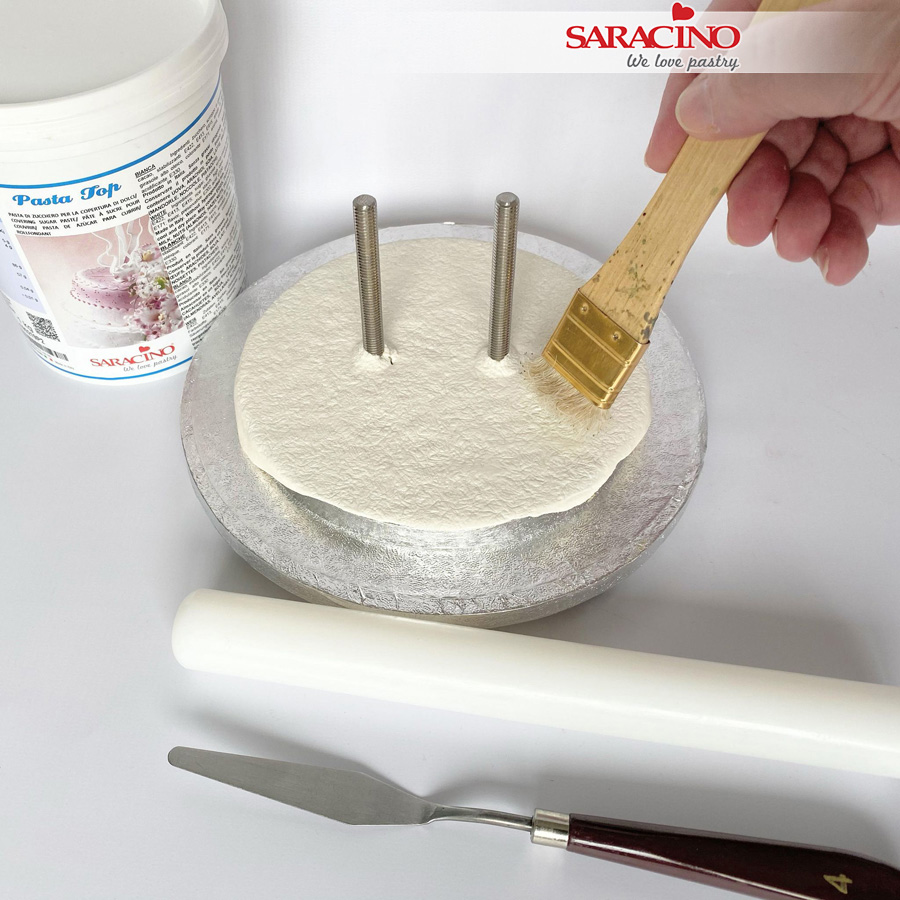
Step 2
Cover the top of the 6” drum with fondant Pasta Top. Use a cut off stiff brush to give the fondant texture.
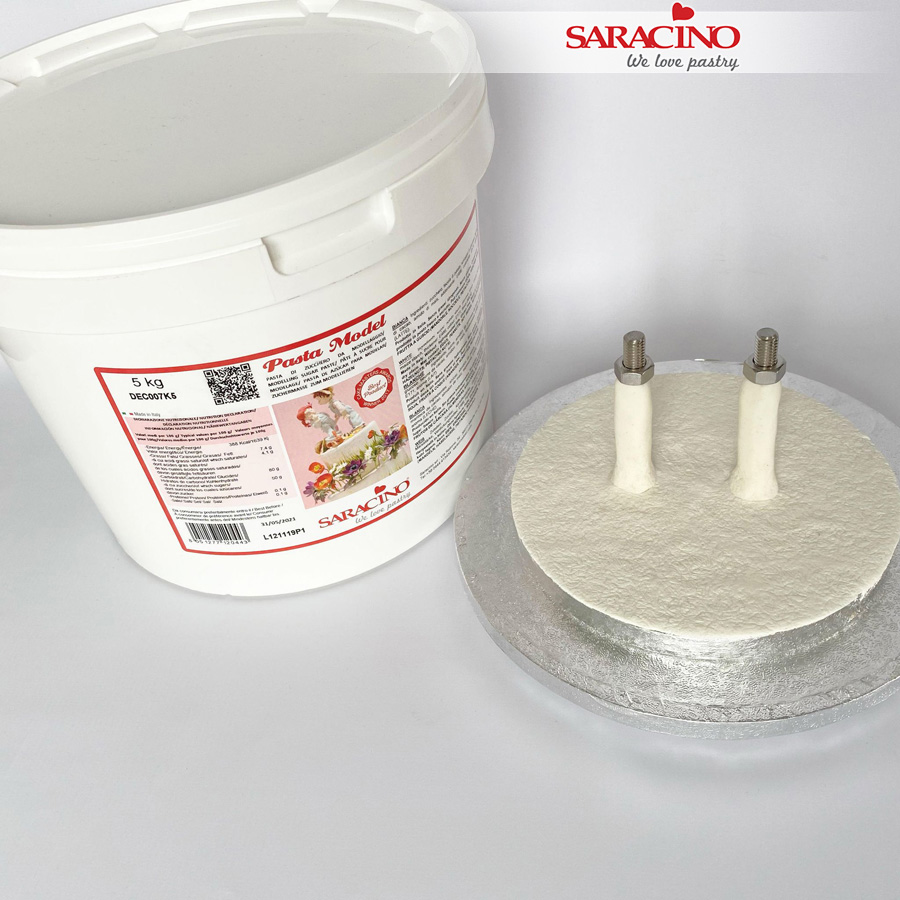
Step 3
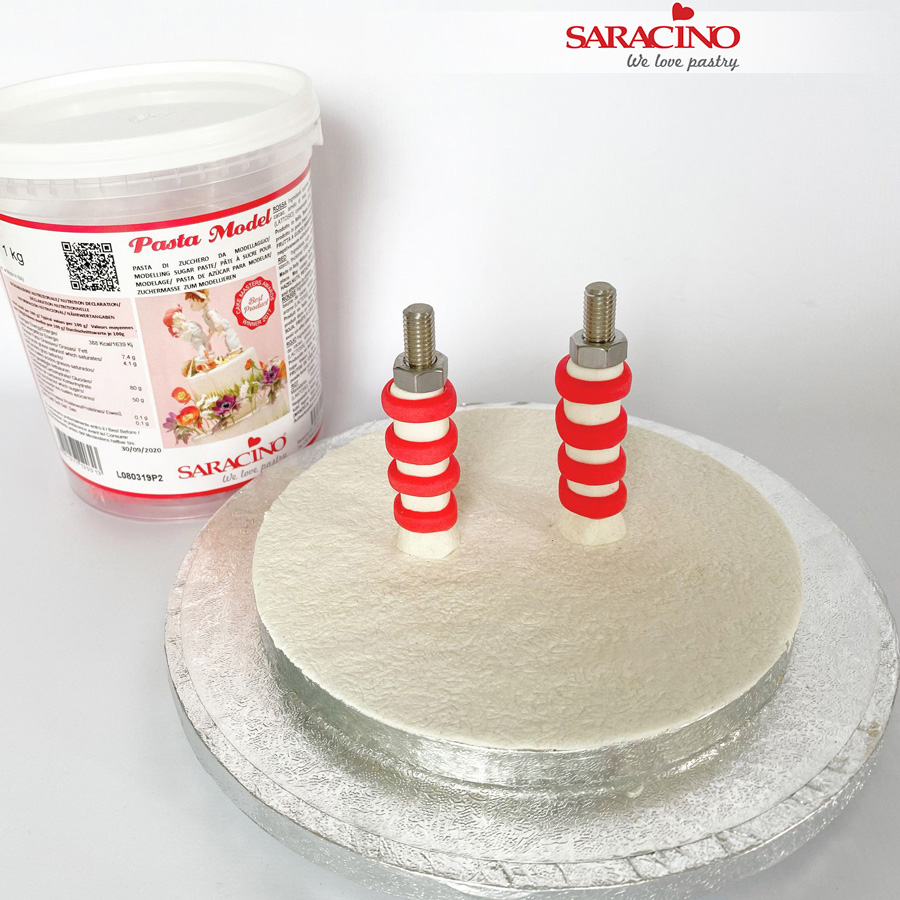
Cover the two threaded bar legs with modelling paste. Do not cover the top of the threaded bar (as we need to fix the third drum). Thread a hex nut on the top of each bar.
Step 4
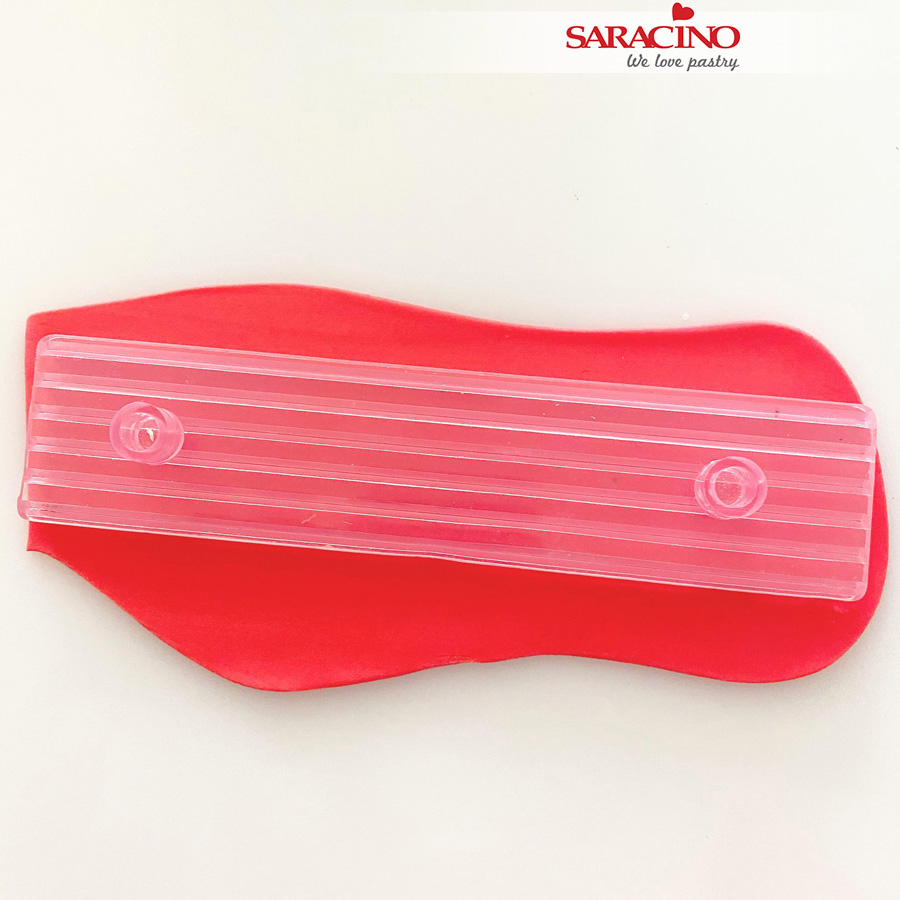
Roll red modelling paste and use the strip cutter to create strips
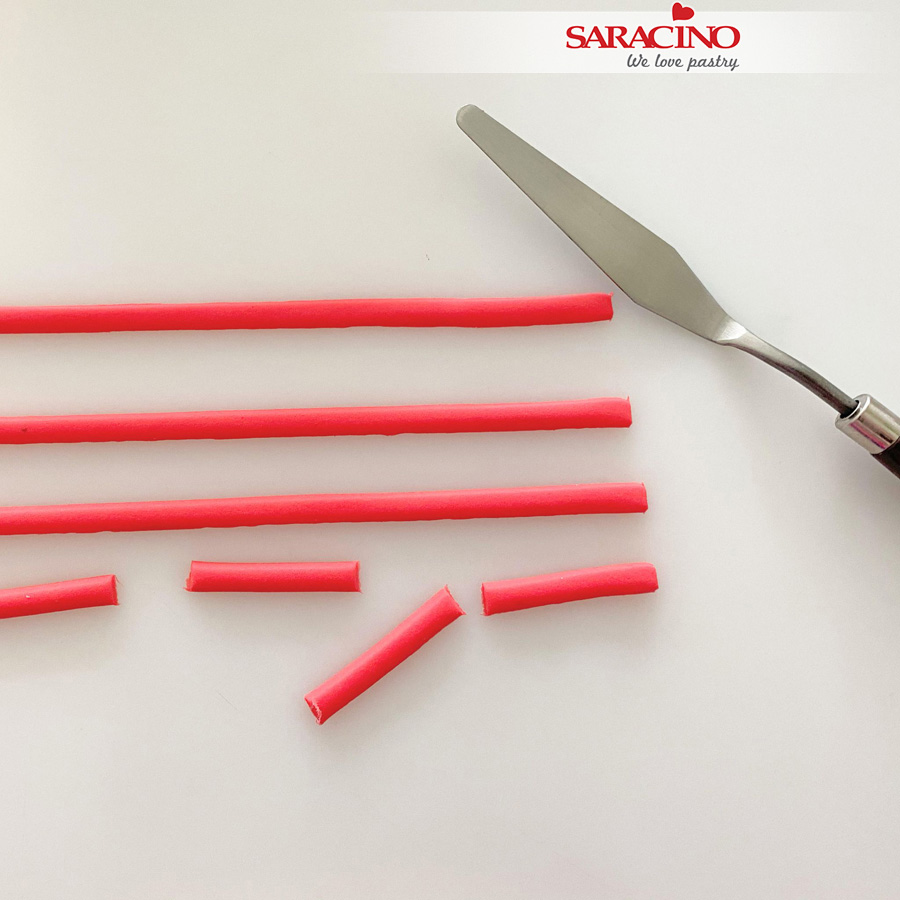
Step 5
Cut the strips into long pieces
Step 6
Glue the strips to the legs to form the stripes on the leggings.
Step 7
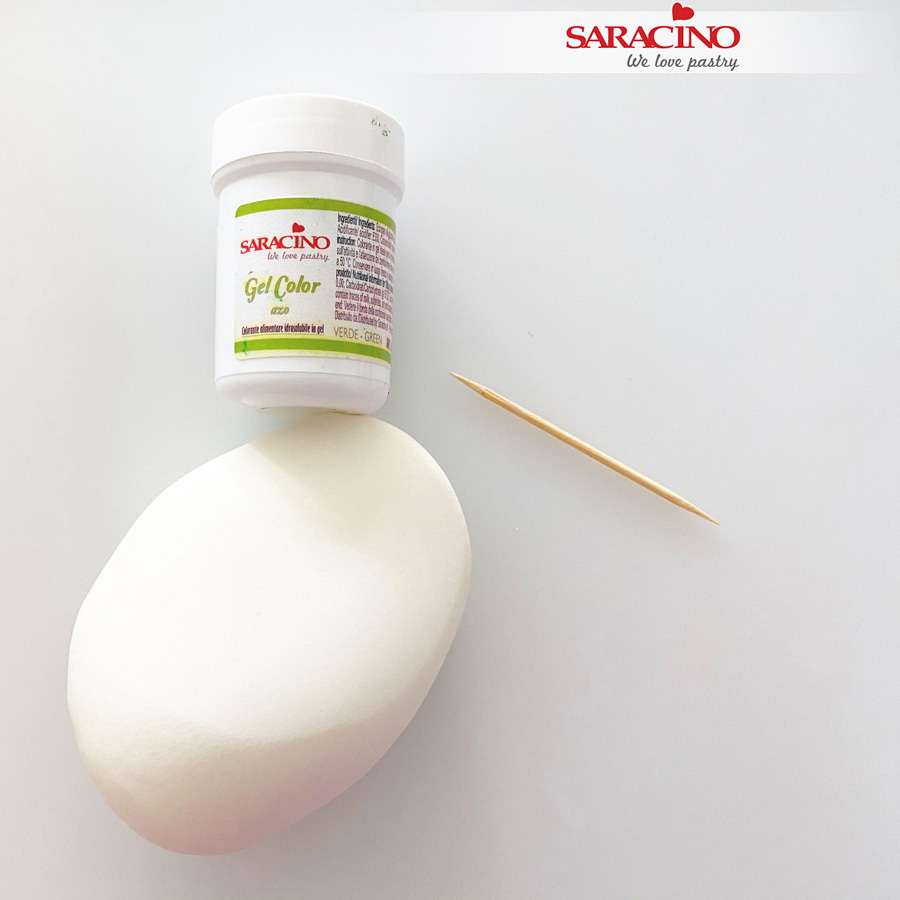
For the shoes colour some white modelling paste with the green gel colour, as dark as you want to
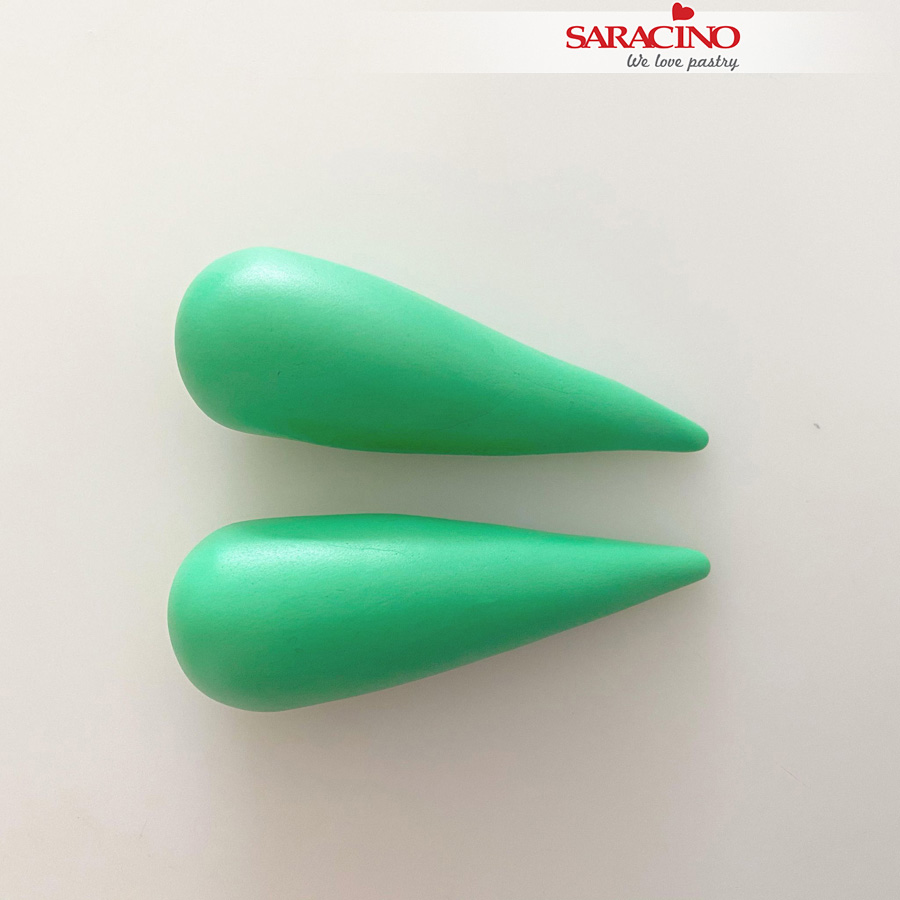
Step 8
Create two big tear drop shapes for the shoes.
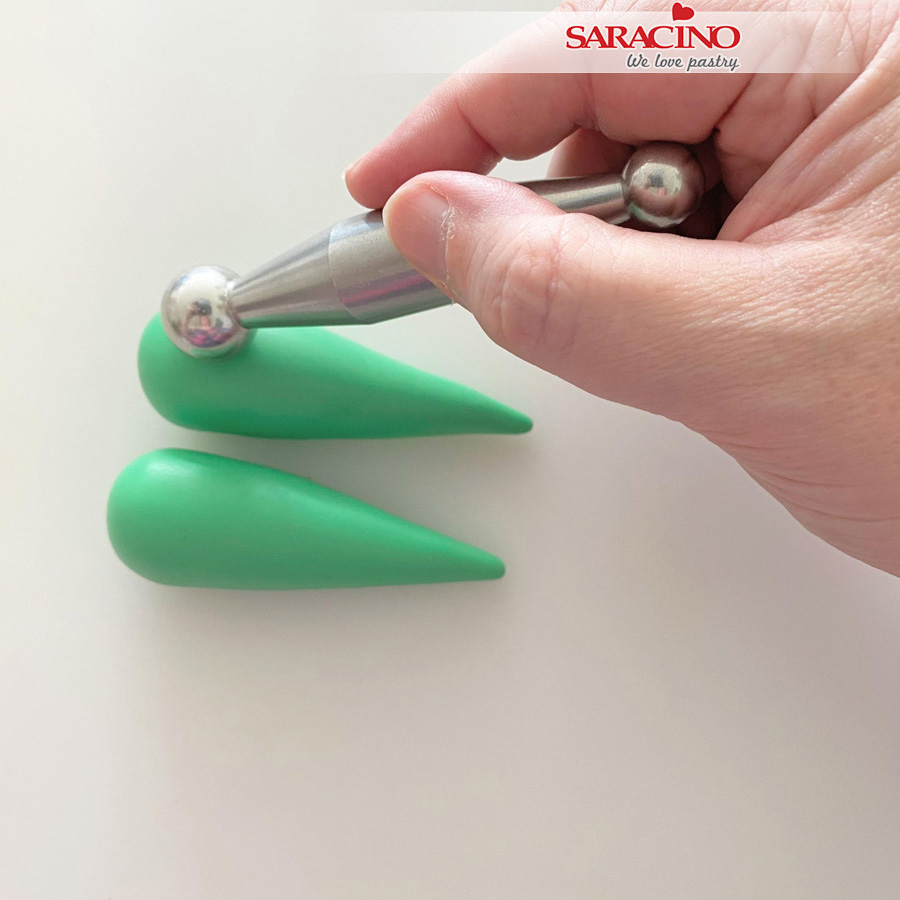
Step 9
Use a ball tool to form a hole for the legs
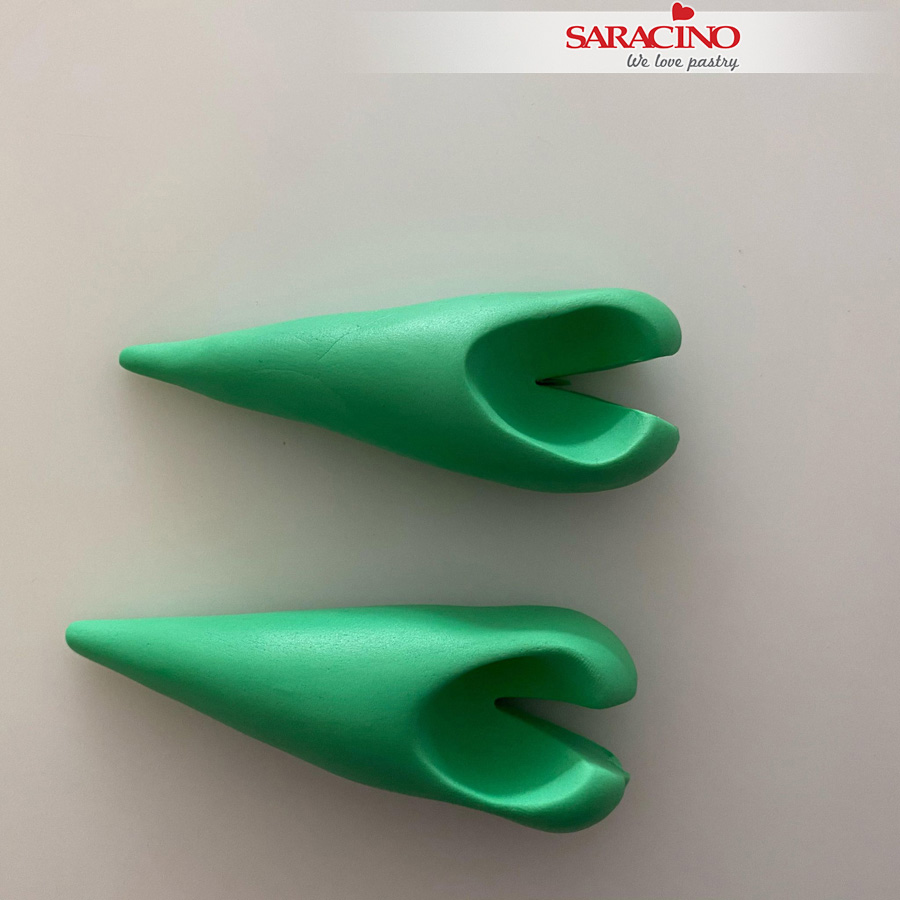
Step 10
Cut the end of the shoe (to put around the legs)
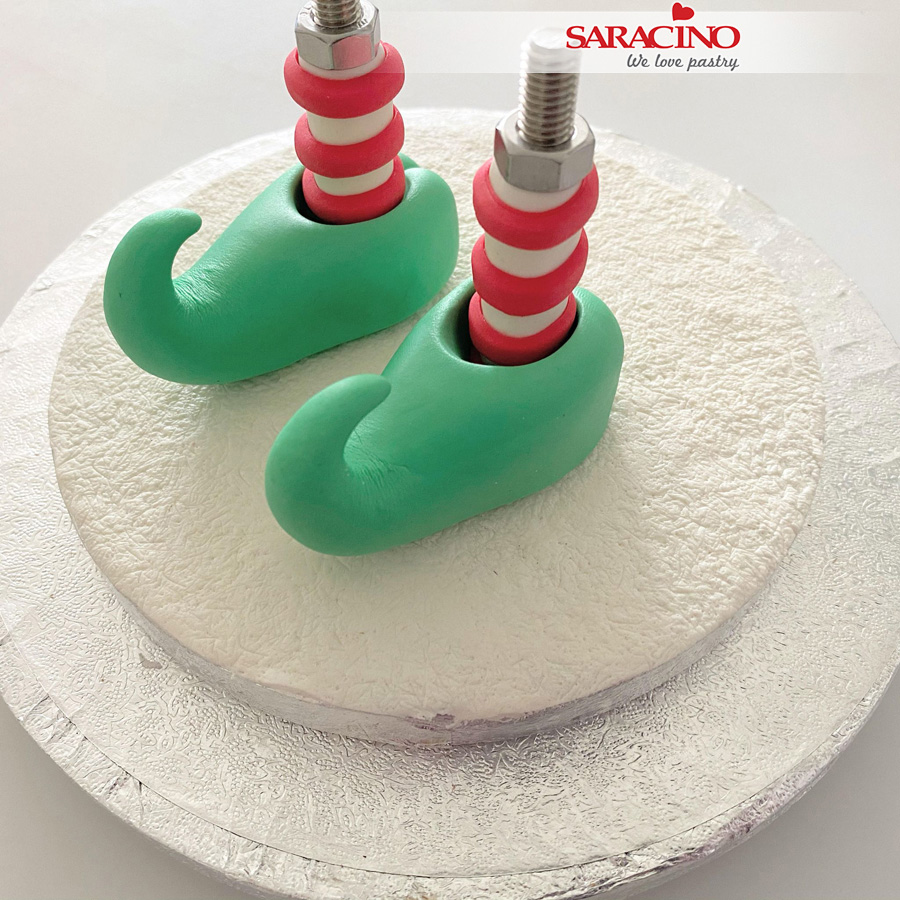
Step 11
Glue both shoes around the two legs, and bend the pointy end so you create an elf shoe, glue the cut ends at the back together.
Step 12
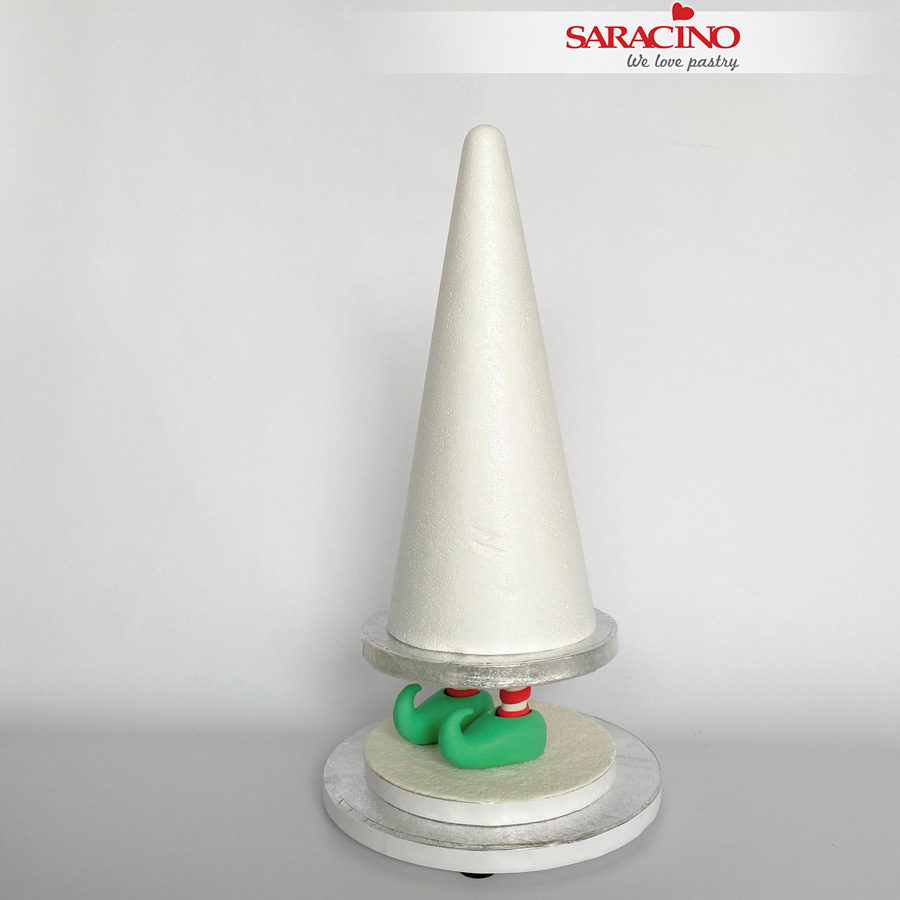
Put the second 6”drum on top of the two legs and thread the hex nuts on top. Use the spanner to tighten them.
Step 13
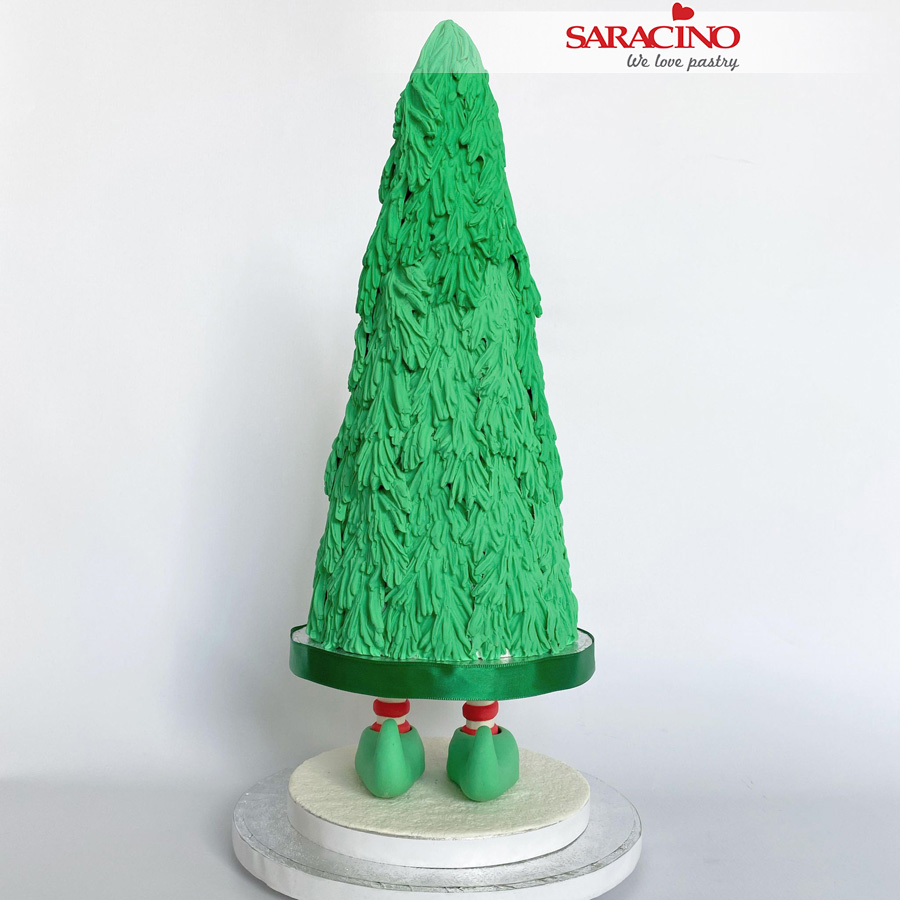
Put your cake on top of the drum in a cone shape (13 cm base) and cover it with ganache. I used a dummie instead. If you’re using cake make sure you cover the drum and hex nuts with fondant before placing your cake on the drum.
Step 14
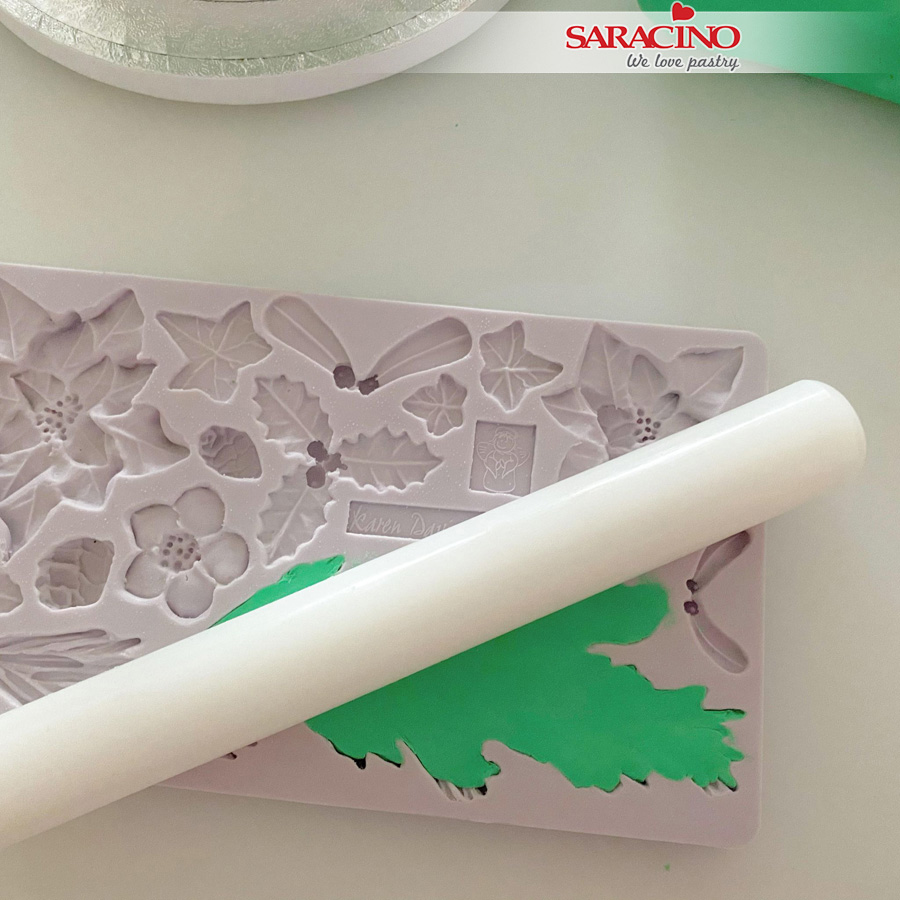
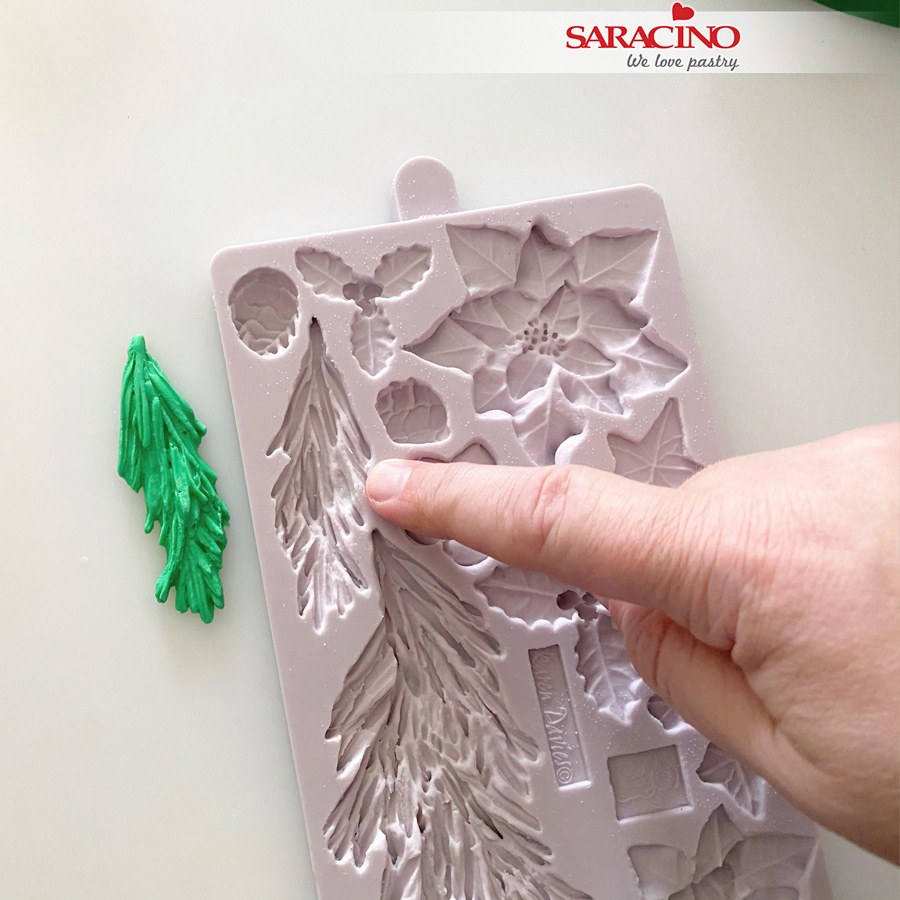
Colour some white Pasta Top fondant with the green gel colour. Use the KD mould to create pine needles. Before putting the paste into the mould apply some Trex to the piece of fondant. Flatten it into the mould with a rolling pin. Trim off the access fondant.
Step 15
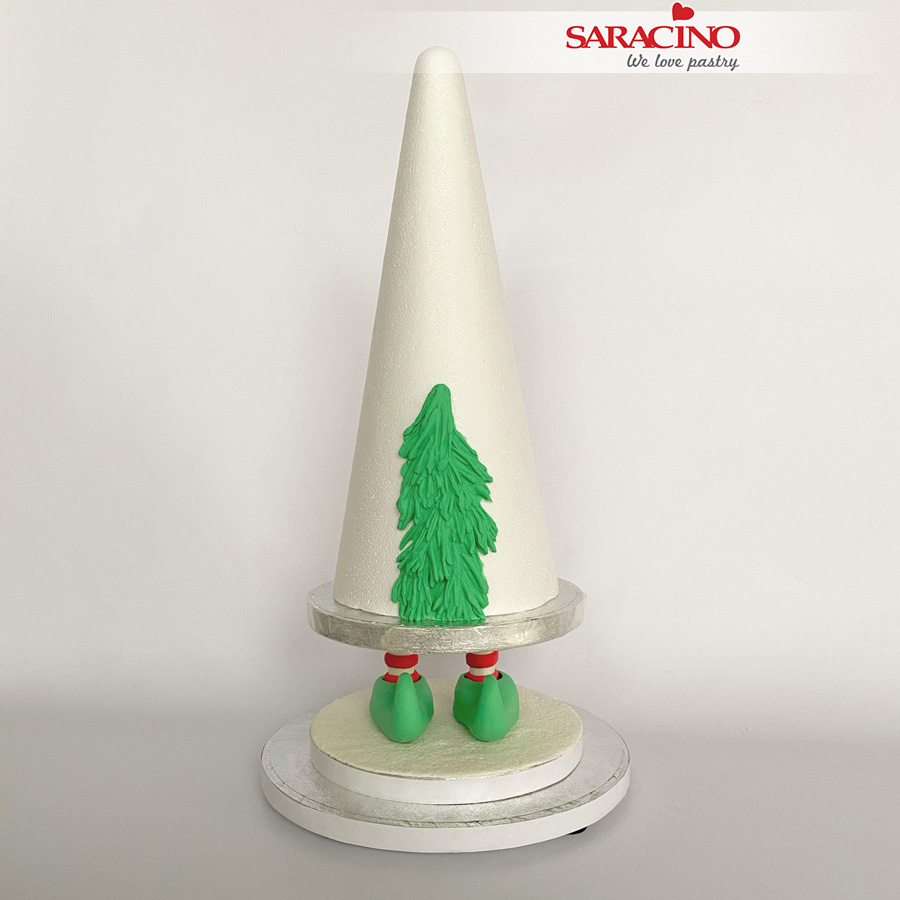
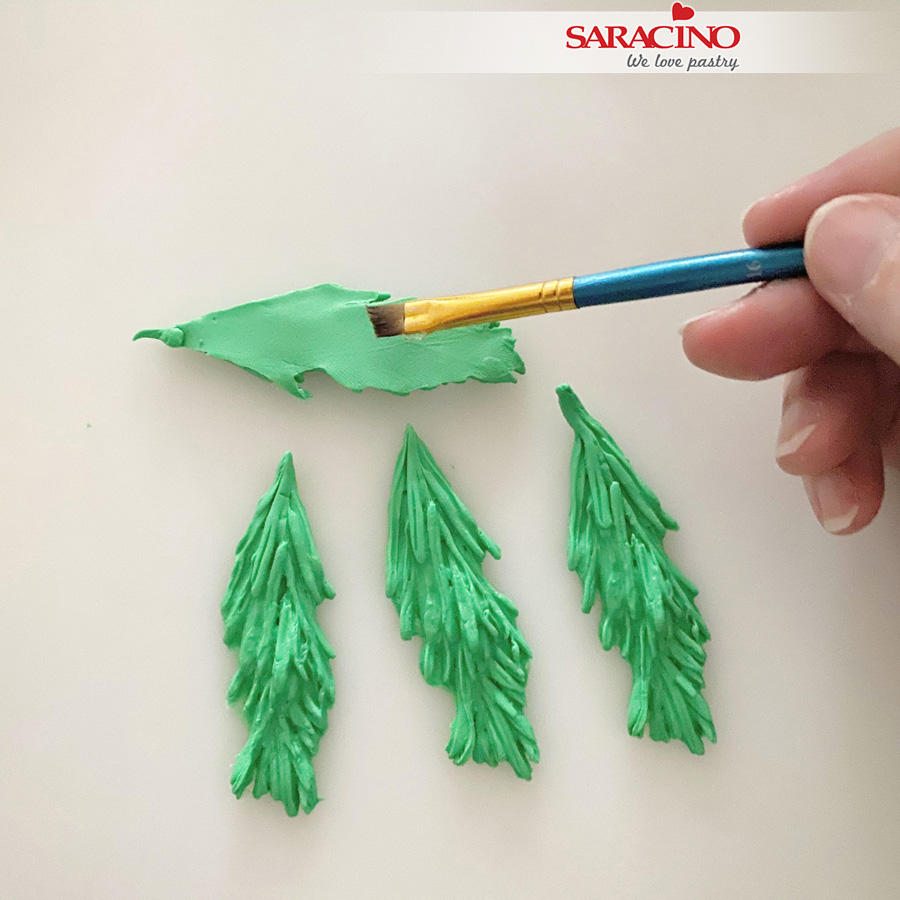
Take the fondant out of the mould and glue it on your cake with Trex or a little water. you may want to start at the rear of the cake to practice the look you would like to achieve.
Step 16
Repeat until your cake/dummy is fully covered. Fix a green ribbon around the drum.
Step 17
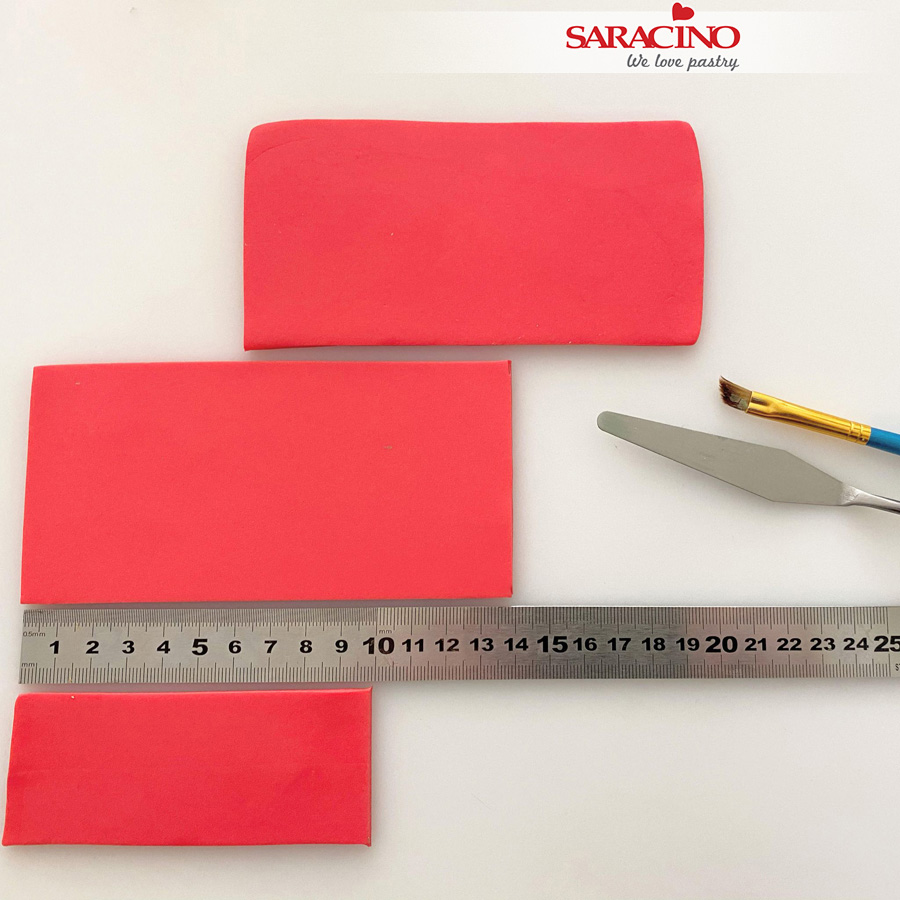
Roll out red modelling paste to create a bow. Cut out two rectangles of 14cm x 7cm and one rectangle of 10cm x 4cm.
Step 18
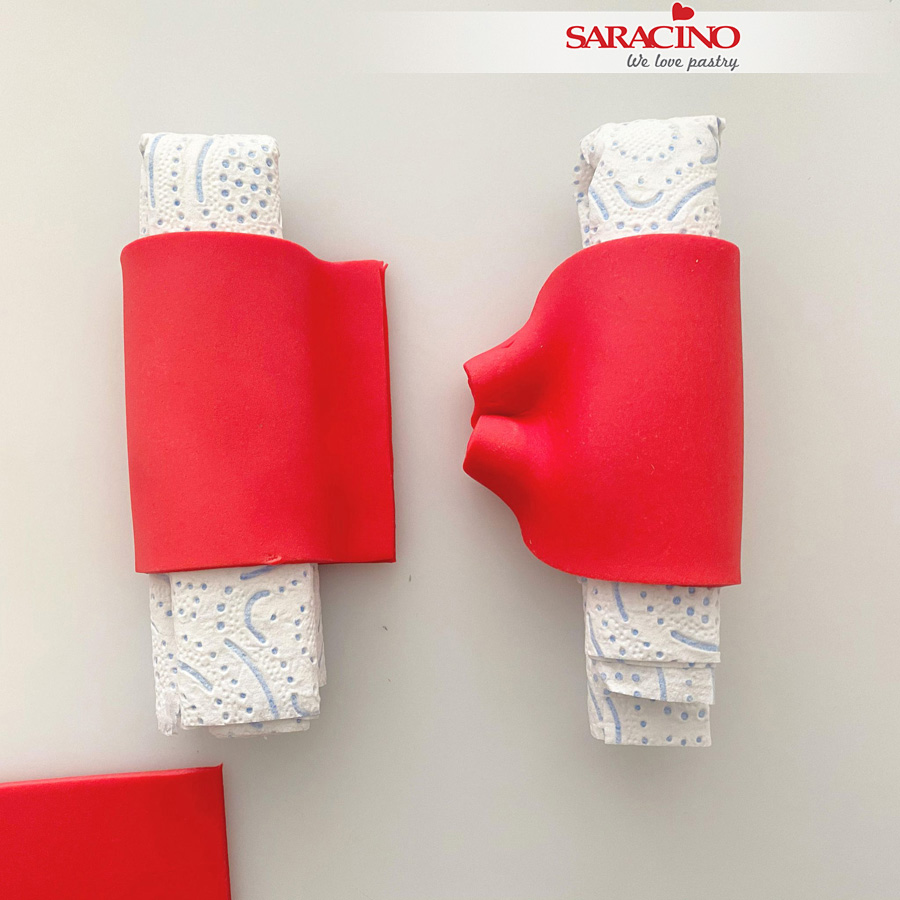
Apply a little glue to the ends of the two rectangles and fold the other end over. Place some rolled up paper towel in the bow so that the bow dries forming a round shape. Pinch the ends of the glued side together.
Step 19
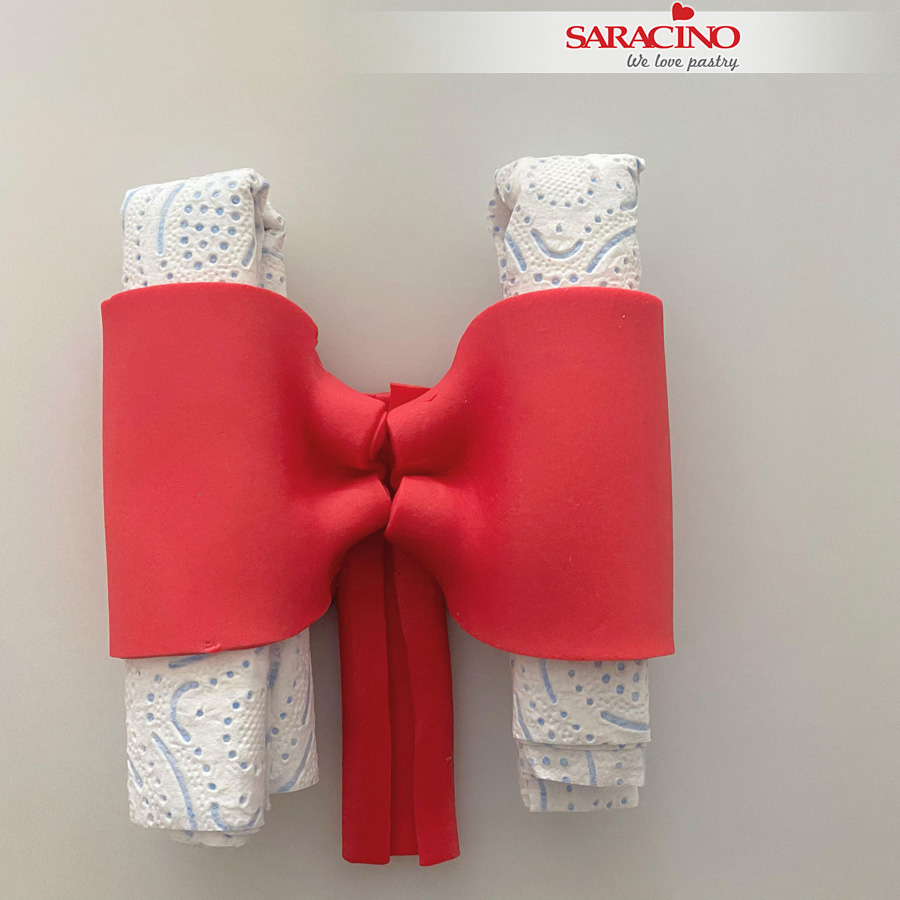
Fold the long sides of the small rectangle to the inside and glue the end to the two bows.
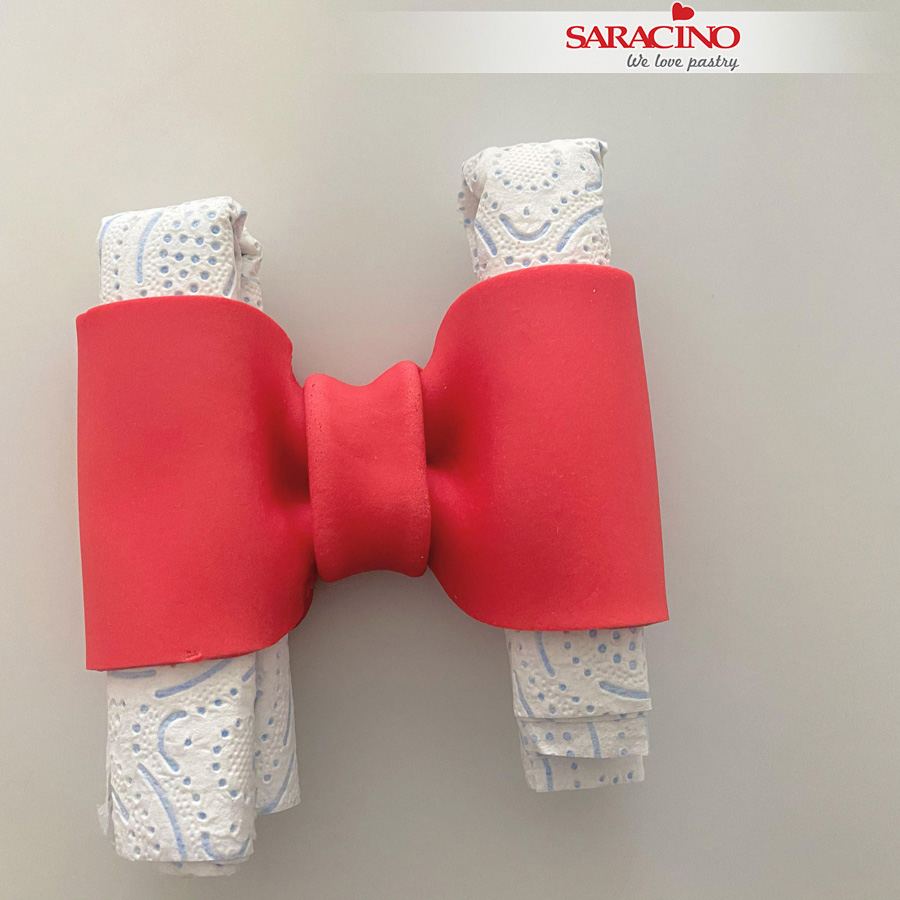
Step 20
Glue the rectangle all around and leave it to dry.
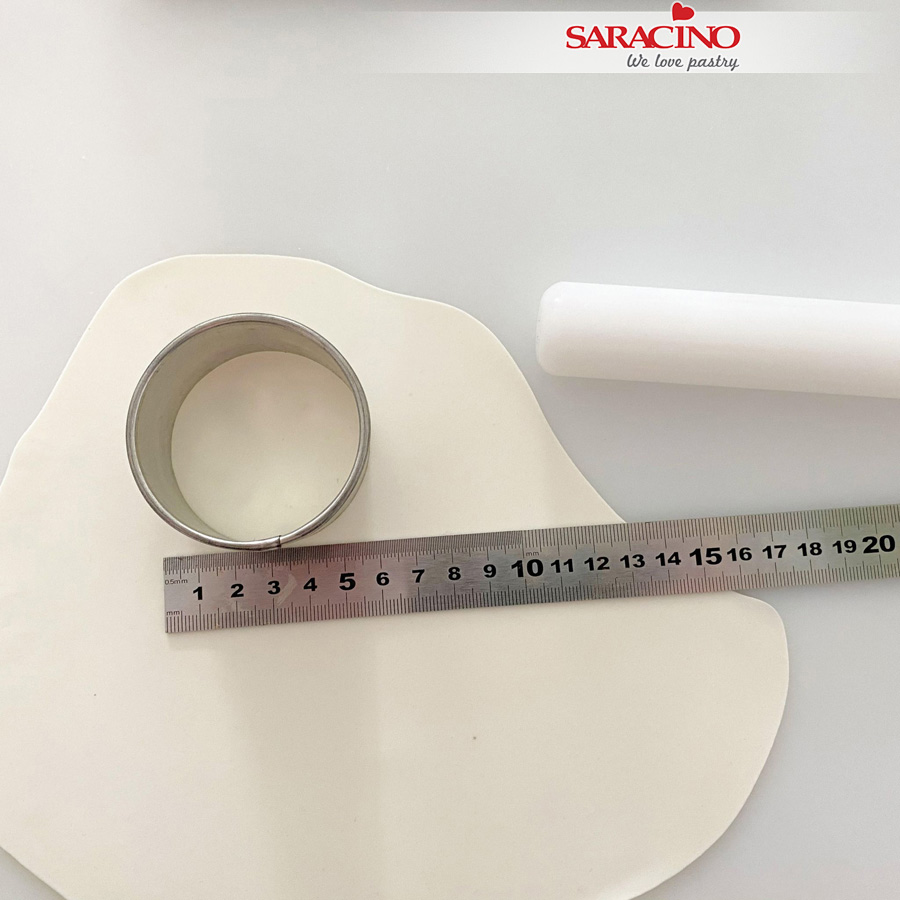
Step 21
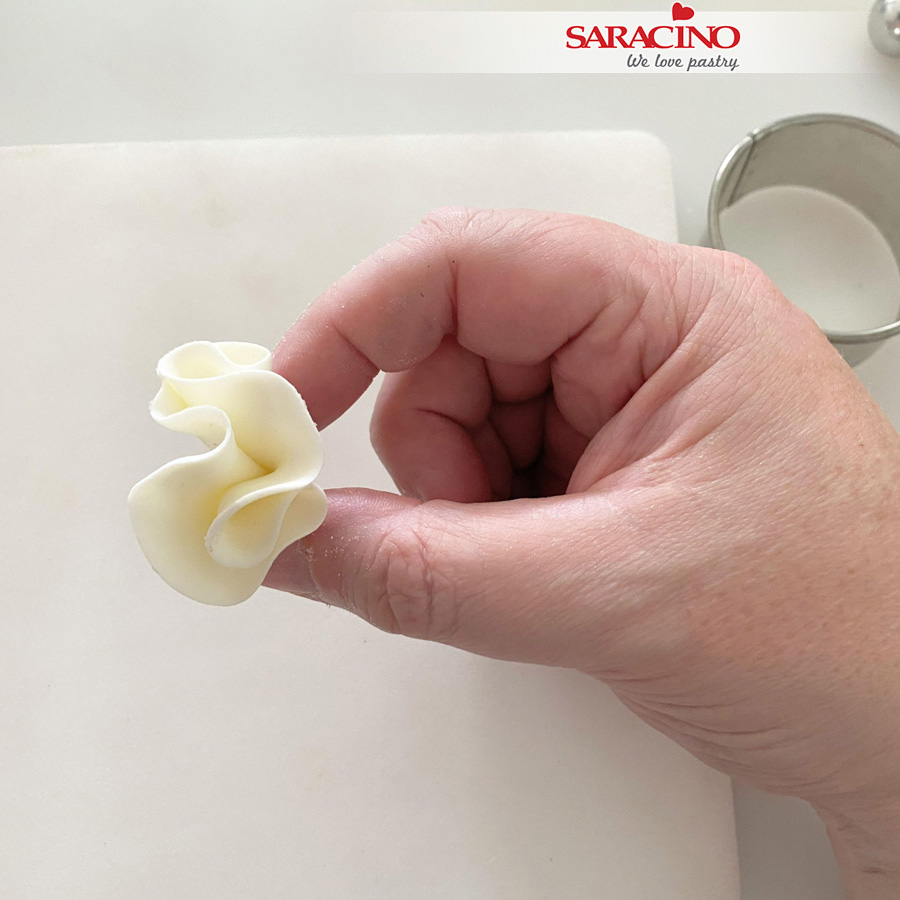
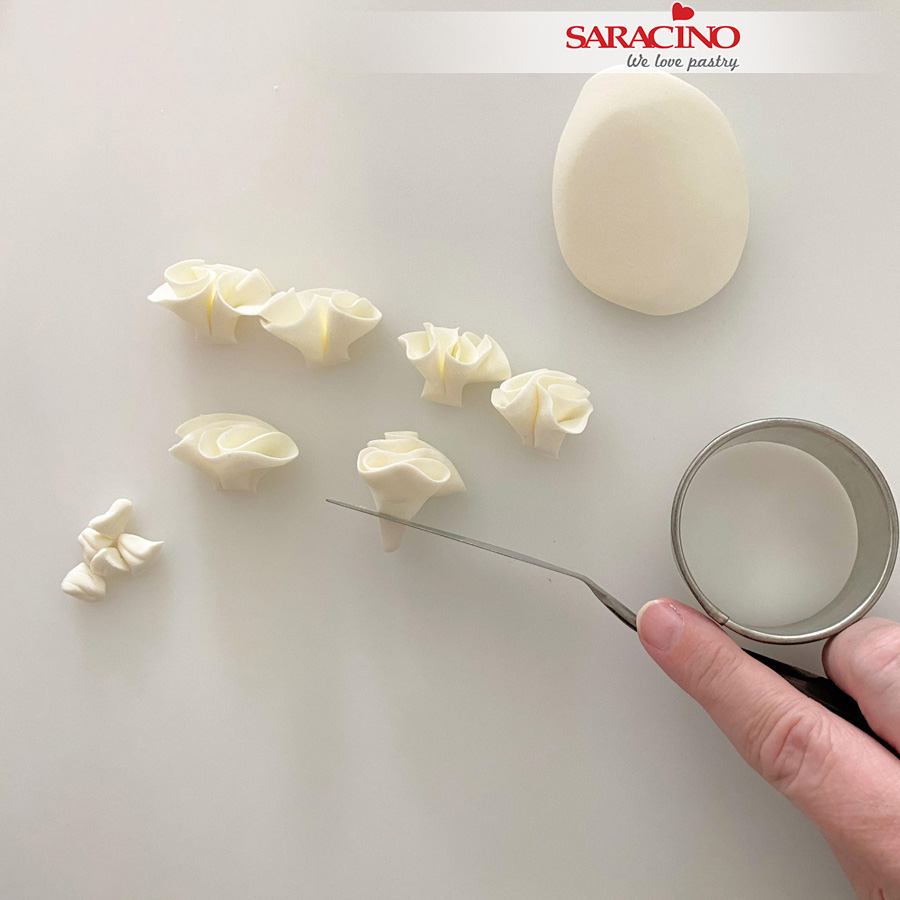
Roll out some white Pasta Top fondant and cut out circles
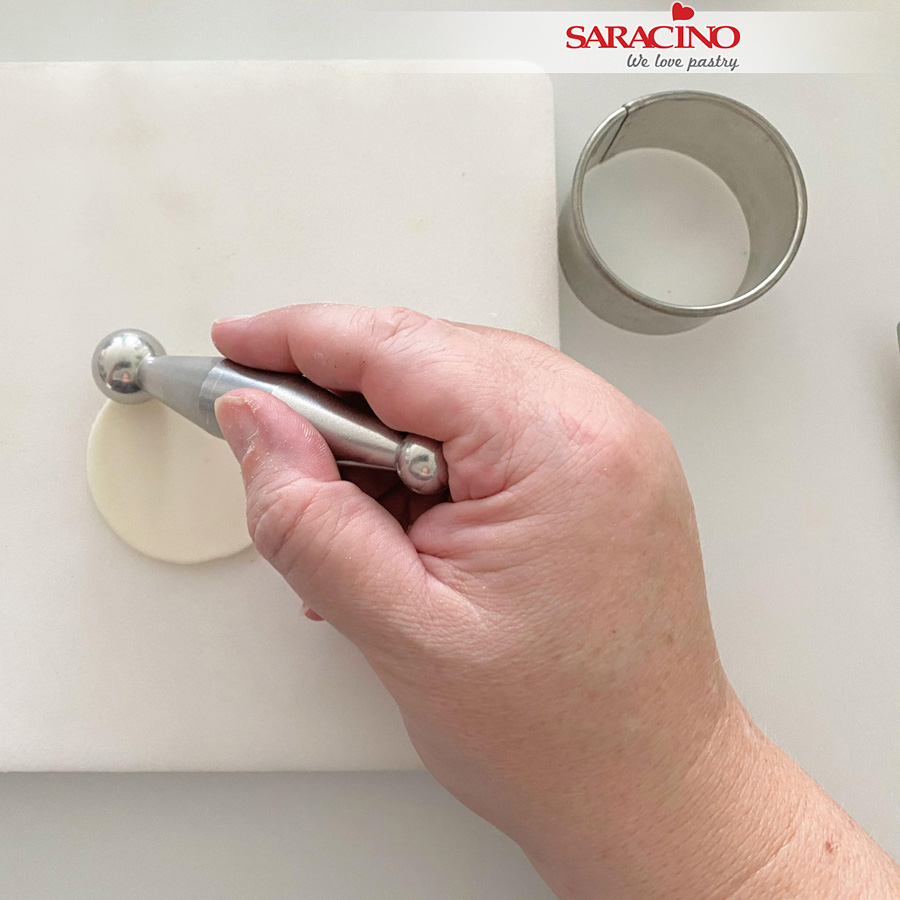
Step 22
Use a ball tool to flatten the edges of the fondant on the foam pad. Make sure your tool is half on the foam pad and half on the fondant. That will create a ruffle effect.
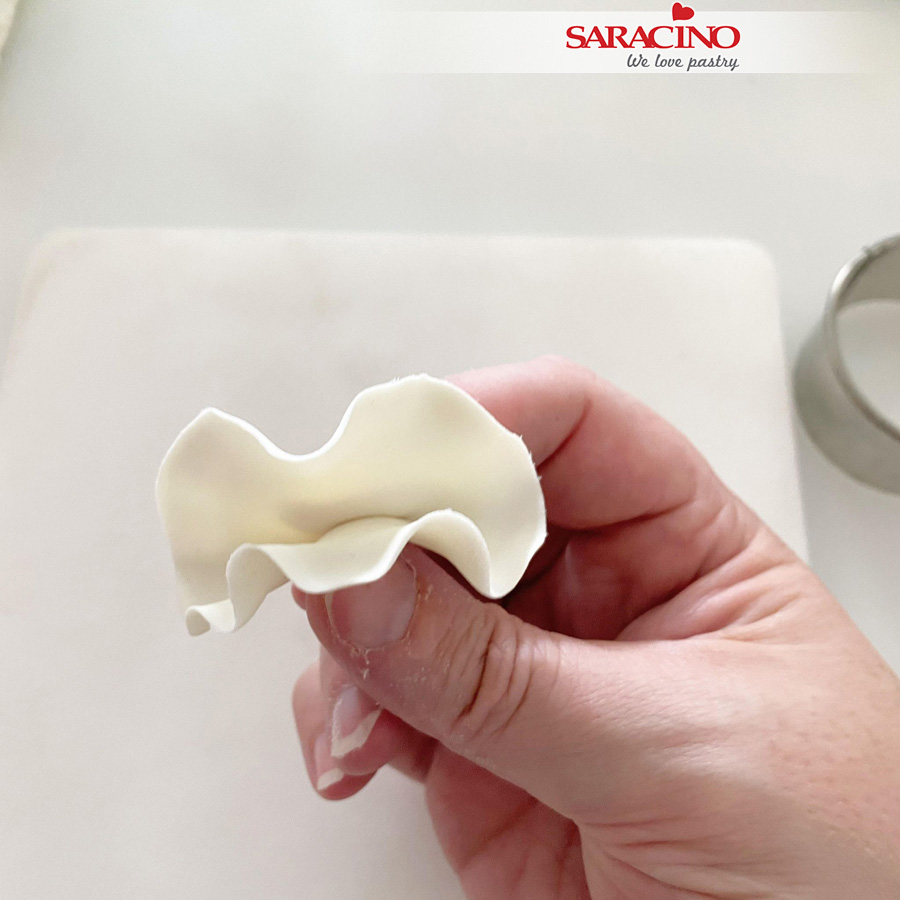
Step 23
Fold the circle in half.
Step 24
Fold into three.
Step 25
Remove the access fondant from the base of each ruffle.
Step 26
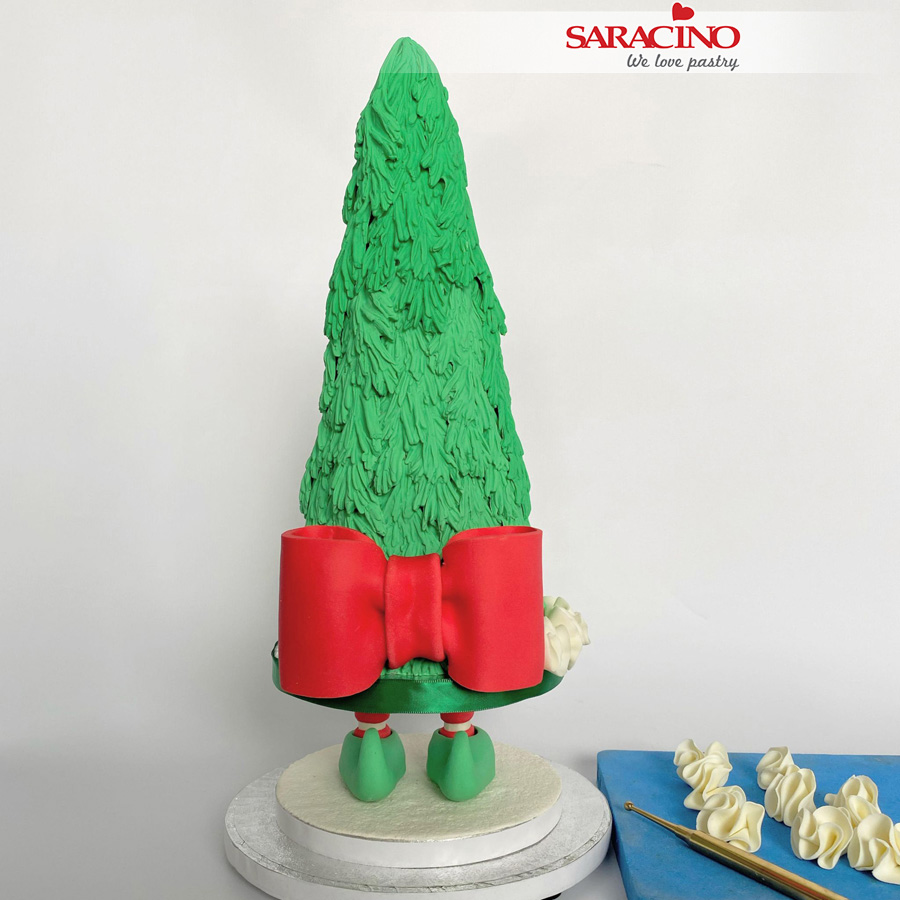
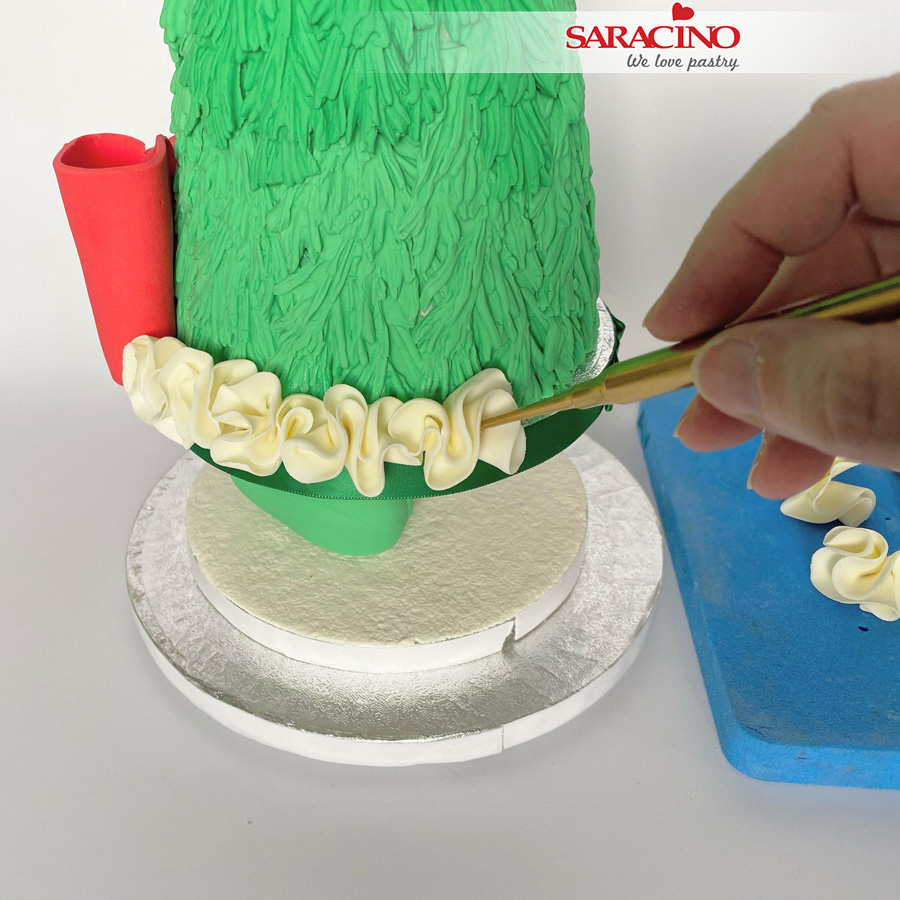
Fix the bow to the front of the cake. Fix the ruffles around the base of your cake
Step 27
Use a small ball tool to push the ruffles on to the cake. Create three layers of ruffles around the bottom of the cake.
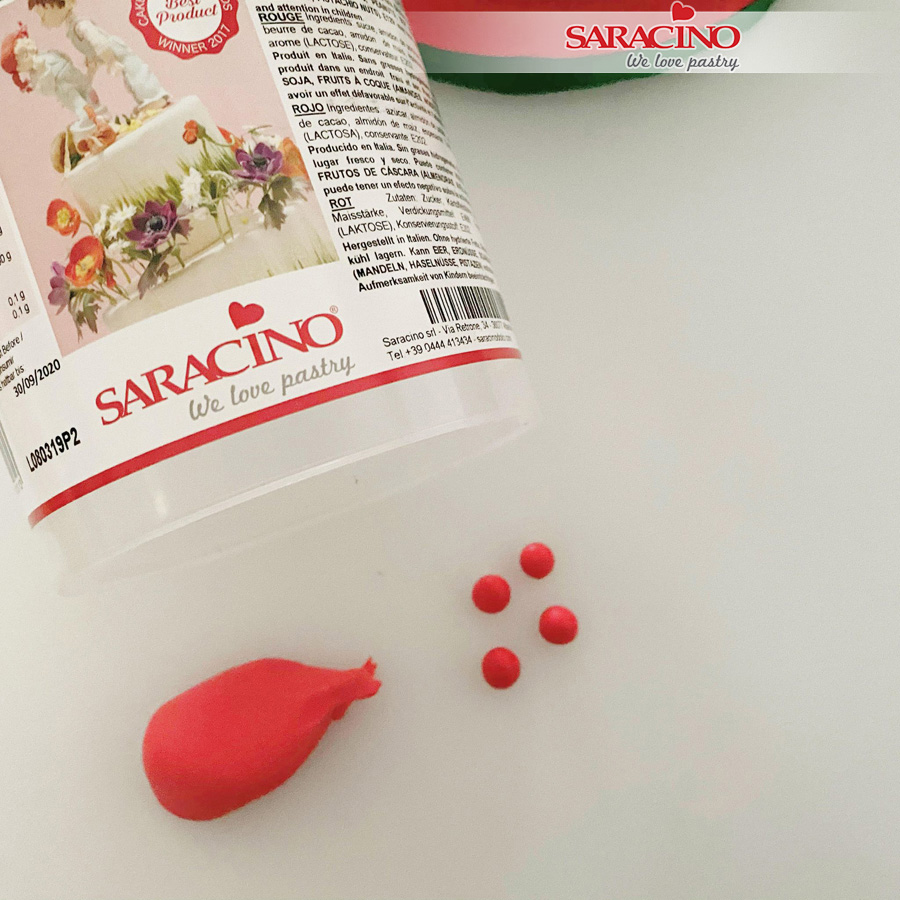
Step 28
Make balls of red modelling paste to glue in your ruffles. As many as you want to.
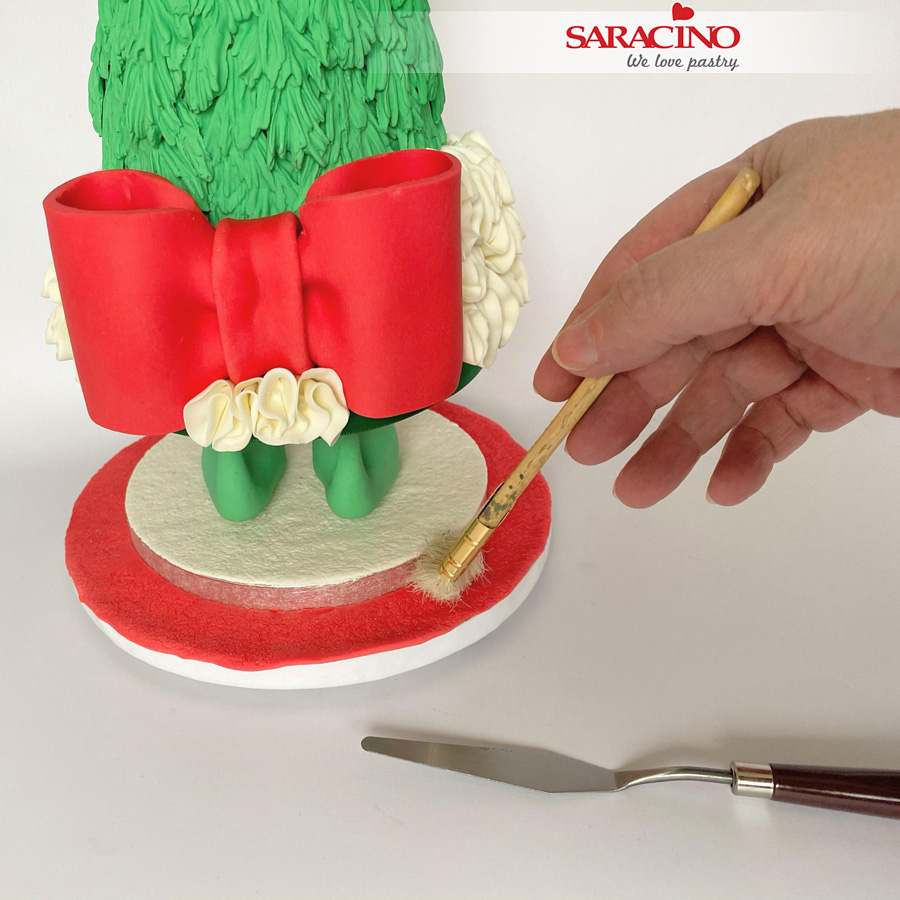
Step 29
Roll out red modelling paste to a long sausage shape and cover the bottom drum. Use the cut off stiff brush to create texture on the paste. Cut aeay the access fondant. Fix the green ribbon on the side of the drums
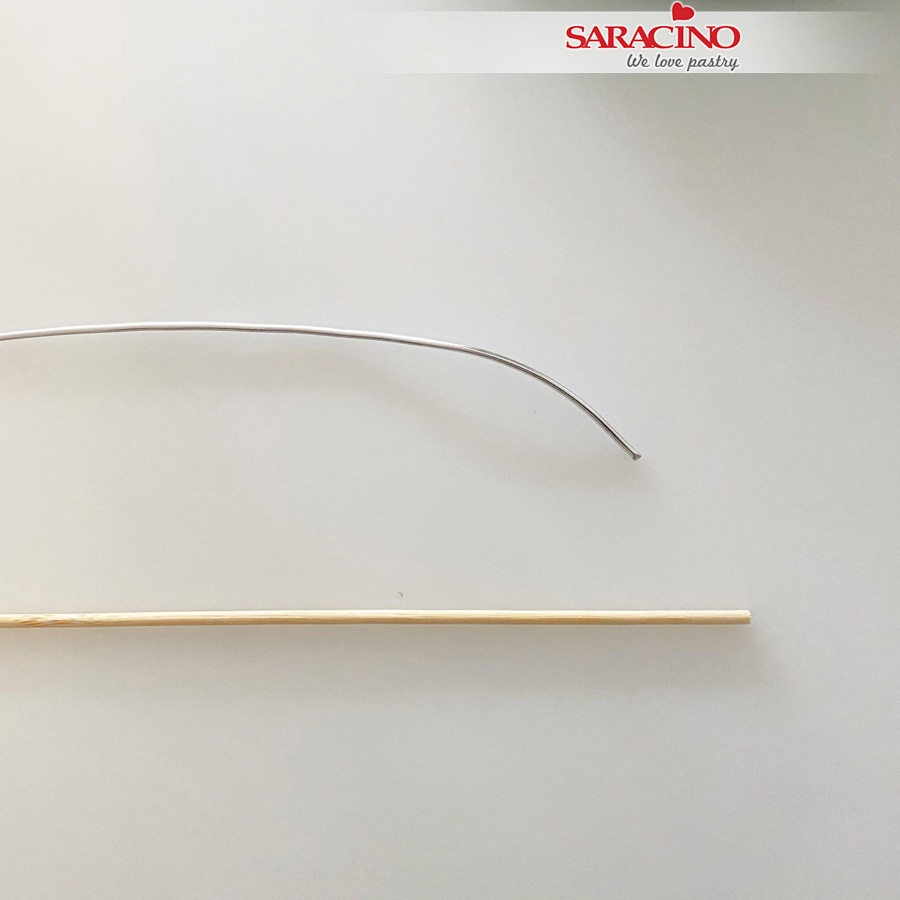
Step 30
You will now need the long bamboo skewer and the bendable wire.
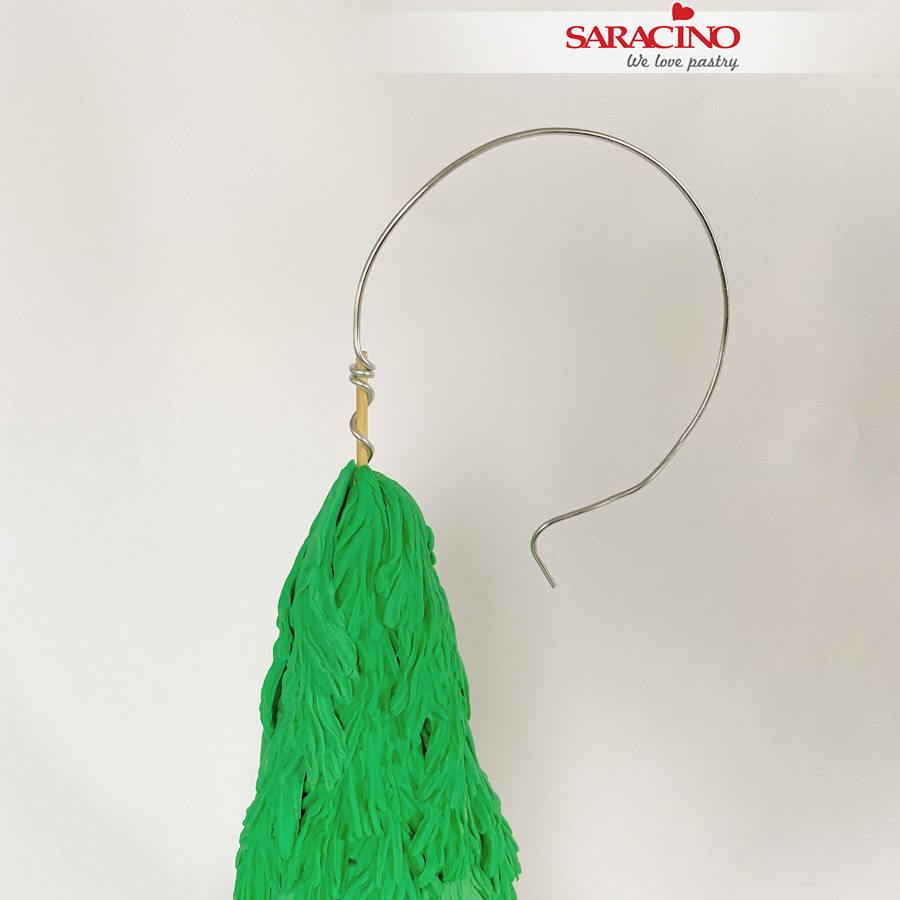
Step 31
Twist the wire around the top of the skewer. Form the wire to a circular shape using the 1kg Saracino tub as a modelling tool. Insert the skewer in the cake, leaving the wire out of the top of the cake.
Step 32
Insert a skewer into the bottom of the flower bud.
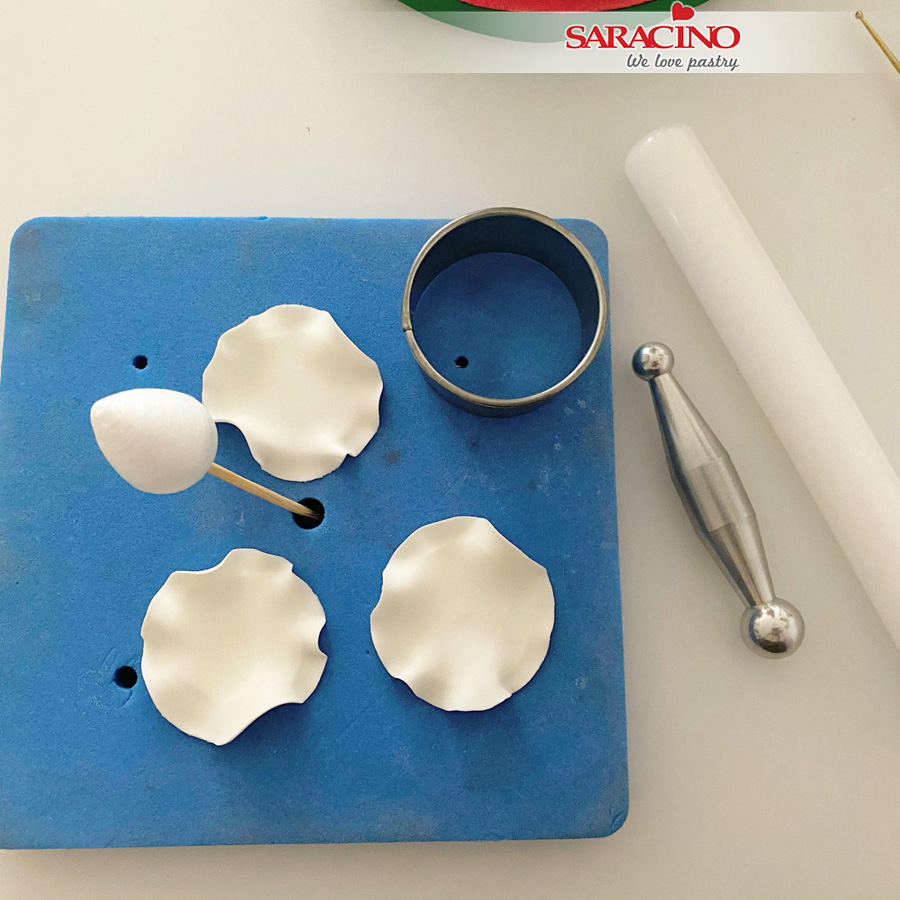
Step 33
Cut out three circles of Pasta Top fondant and use the ball tool to ruffle the edges.
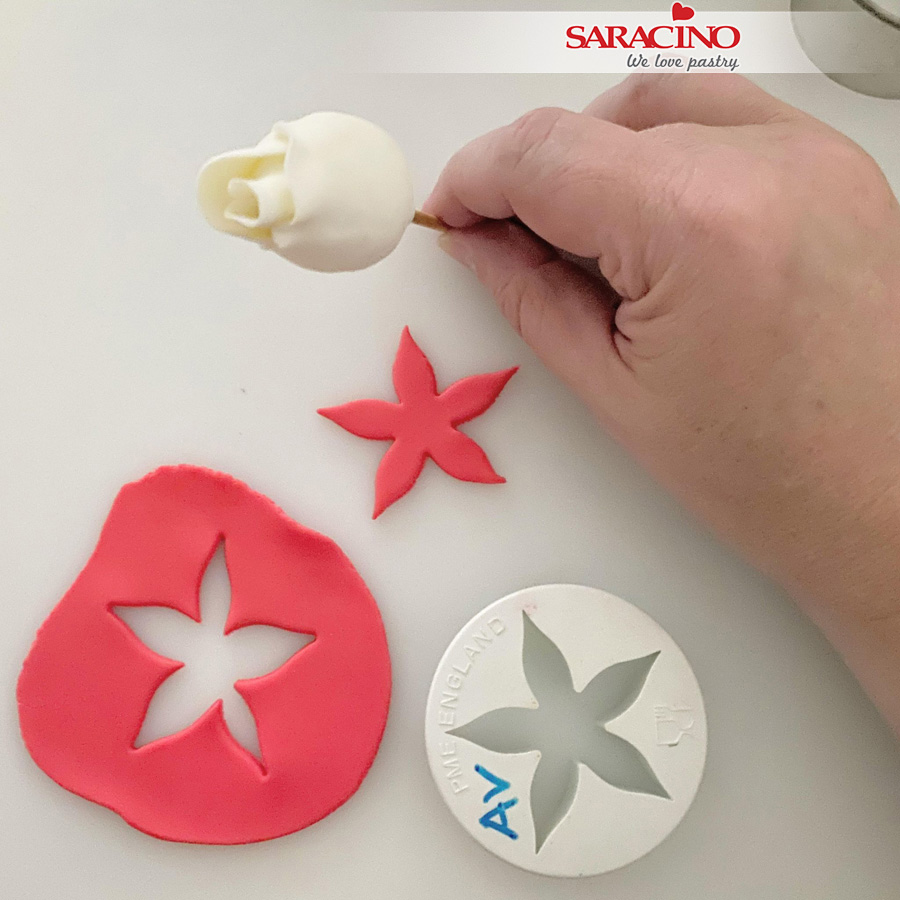
Step 34
Fix the three ruffled circles one by one around the flower bud. Roll out red modelling paste and cut out a large calyx.
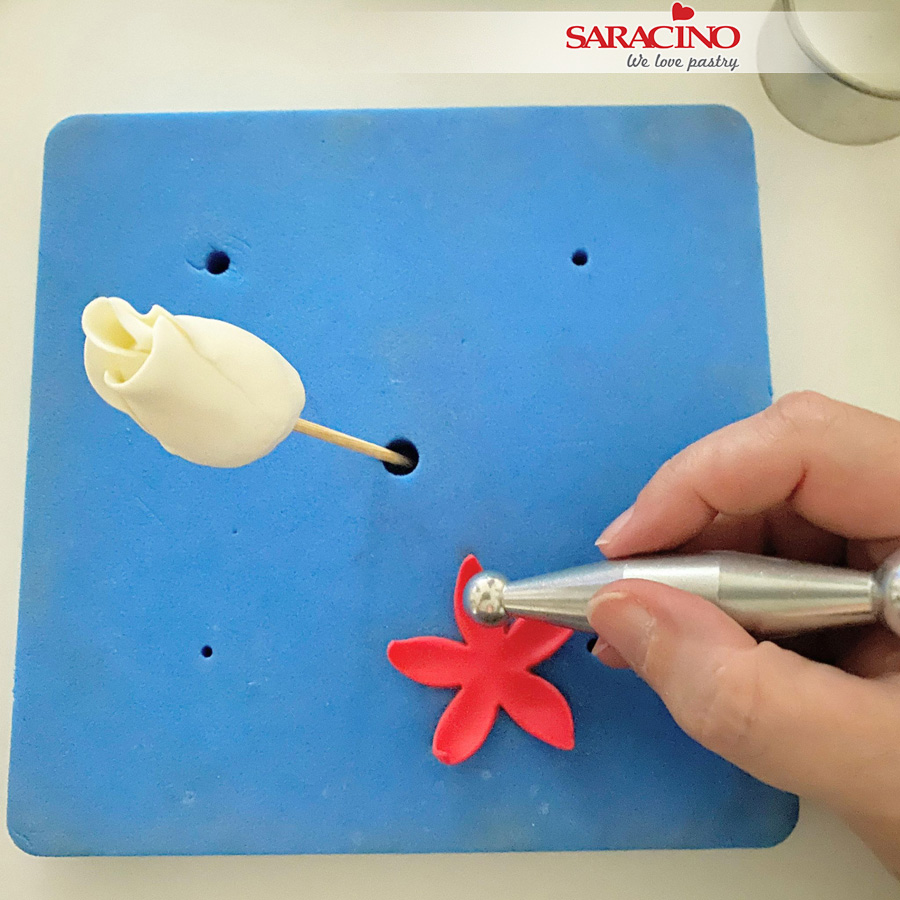
Step 35
Use a ball tool to ruffle the edges of the calyx and glue the calyx on to the flowerbud
Step 36
Using green fondant in the small needle mould cover the top of the skewer and the wire at the top of the tree.
Step 37
We need about 4 moulded small needles. Put some edible glue at the back of the fondant and glue the fondant onto the wired part of the skewer.
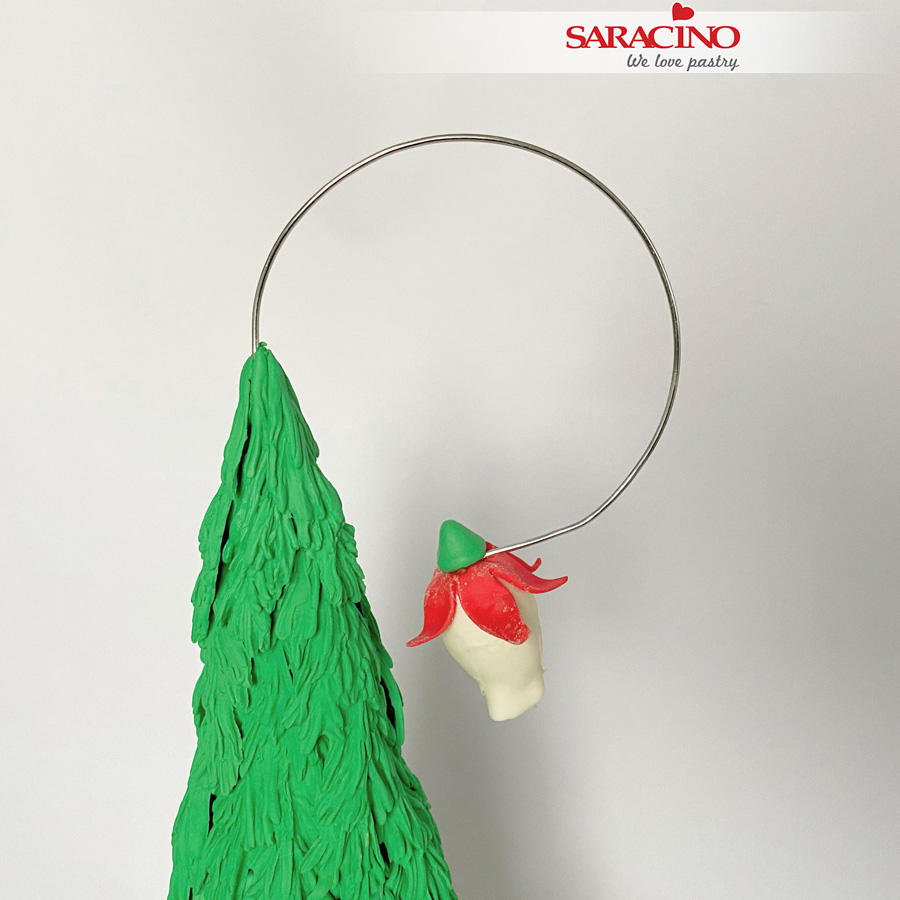
Step 38
Glue the flowerbud on the end of the wire. This can be any decoration of your choice. Cover the end of the bud with a small amount of green paste.
Step 39
Use some sprinkles to decorate the Christmas tree cake

Step 40
Use the metallic sprinkles to create a garland look on the cake.
Step 41
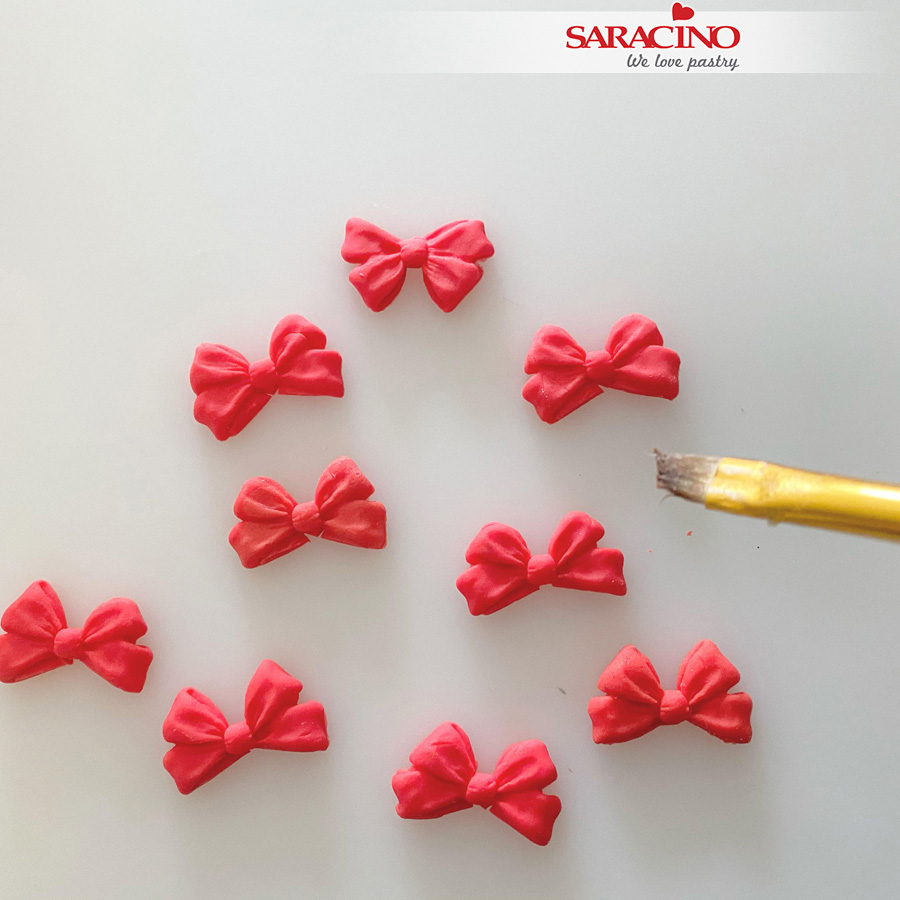
Make some red bows using modelling paste or use a bow mould. Use the bows to decorate the cake. Glue some red and white sprinkles on the cake.
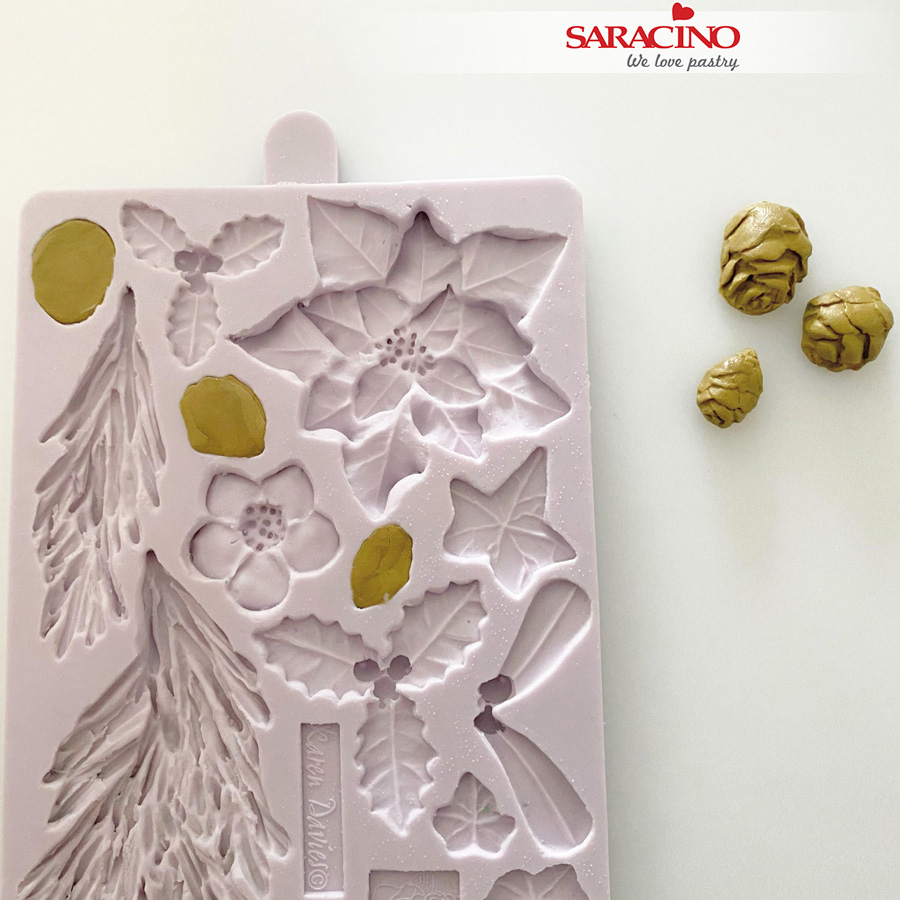
Step 42
Colour some modelling paste with the brown gel colour for the pine cones. Use the mould to create the pinecones. Make different sizes of pine cones.
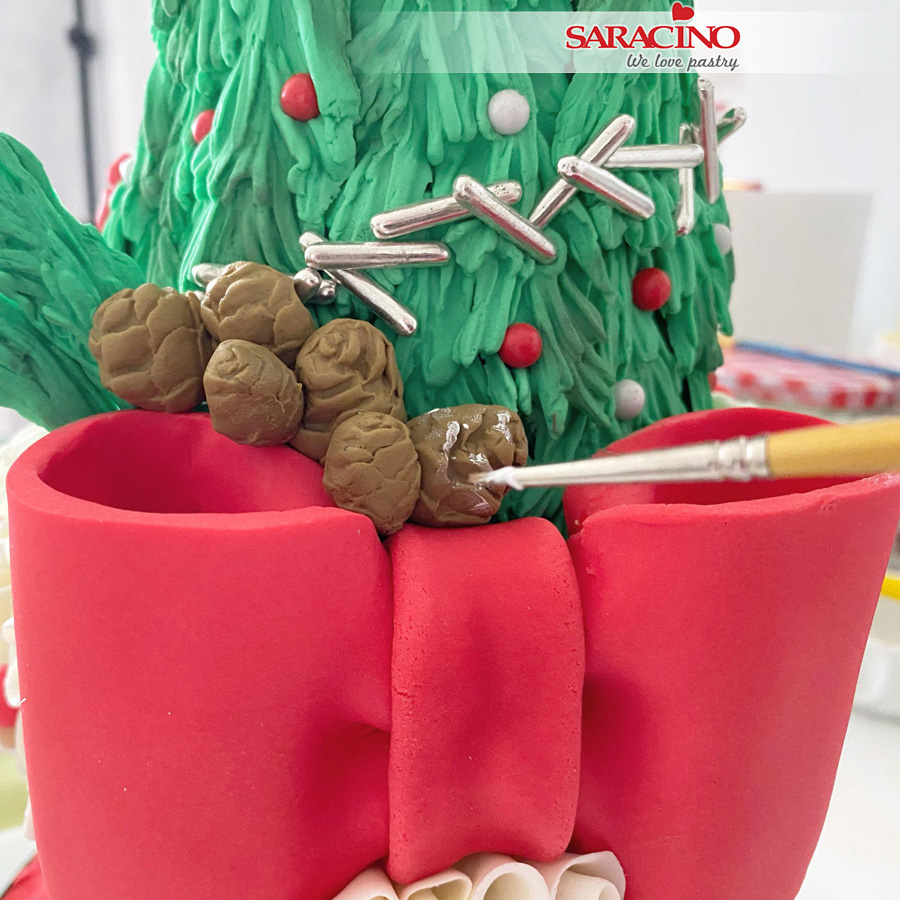
Step 43
Glue the pine cones on to the cake above the red bow and paint the tips with white to give a frosty look
Step 44
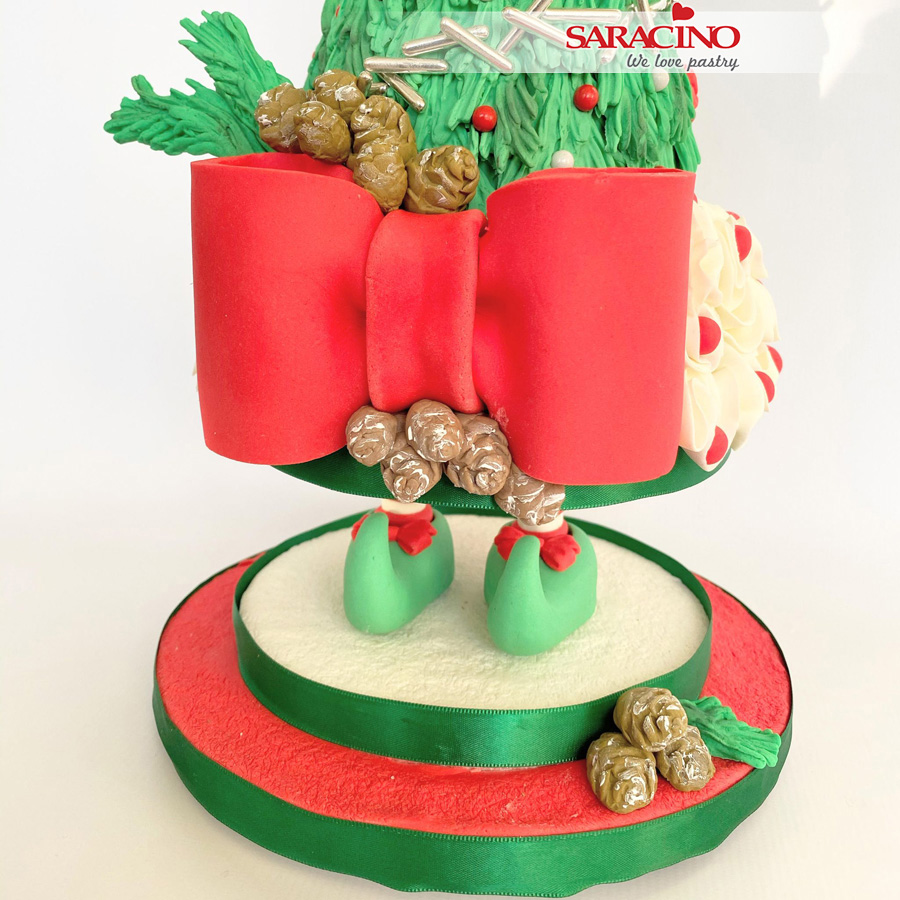
Fix pine cones at the base of the bow (or you can glue ruffles). You decorate it the way you would like it to look.
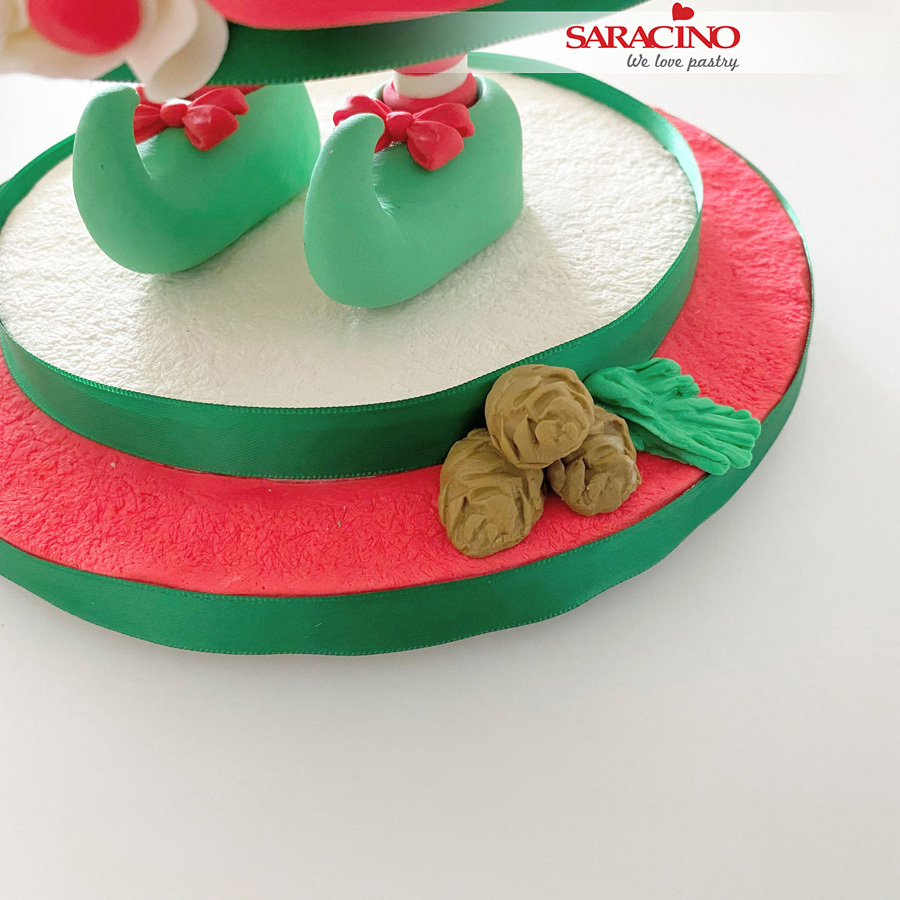
Step 45
Fix pine cones and needles on the drum if you wish.
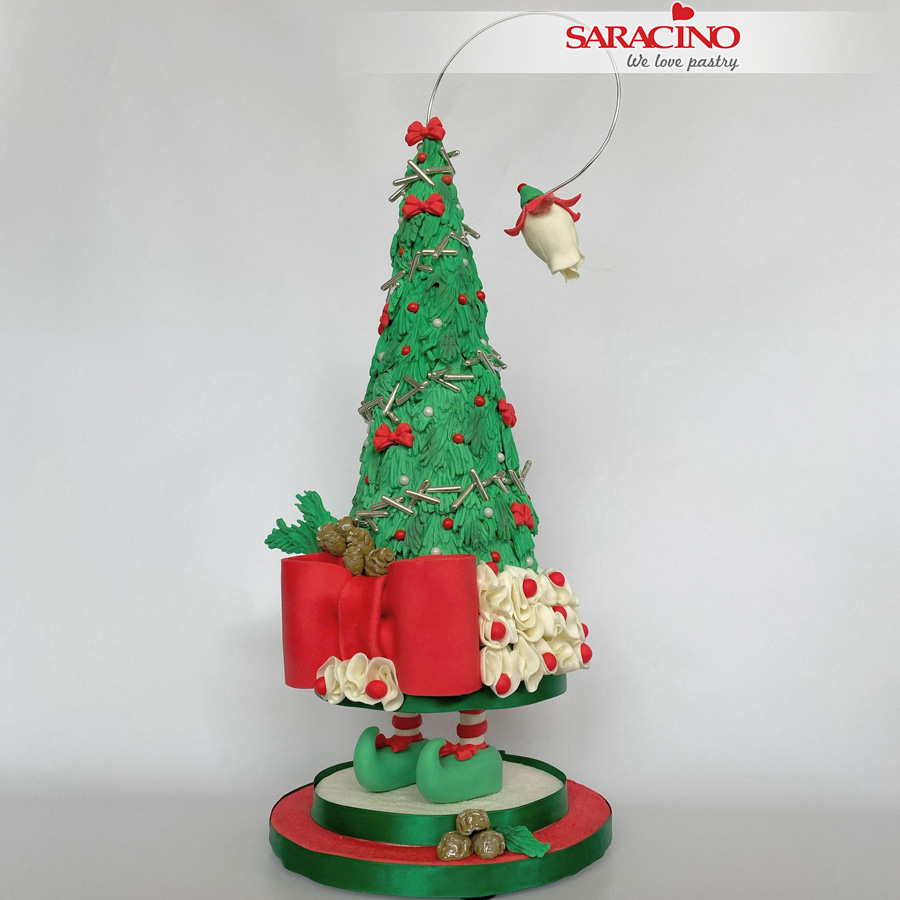
Step 46
Your Christmas cake is ready to party!
