Author: Angelika Chwyc

Skill level: INTERMEDIATE
TIP:
Remember to use gloves. Always protect the pieces of paste from drying out. Always pack them in foil or cling film– if you are mixing colours to make it very dark, do it a few hours in advance. Freshly mixed colour will be too soft to use immediately
You will need:
Saracino white modelling paste
Saracino white modelling chocolate
Saracino red powder colour
Saracino orange powder colour
Saracino white powder colour
Saracino black powder colour
Saracino green powder colour
Saracino brown powder colour
Rolling pin
Sharp blade
Wooden skewer
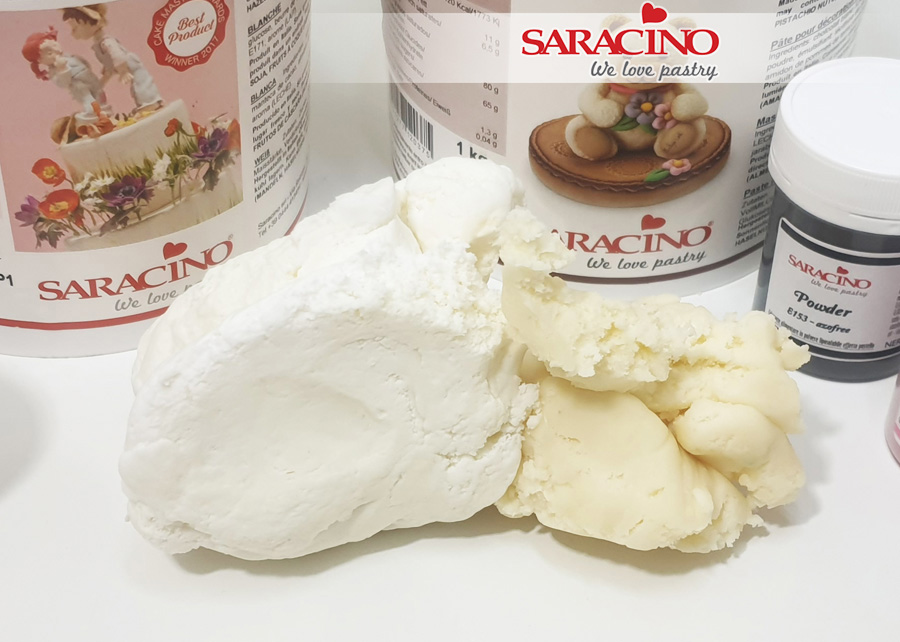
Step 1
Prepare a mix of Pasta Model and white modelling chocolate 2:1 (2 parts paste and 1 part chocolate). Mix them with a small amount of white powder colour.
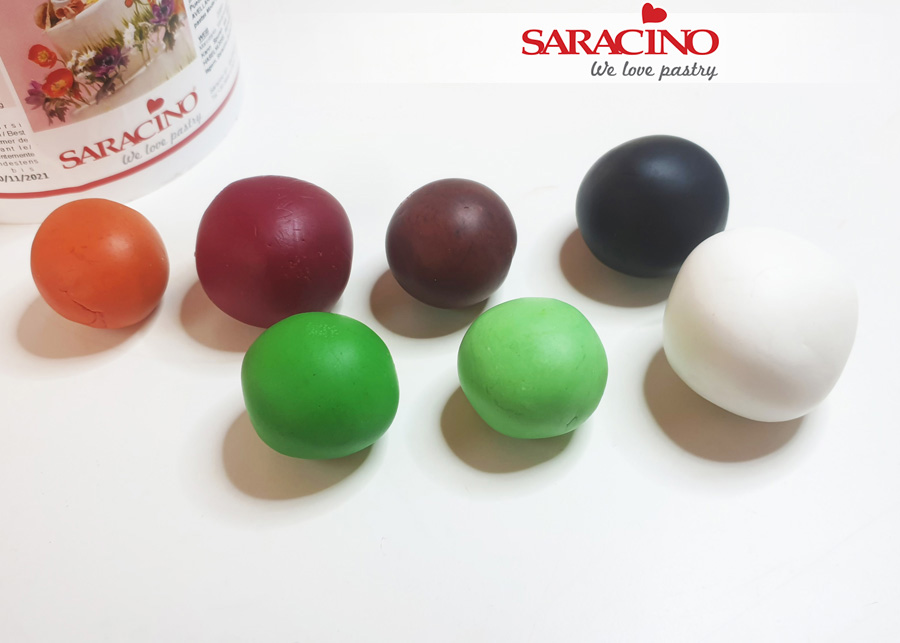
Step 2
Colour pieces of the mixed paste with the powdered colours visible on the photo. Leave a larger piece white colour
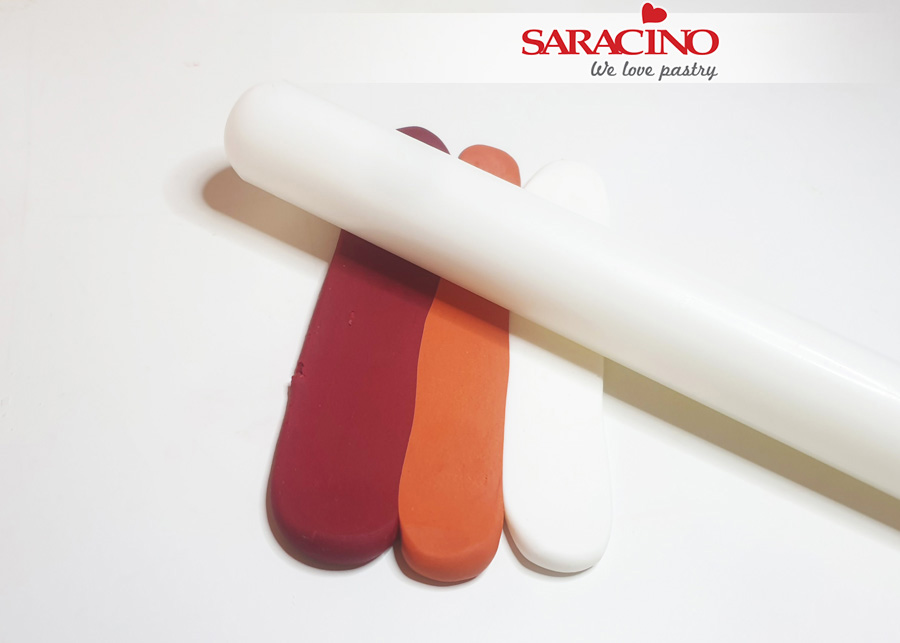
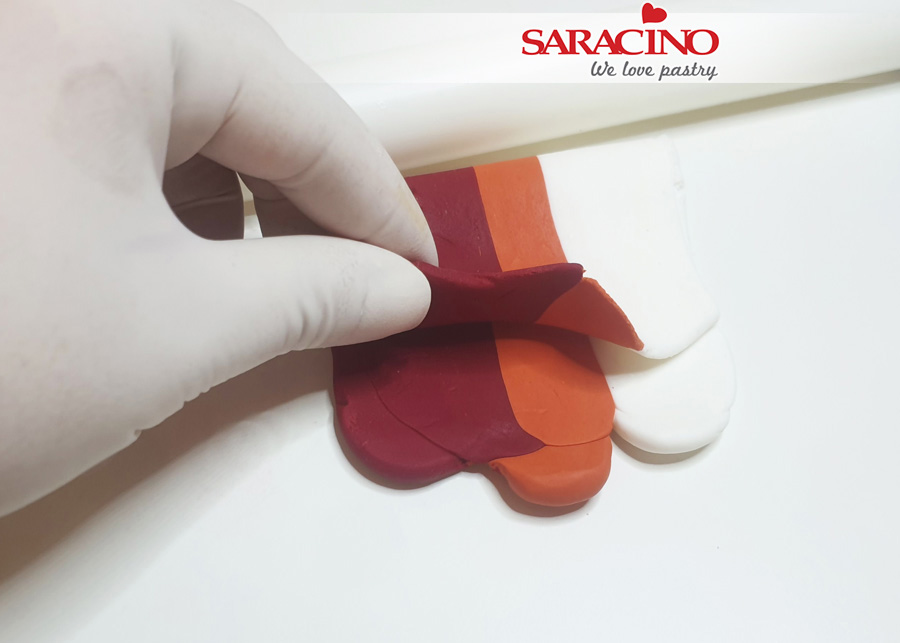
Step 3
Start by making a flower. Use white, red and orange colour paste. Roll out into strips as shown in the picture. The colours may be different (to your choice), but it is important that each colour is of the same thickness and width.
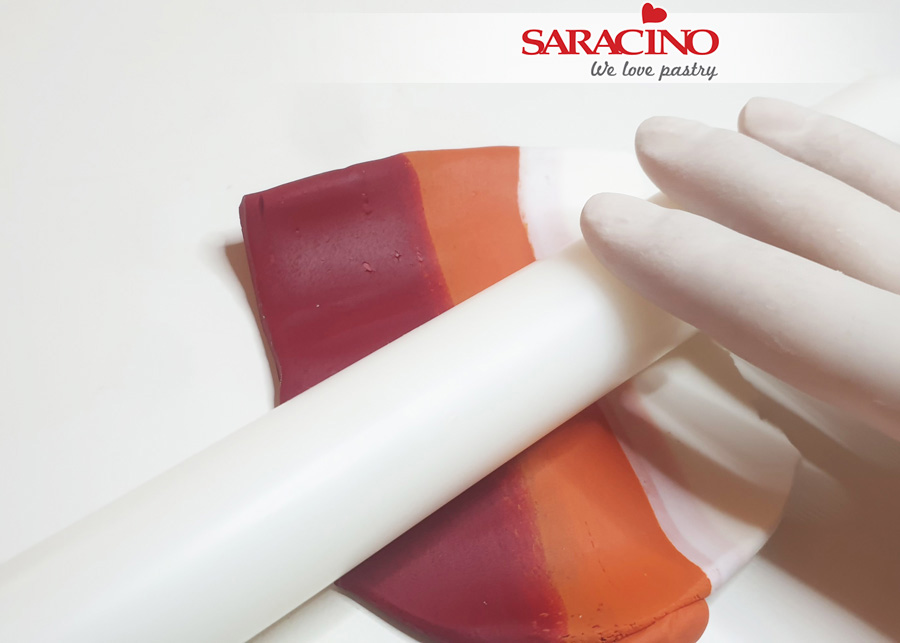
Step 4
Fold the rolled out strips in half making sure the boundary of each colour overlaps the lighter colour next to it. Roll out again.
Step 5
Repeat this a number of times to achieve the blended look.
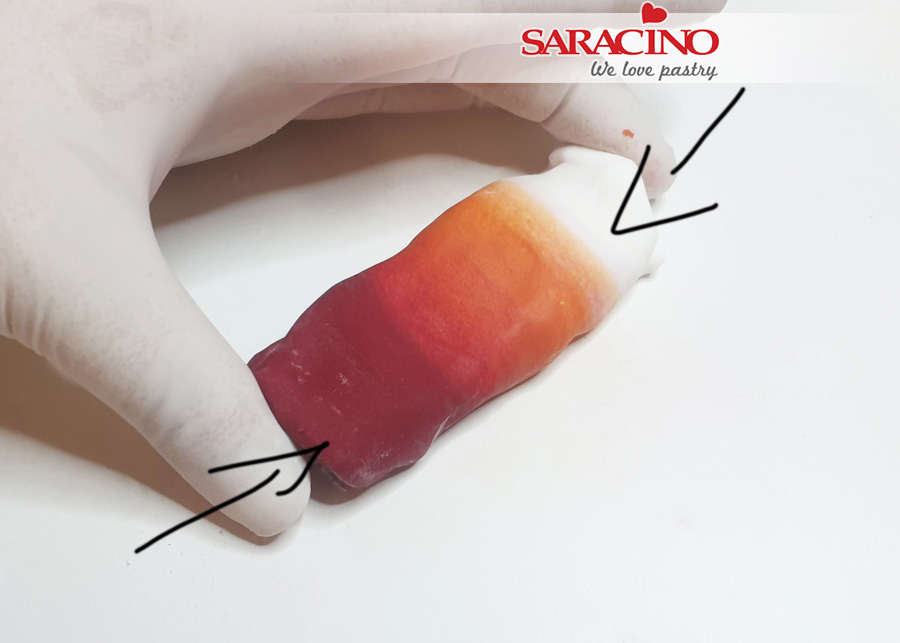
Step 6
When we roll colours the length automatically wants to increase. Each time you roll out the paste remember to push back to the original width using your fingers (look at the arrows)
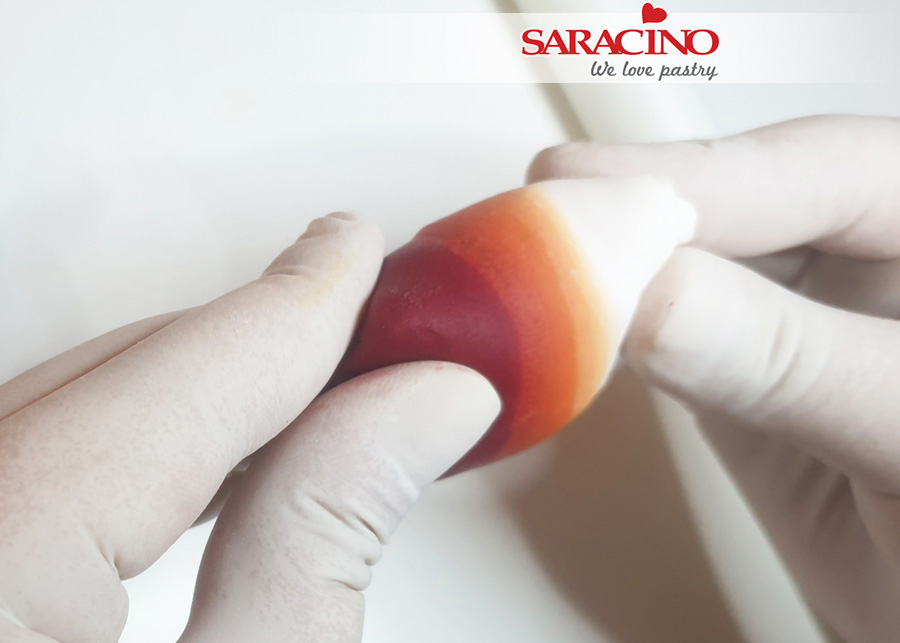
Step 7
Using your fingers pinch the ends of the fat sausage shape.
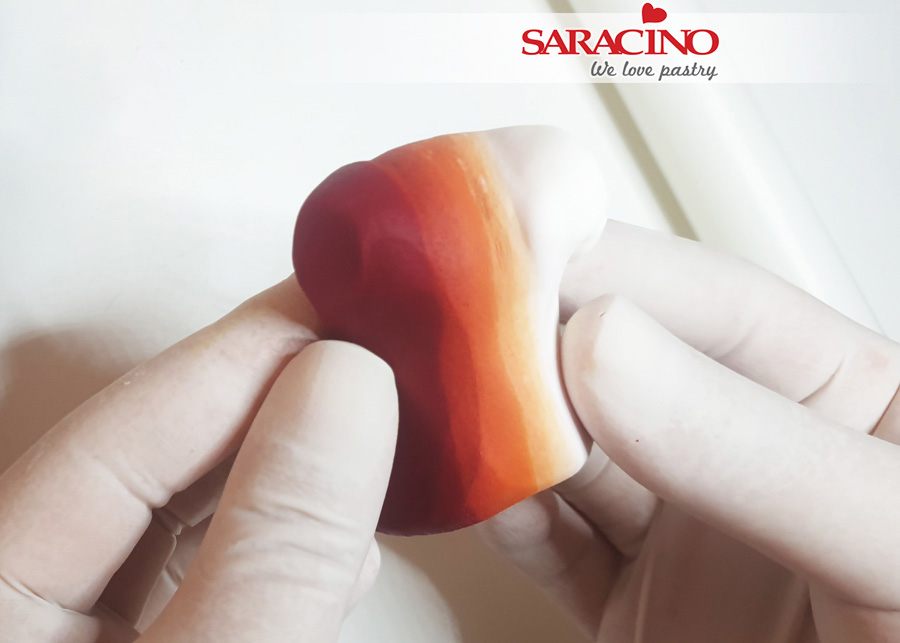
Step 8
Gently press and elongate the piece using finger pressure. Be gentle as we don’t want to ruin the blended effect we have achieved.
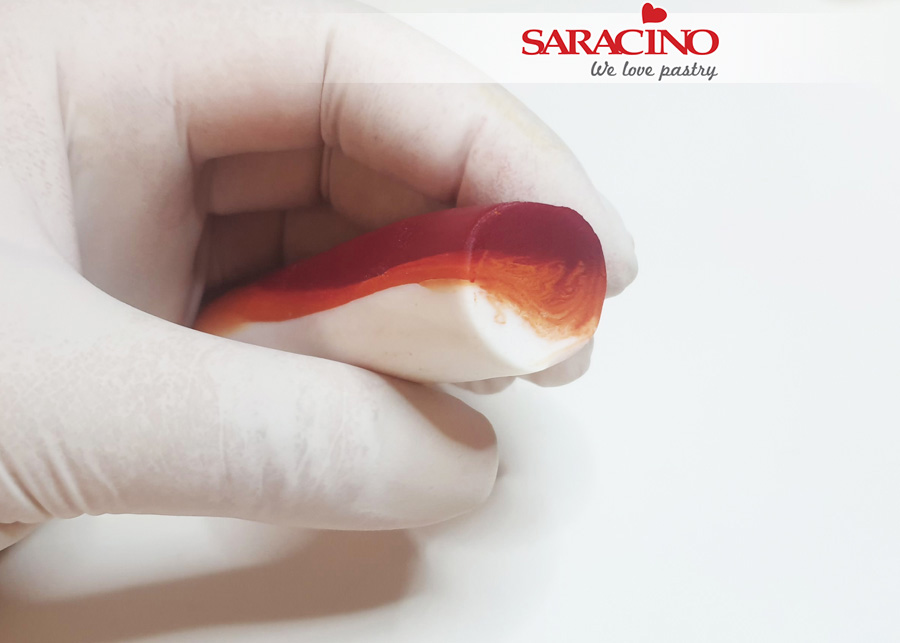
Step 9
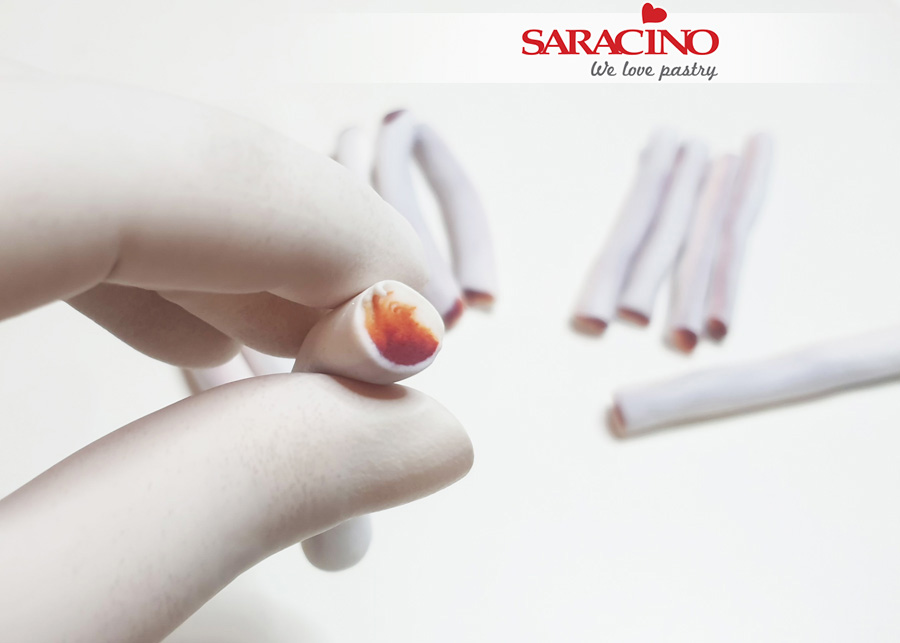
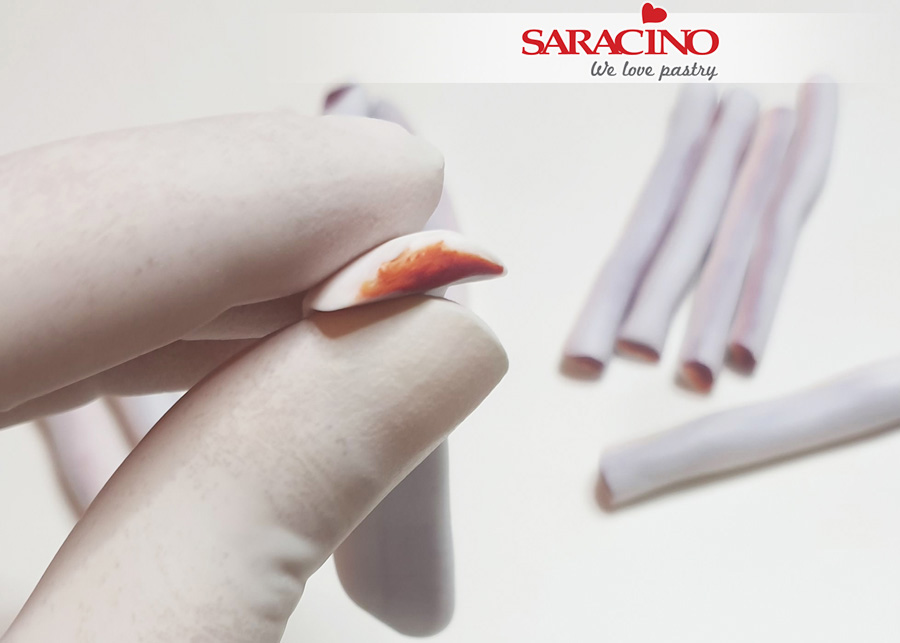
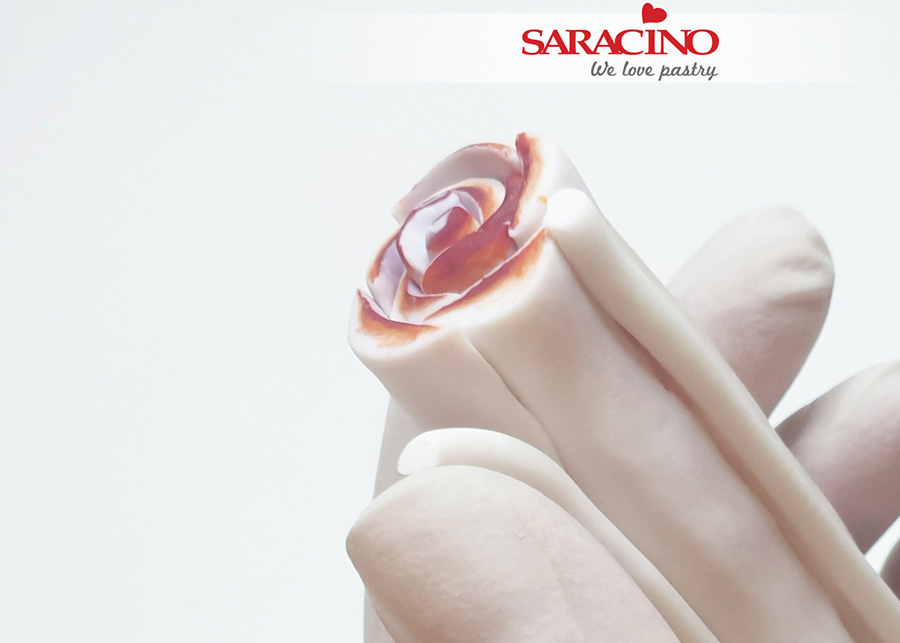
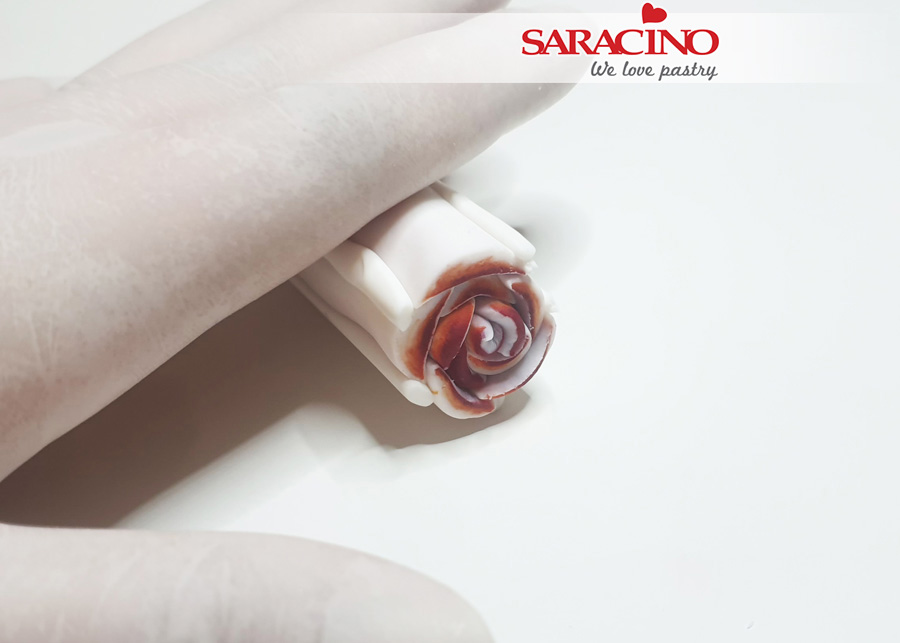
Your paste should be formed to a roll shape like this. The cross section will show the transition blending of the colours.
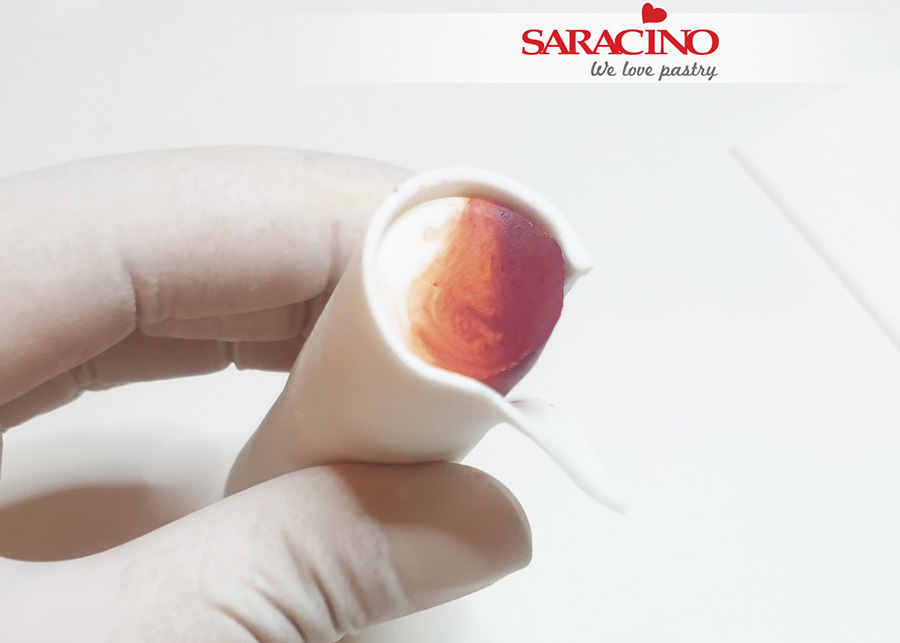
Step 10
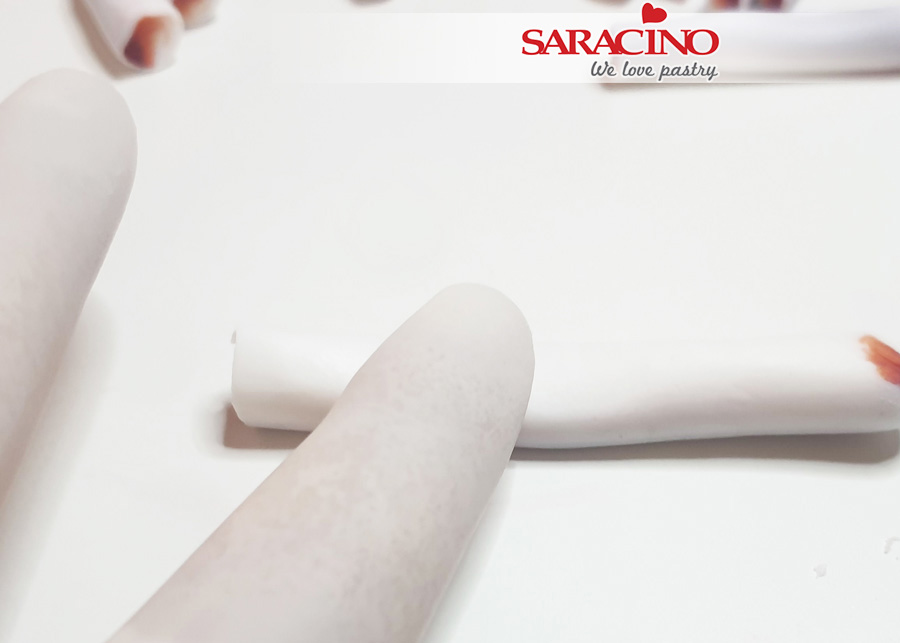
Roll a thin sheet of white paste and fix around the roll by pressing gently.
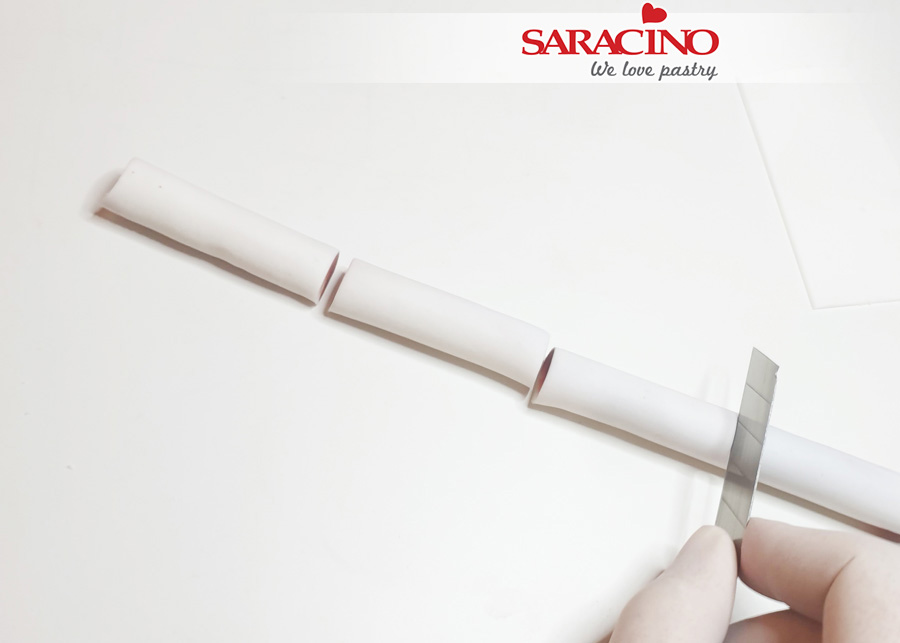
Step 11
On your work surface roll to extend the paste to a long and thin sausage shape. Divide the length into 4 equal parts. Each part will have to be divided into different lengths as described in the next step.
Step 12
The first piece should be cut into two unequal lengths. One quarter : three quarter (the smallest piece is the centre and the largest is the last largest flower petal)
The second piece should be cut in half (2 pieces)
The third piece should be cut into third’s (3 pieces)
The fourth piece should be cut into quarter’s (4 pieces)
Roll each piece again. They will have different thicknesses but should all be the same length.
Step 13
Step 14
Keep the two outer edges thin.
Step 15
Repeat to all pieces.
Step 16
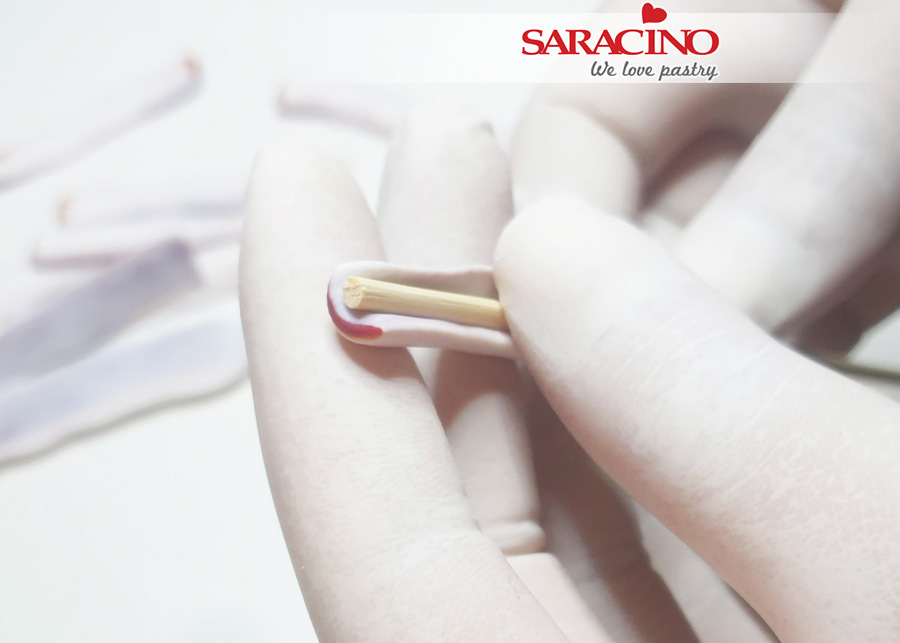
Starting with the smallest pieces form around a wooden skewer to curve and form the centre of the flower.

Step 17
Roll up tightly.
Step 18
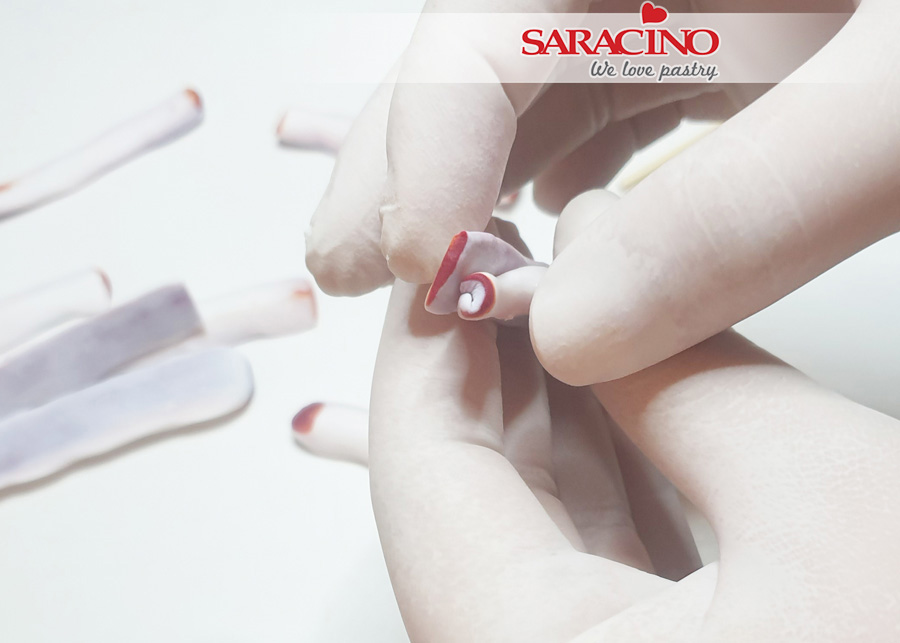
Add the next piece over the joint of the centre bud.
Step 19
Keep adding more petals with an overlap
Step 20
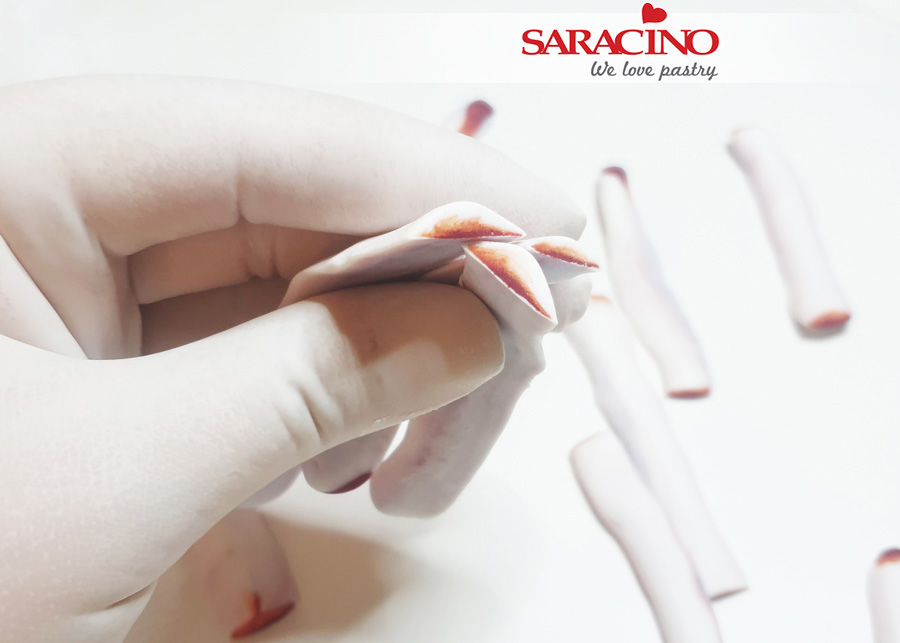
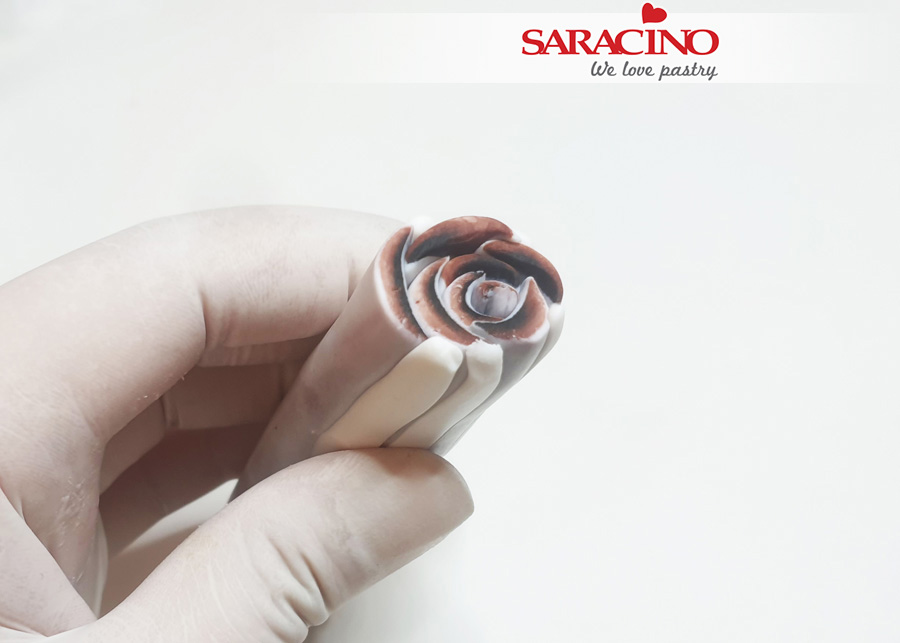
Repeat until you have used all sizes. You should finish with the largest pieces.
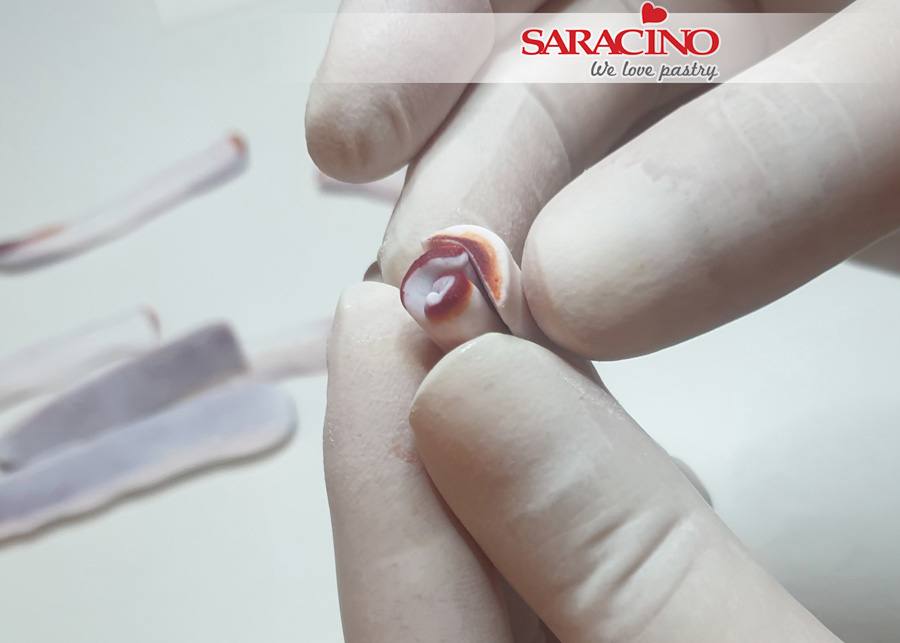
Step 21
Roll a thin length of white paste and fix over the join of the larger petal.

Step 22
Repeat on all of the outer petal joints.
Step 23
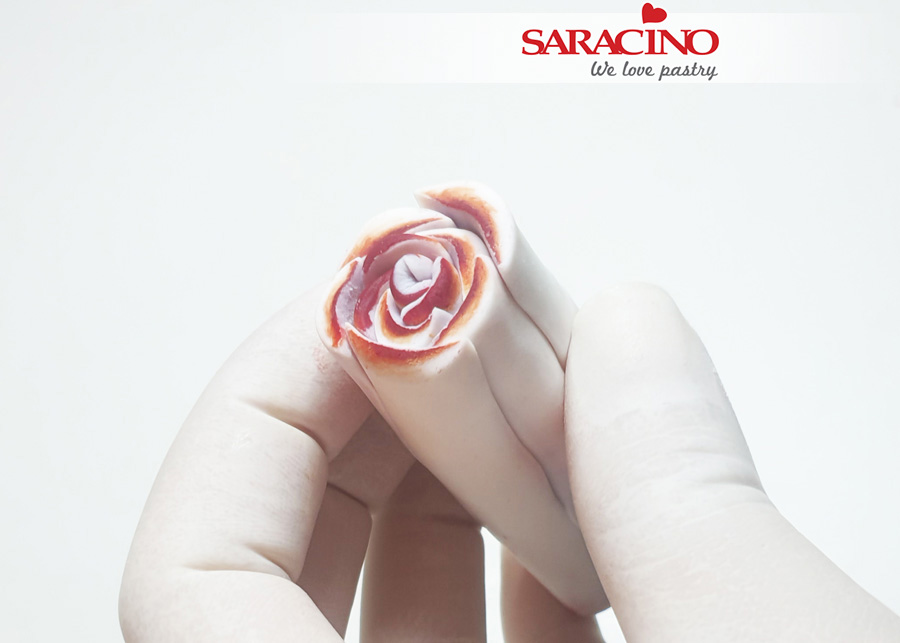
Using your hand roll out to give a smooth surround.
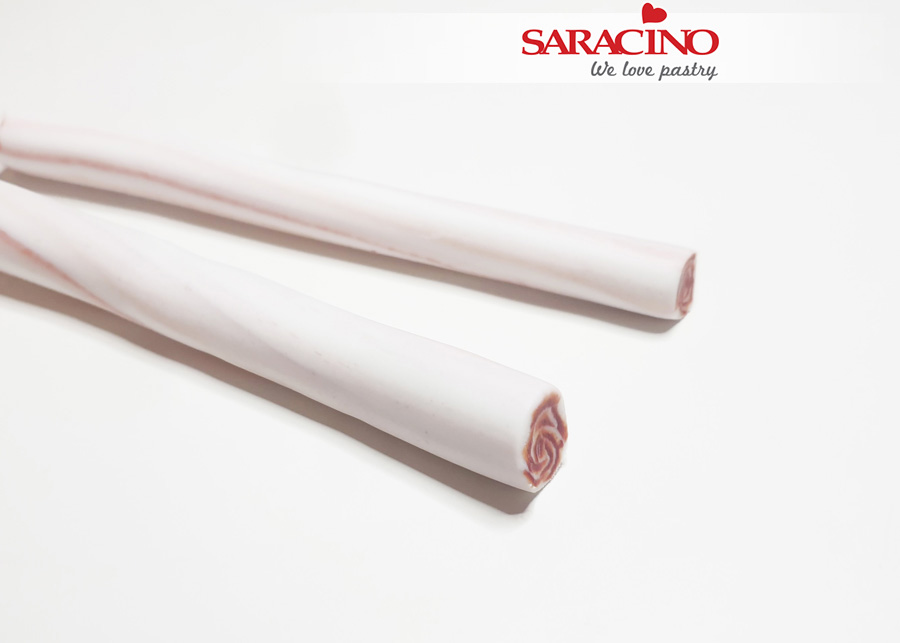
Step 24
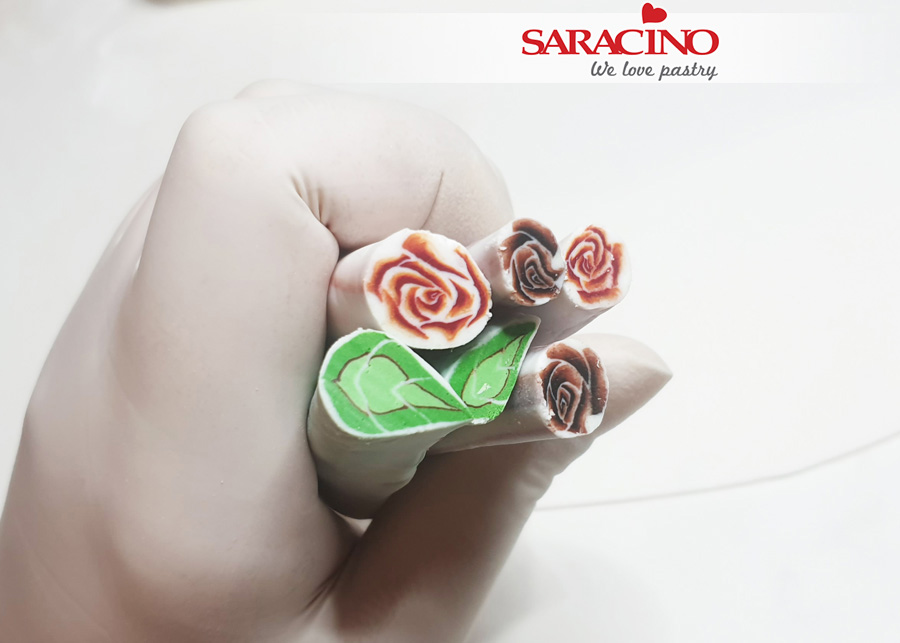
Cut into two pieces. Set one aside for the larger flowers. Continue rolling the other piece to form a narrower sausage shape (smaller flowers)
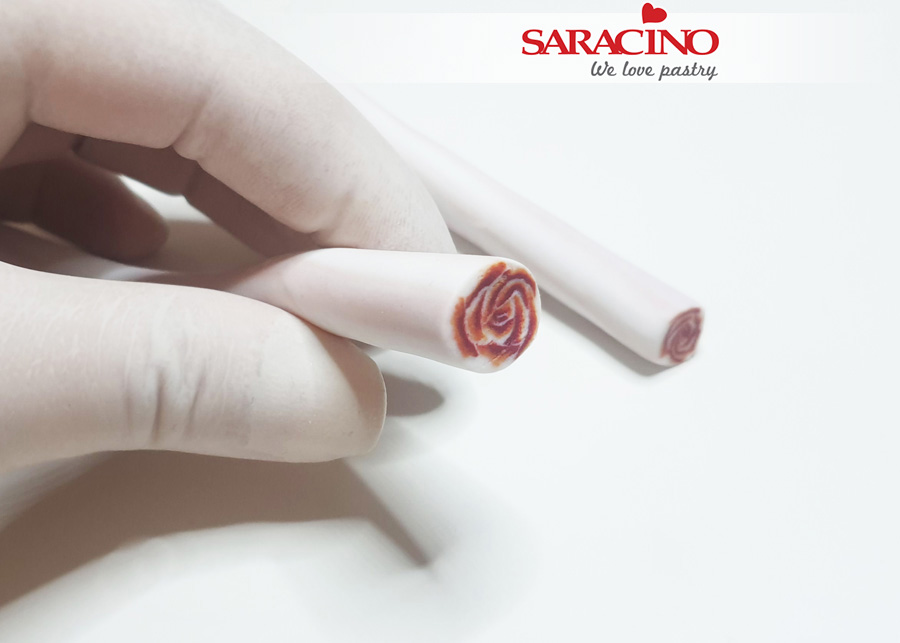
Step 25
When you cut make sure you use a very sharp blade to ensure the pattern stays visible and doesn’t ‘blend’.
Step 26
You can repeat all of the above steps to create different flowers if required.
Step 27
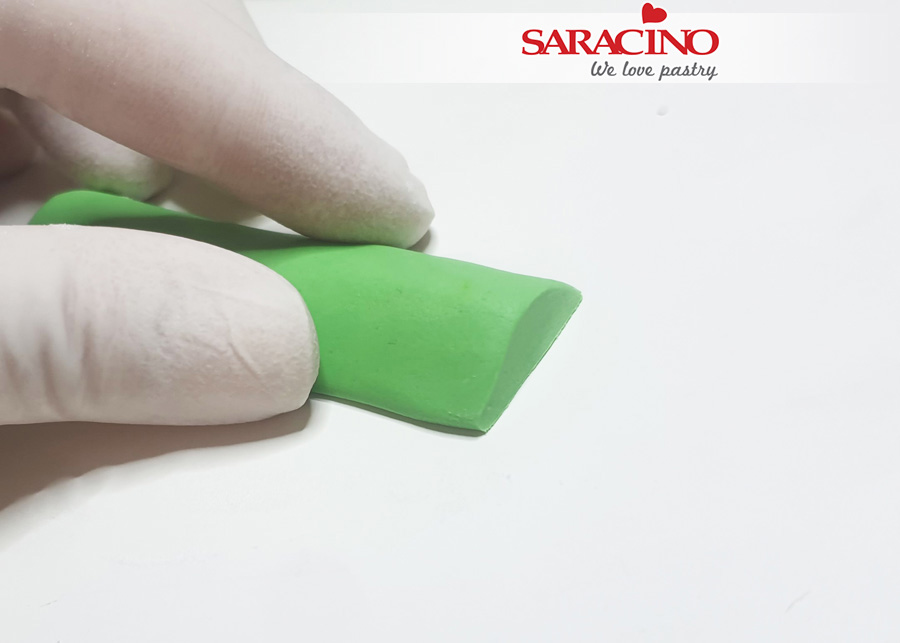
The next steps are for the leaves.
Prepare four pieces of green paste in different shades. You will also need a small amount of white and brown paste. Roll the lightest green colour into a sausage shape then press down to form the semi circle shape shown in the picture.
Step 28
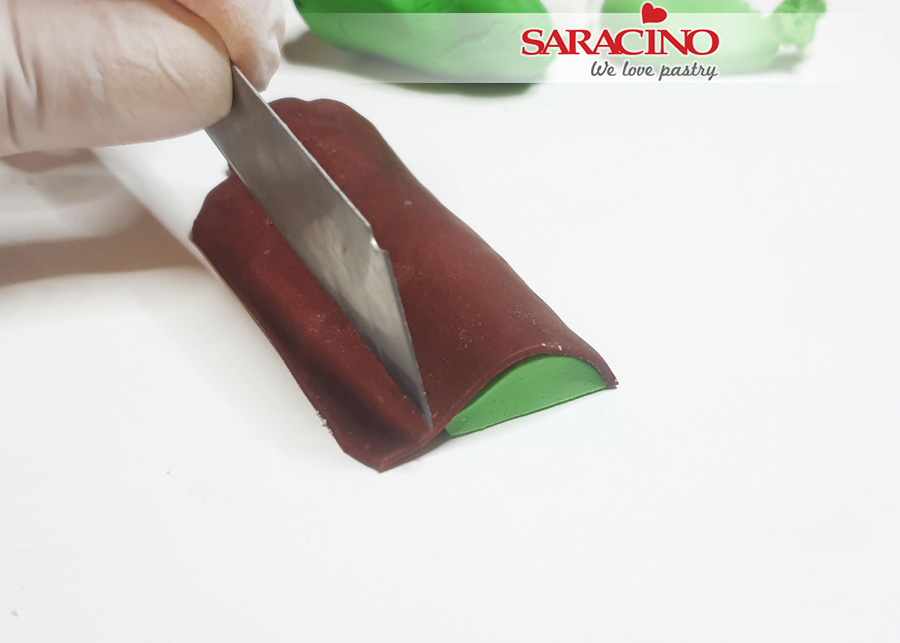
Roll out the brown thinly and cover the light green shape previously formed. Trim off any excess paste.
Step 29
Add next green layer (darker shade)
Step 30
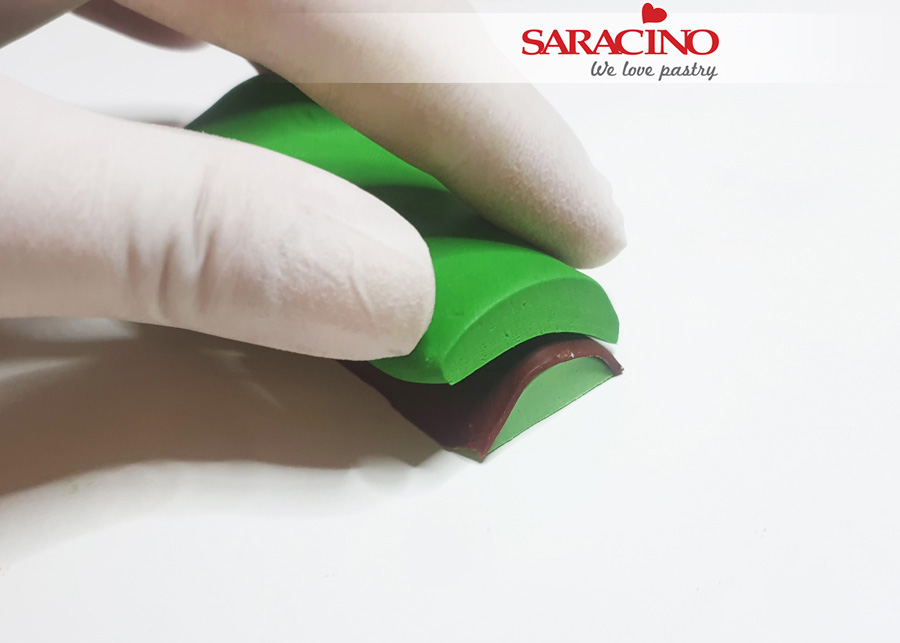
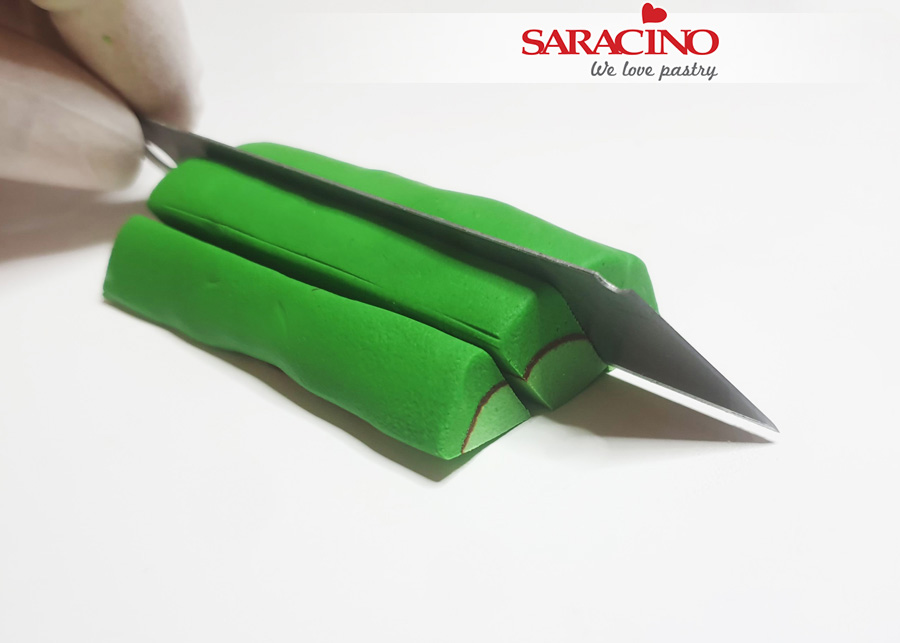
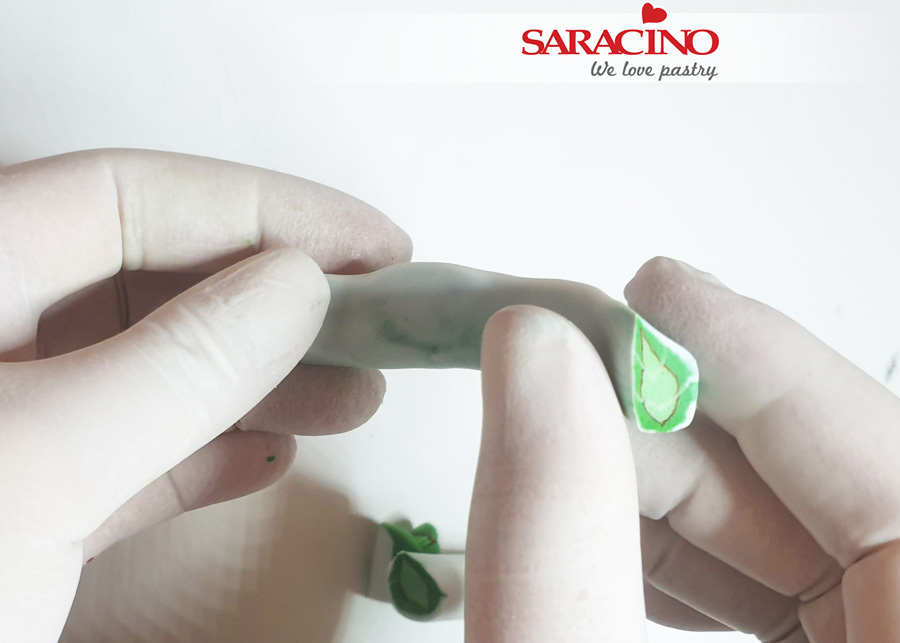
Using a sharp blade make two cuts along the length of the piece. The cuts need to be at an angle.
Step 31
Roll out your white paste thinly. Cut into strips. Place a strip of white in each cut.
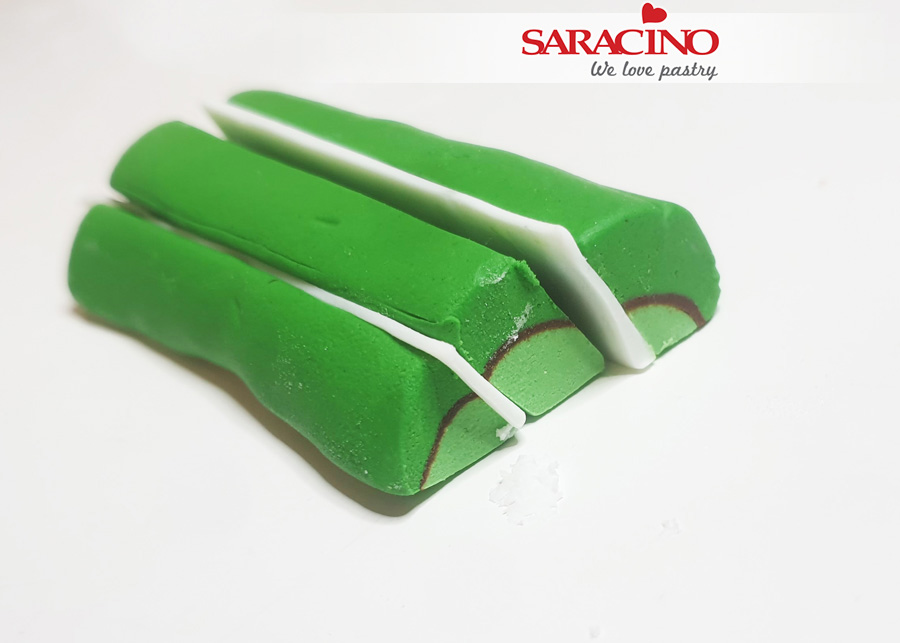
Step 32
Push together to sandwich the white and then cover using thinly rolled white paste.
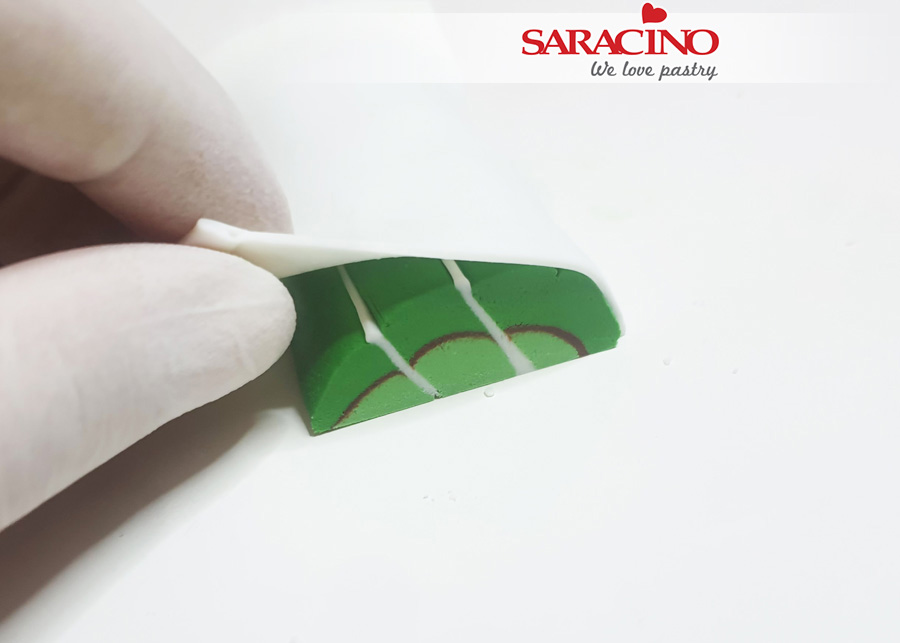
Step 33
Use a sharp blade to cut in half.
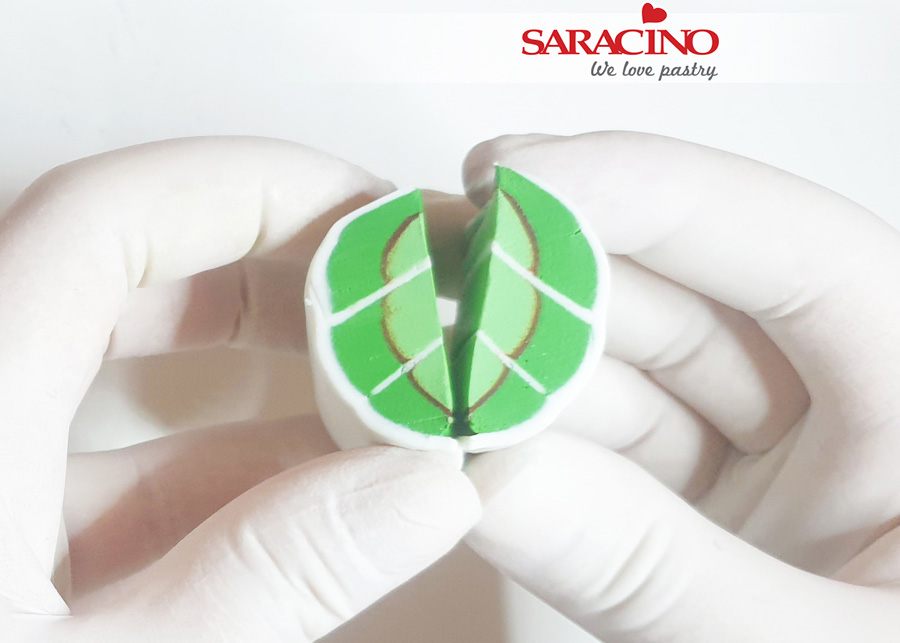
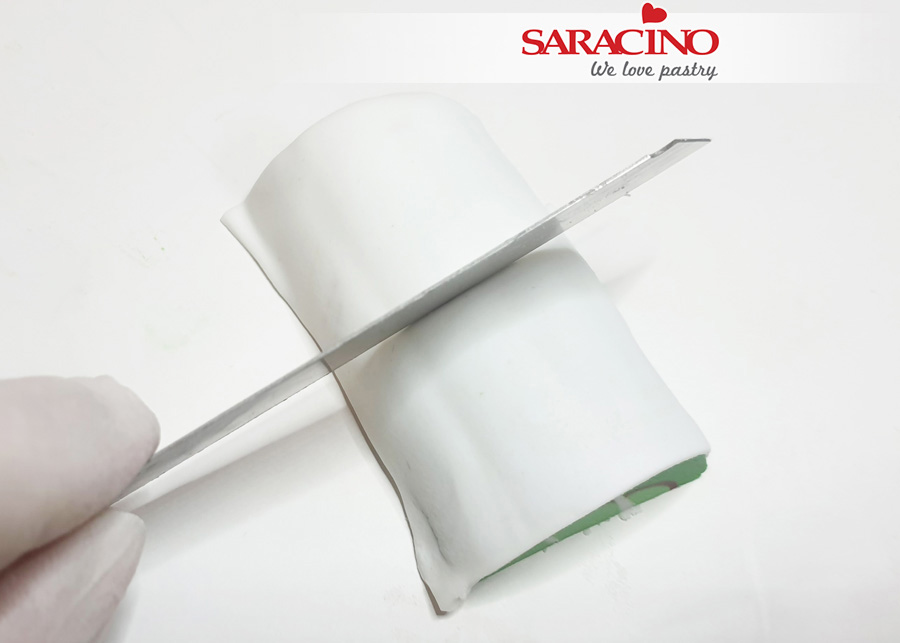
Step 34
Now put them together. And press gently making sure the patterns line up.
Step 35
Gently press the shape together to make sure there are no voids or air gaps.
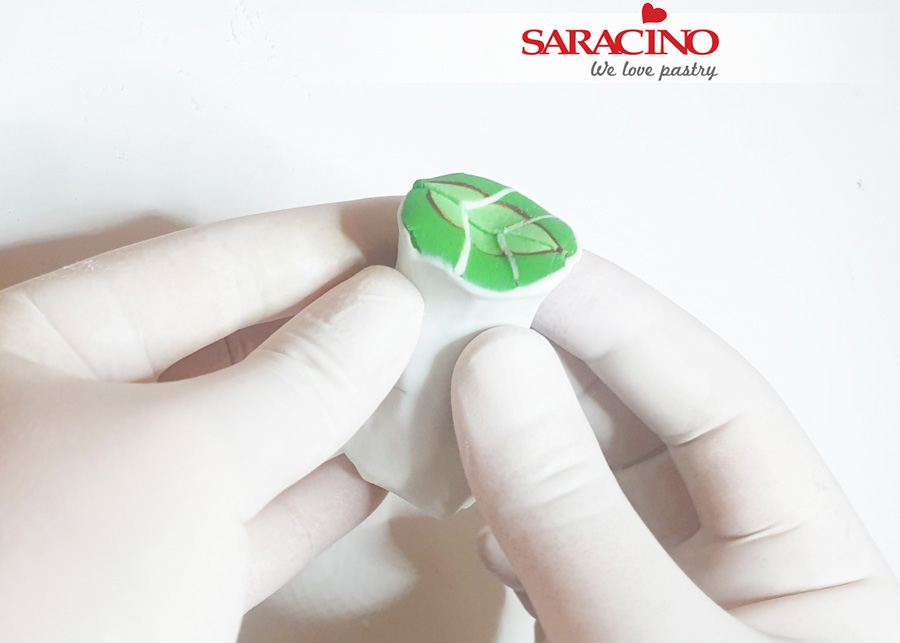
Step 36
Making it longer as you work it.
Step 37
Pinch into a leaf shape.

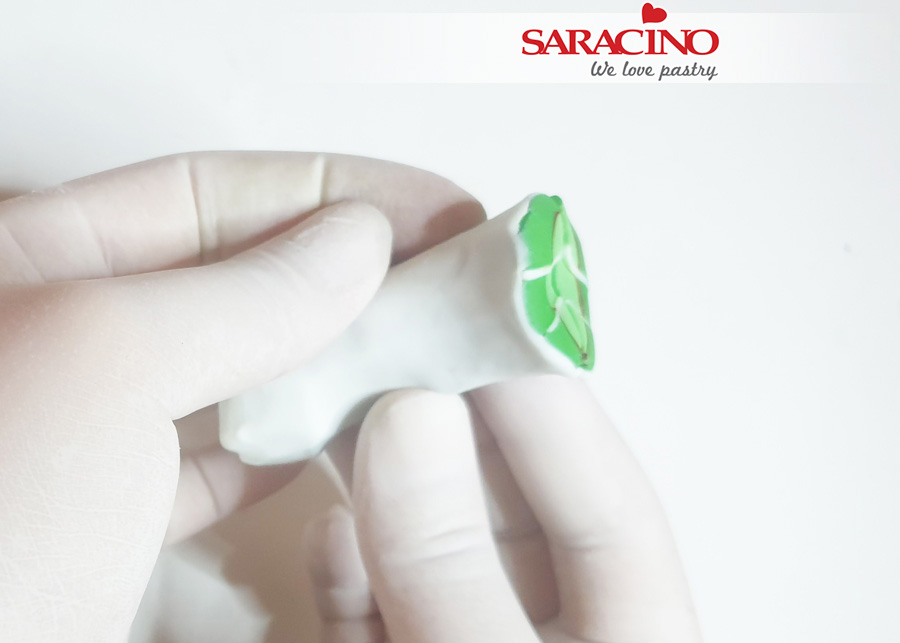
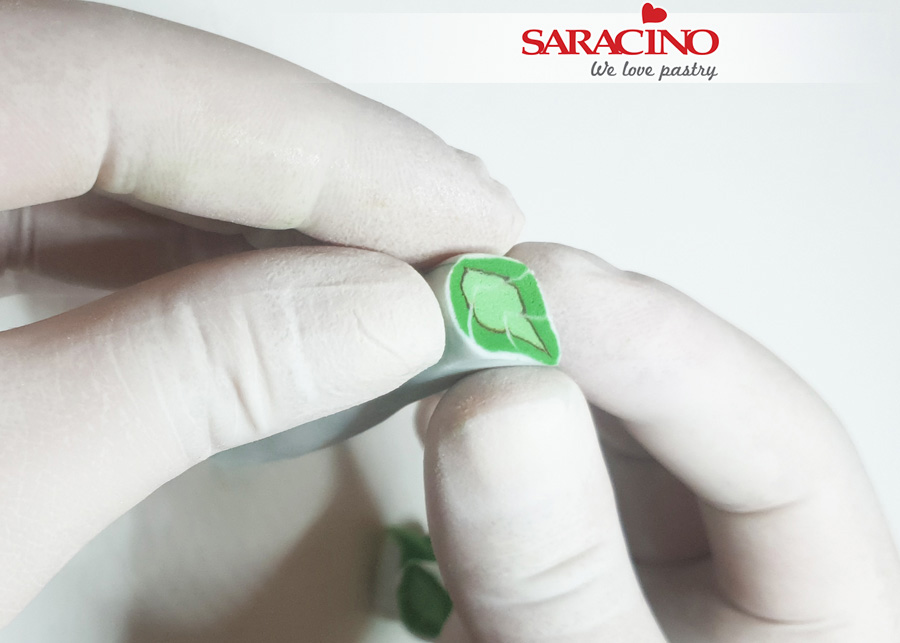
Step 38
Squeeze it along the entire length as shown in the photo
Step 39
Work the two lengths differently to give you two sizes.
Step 40
Once made the rolls can be stored ready to be used whenever you need them. To prevent drying out wrap them well in cling film and store in an airtight container.
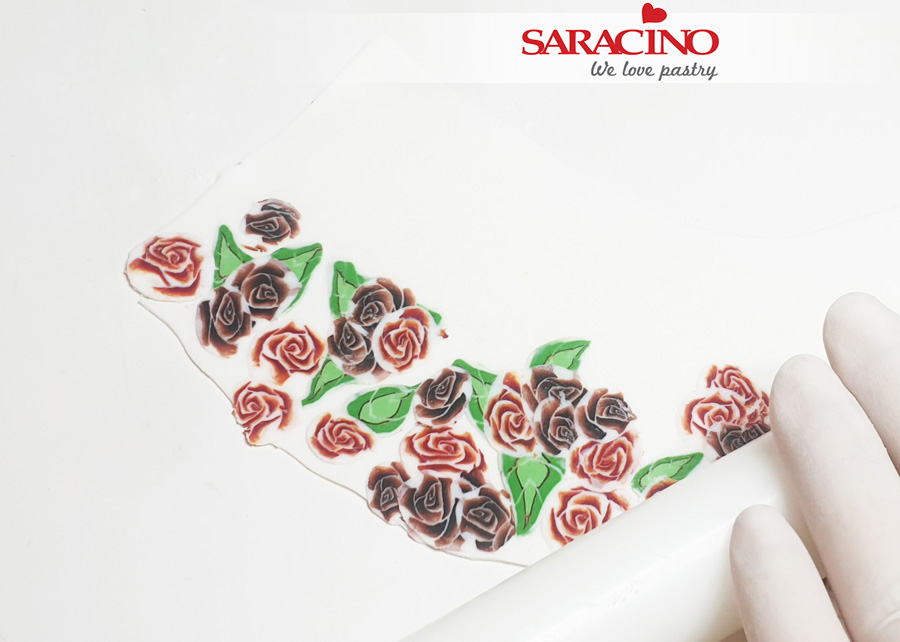
Step 41
If you intend to use patterns to decorate skirts, for example, roll out a piece of white paste
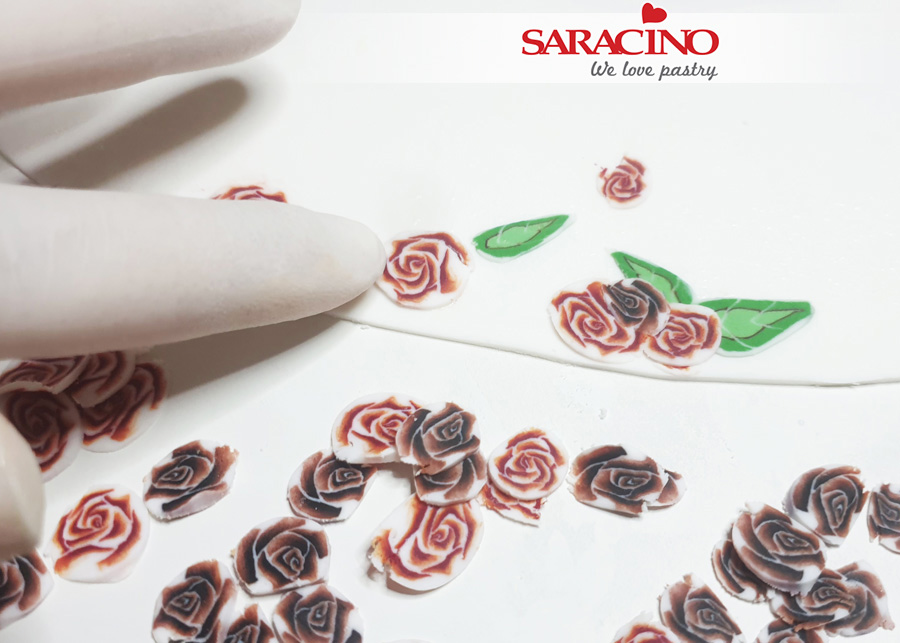
Step 42
You can then fix the pattern to the white paste to the design you require. Use a sharp blade to cut the flowers very thinly.
Step 43
When you have arranged your pattern roll gently with a rolling pin to smooth out. Do not apply too much pressure or it may ruin the blended look of the flowers and leaves.
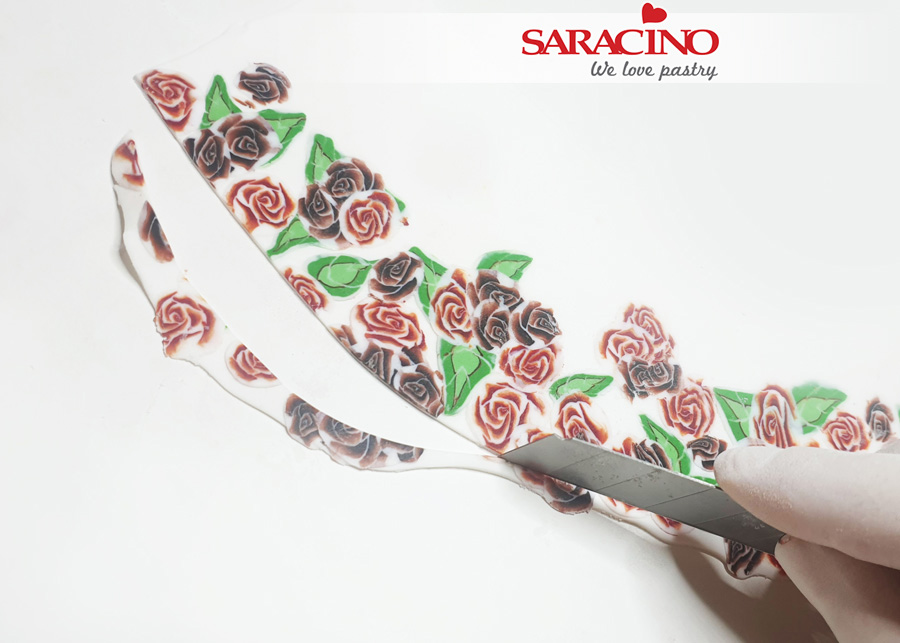
Step 44
Cut and trim to the size you require.
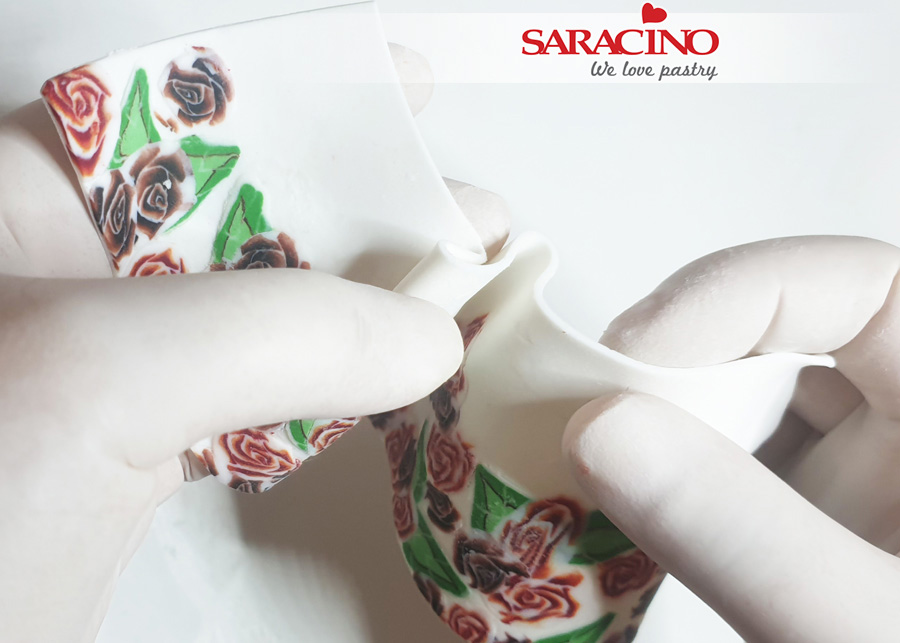
Step 45
Shape the frills along the entire length

Step 46
Your frilly skirt is now ready to use.
