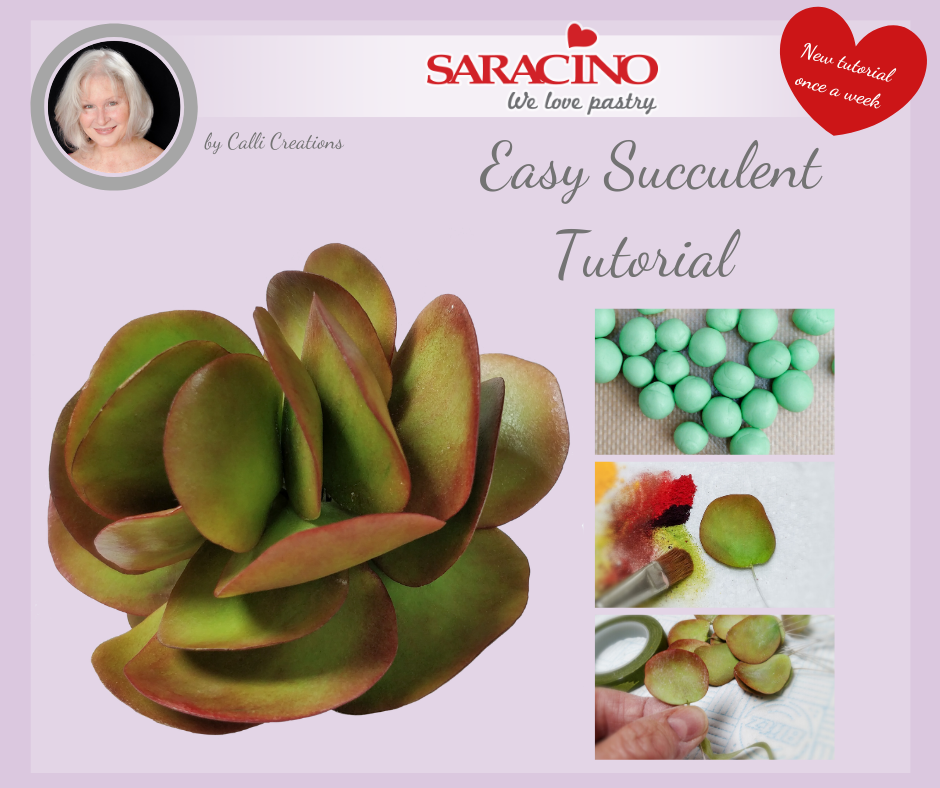

FROM CALLI:
Succulents are quick and fun to do and this one does not require any cutters or veiners, so limited use of tools, with your hands doing all the work.
I do hope you enjoy making this pretty little succulent as it sits well with most cake designs. Have fun!!!
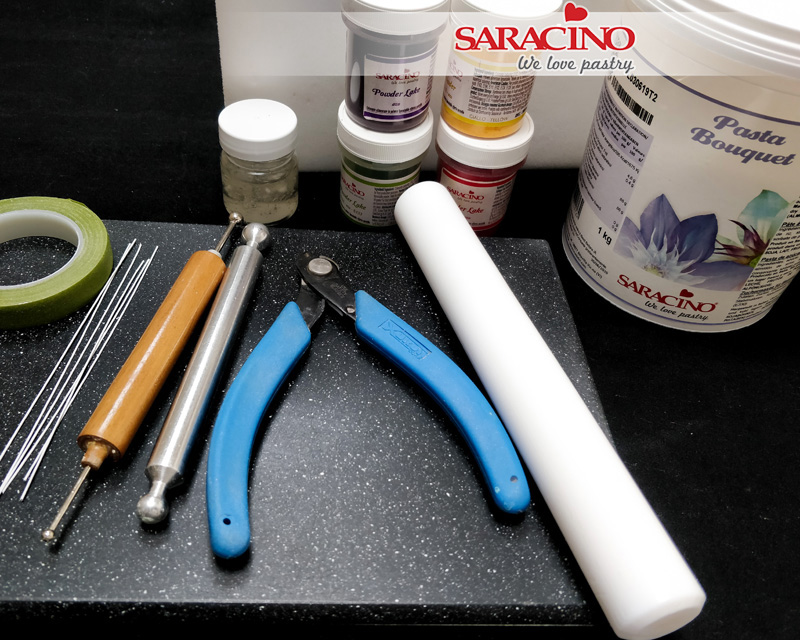
You will need:
- Saracino Pasta Bouquet
- Saracino Colour dusts (Green, Yellow, Red, Purple, White)
- Saracino Green gel colour
- Foam Cel Pad
- Cel Board
- Non-stick rolling pin (approx 9” is sufficient)
- 24 gauge, white or green wires
- Nile green tape (¼ inch)
- Edible glue (can make your own mixing a little tylose powder with water)
- Corn flour (in case you need to dust board and hands)
- Wire Cutters
- Balling Tool
- Kitchen Roll sheets
- Dusting brushes (Appox size 2 or 3. I prefer the soft flat ones)
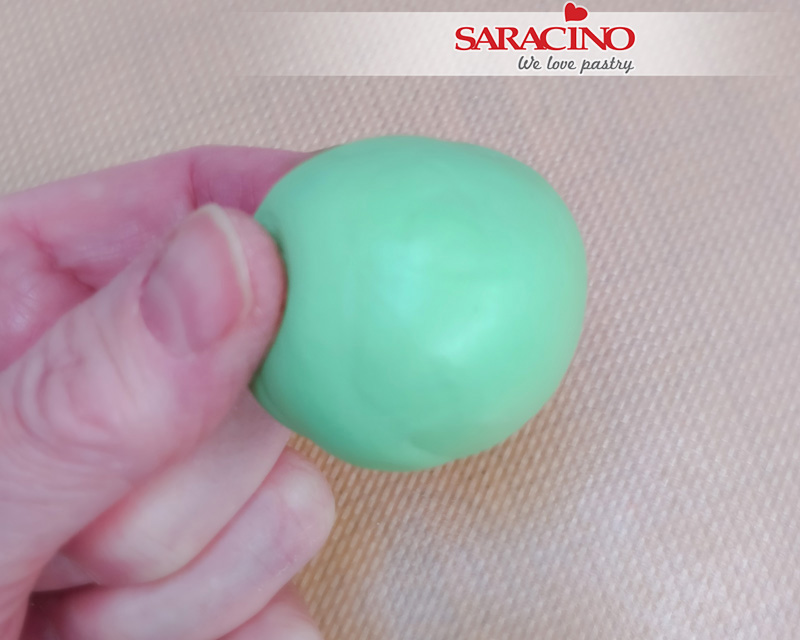
Step 1
On your cel board, knead some flower paste with Saracino Green gel colour
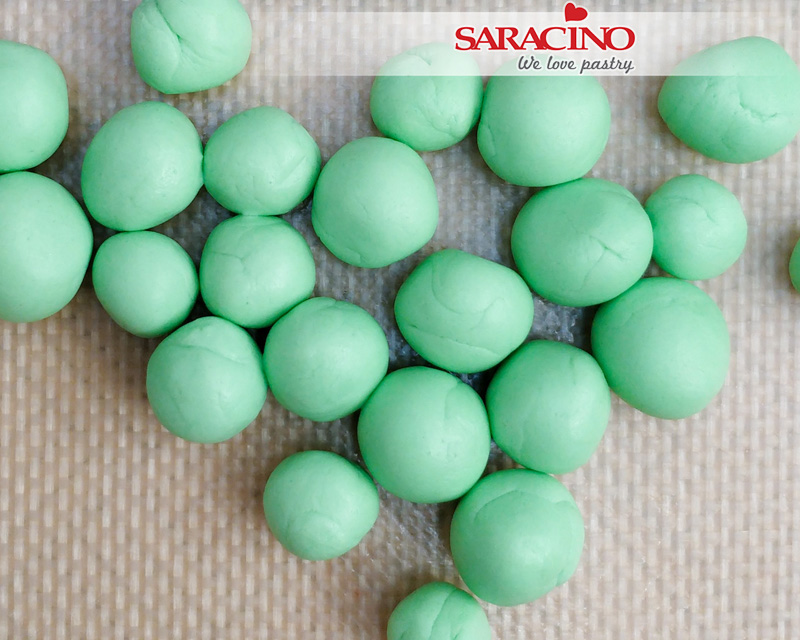
Step 2
Then divide into lots of little small balls, roughly the size of a pea, make some bigger and some smaller as the succulent has various size leaves.
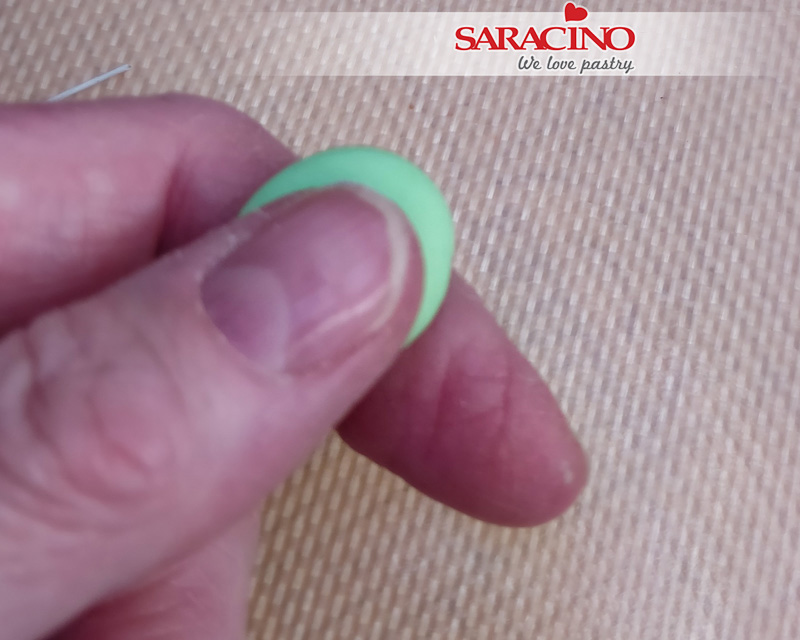
Step 3
Gently squeeze and flatten each ball with your fingers
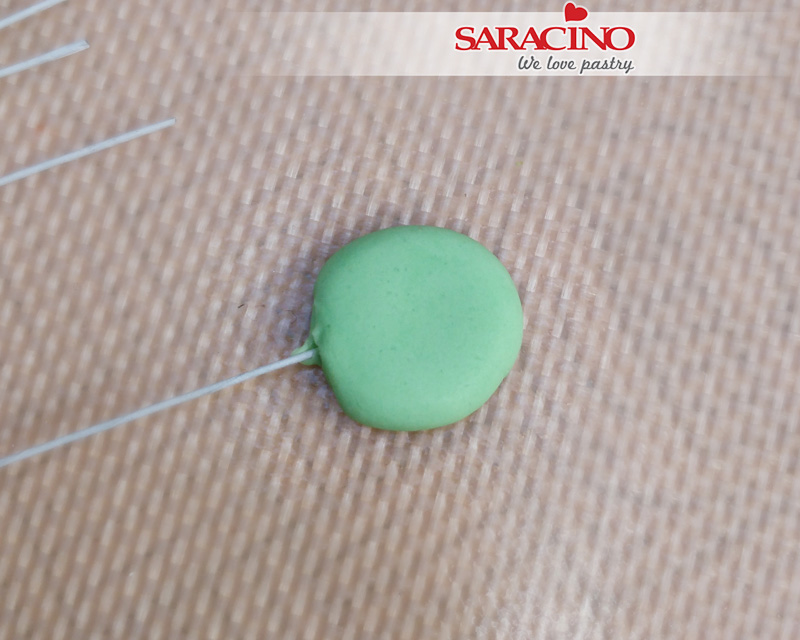
Step 4
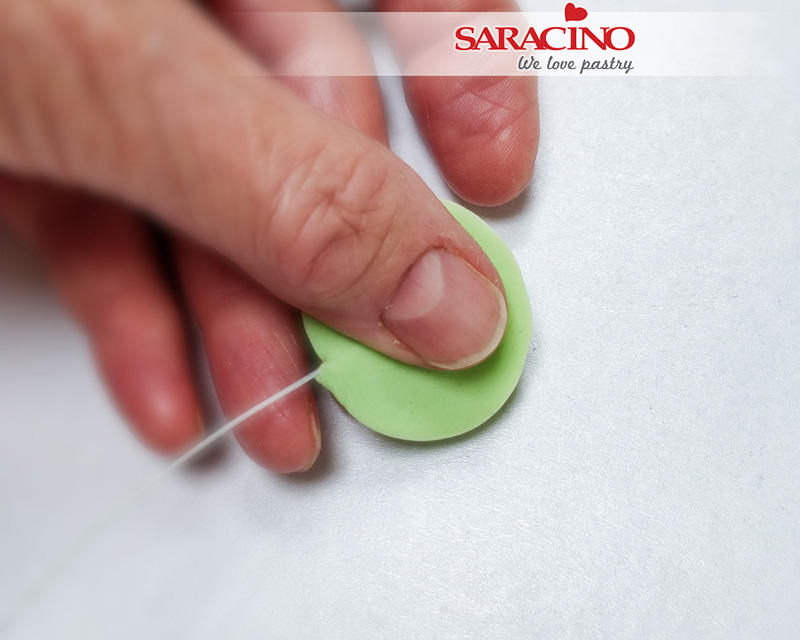
Insert a 24 gauge wire into each petal.
Tip : Use a little Saracino edible glue on the end of each wire to secure in place.
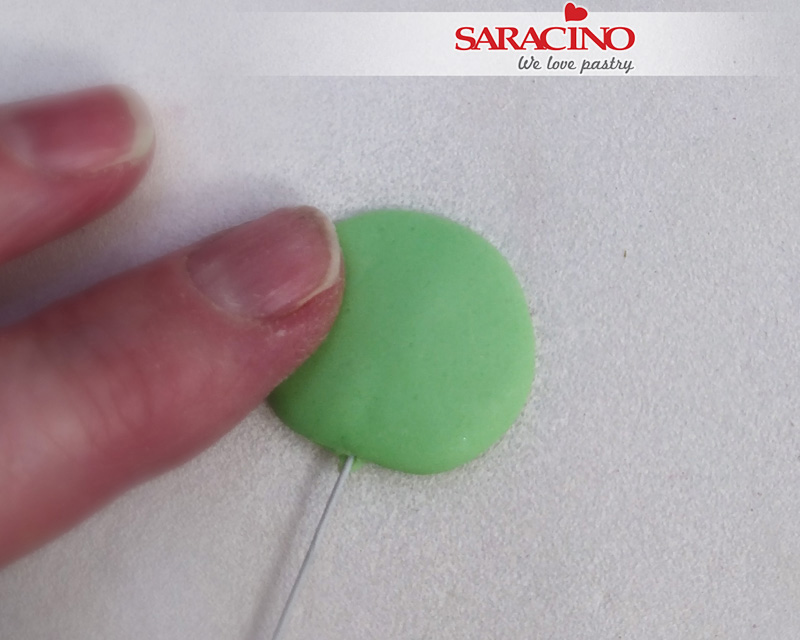
Step 5
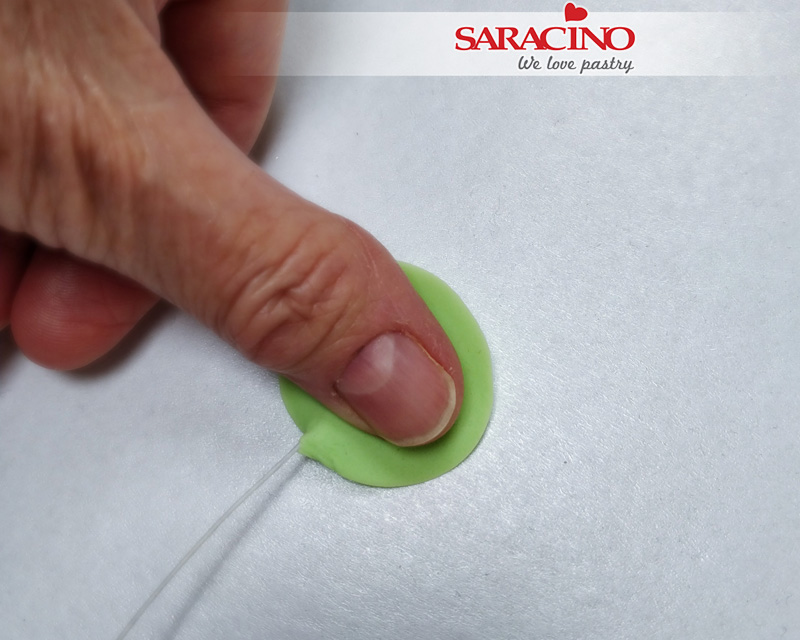
Keeping the centre thicker use your fingers to flatten the edges of each petal.
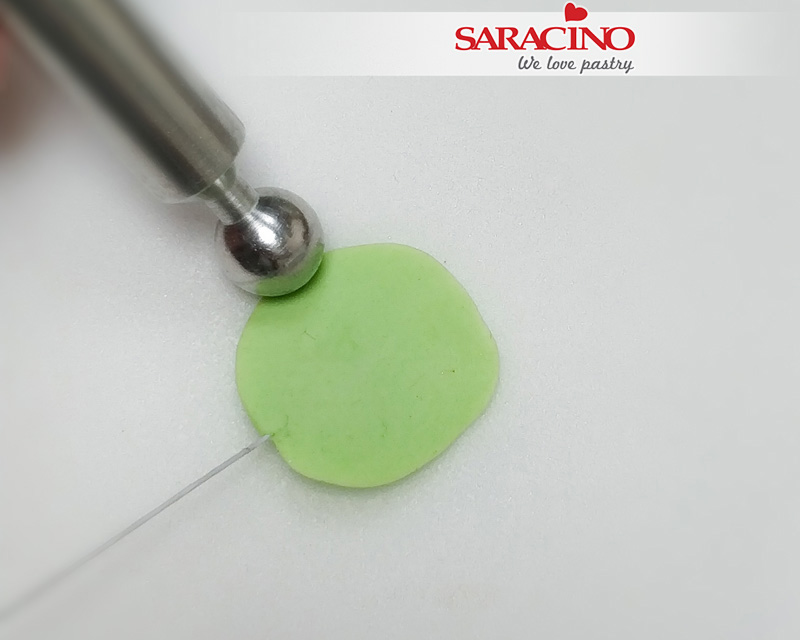
Step 6
Using a balling tool. Further thin the very edge, on your cel pad
Step 7
Shape each leaf between your thumb and forefinger to form a gentle curve to give a natural look
Step 8
Or use your cel pad base to simply push and give each petal definition
Step 9
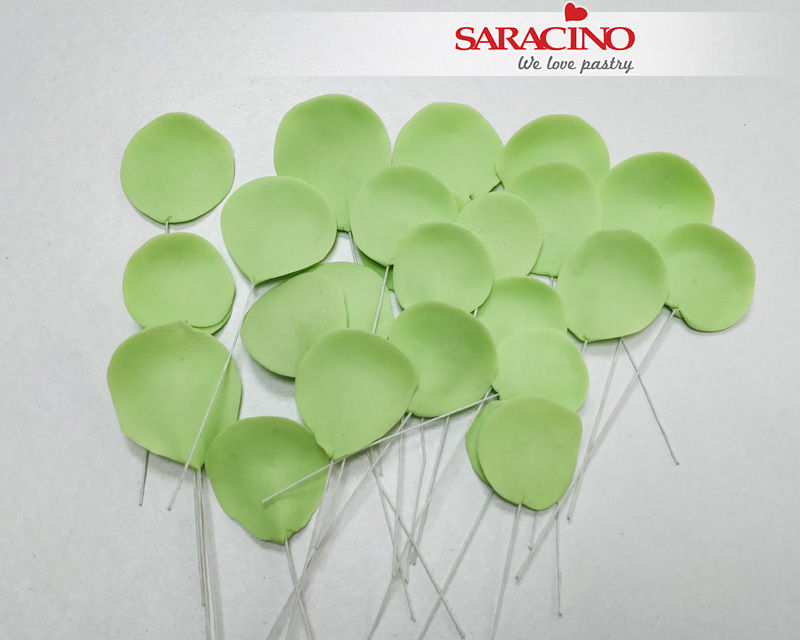
Repeat this around 20 times (up to you how many leaves you want in your succulent). Leave to dry for a few hours or ideally overnight.
Step 10
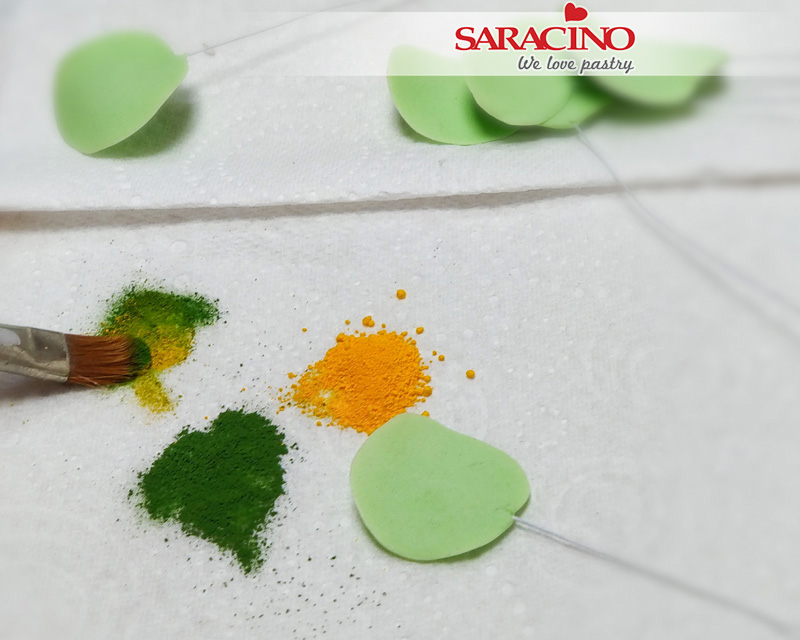
Use a piece of kitchen towel and sprinkle some green and yellow colour dust and loosely mix it
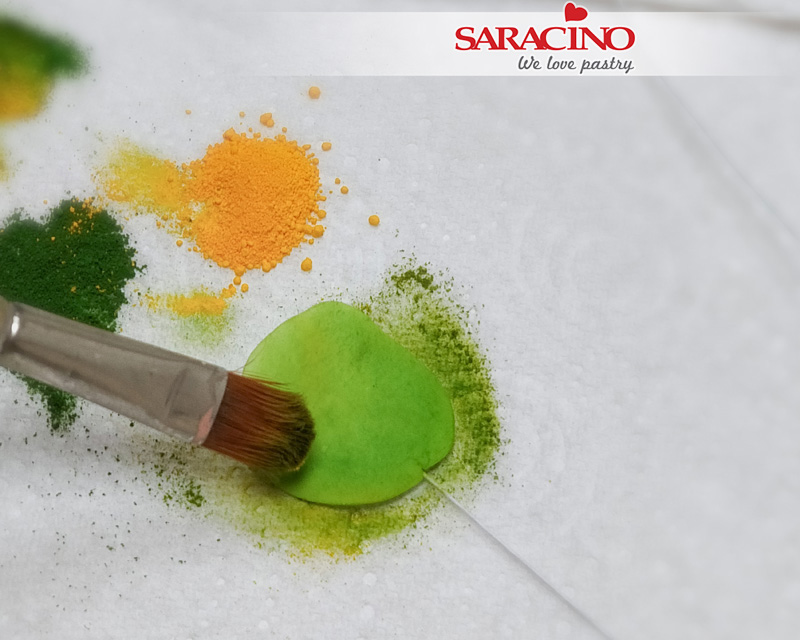
Step 11
Gently dust the green mix over front and back of each petal
Step 12
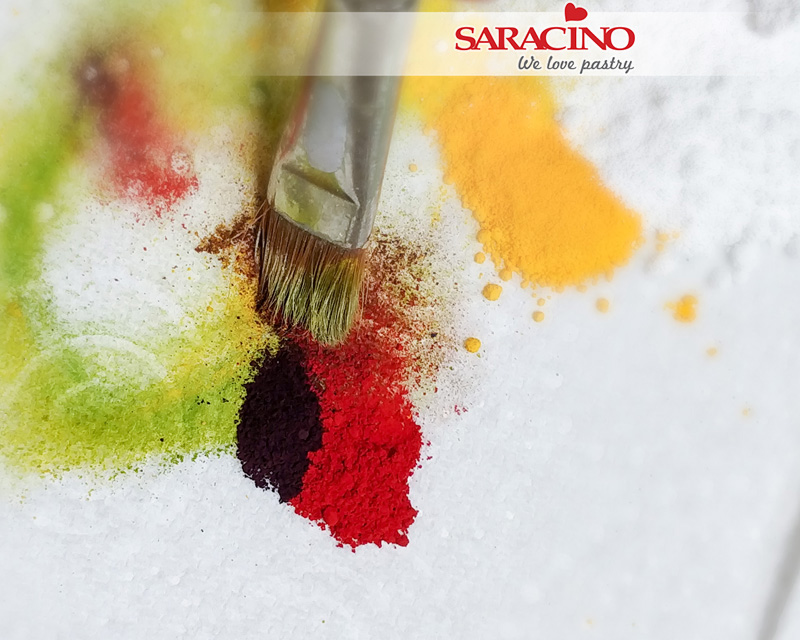
Sprinkle red and a little purple onto your kitchen roll and loosely mix
Step 13
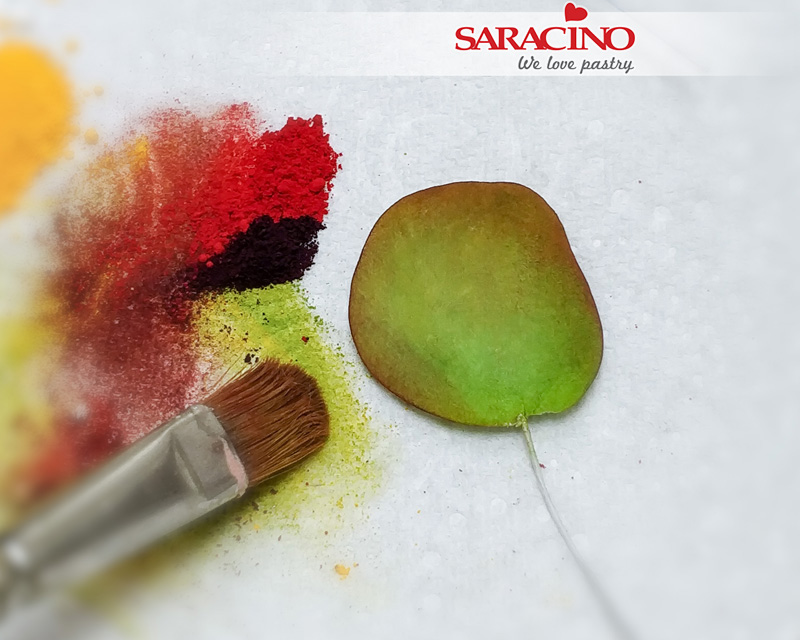
Dust around the edges of leaves, then drag some of the colour inwards in places to blend it.
Step 14
Using white dust, over dust each petal in the centre mainly, front and back
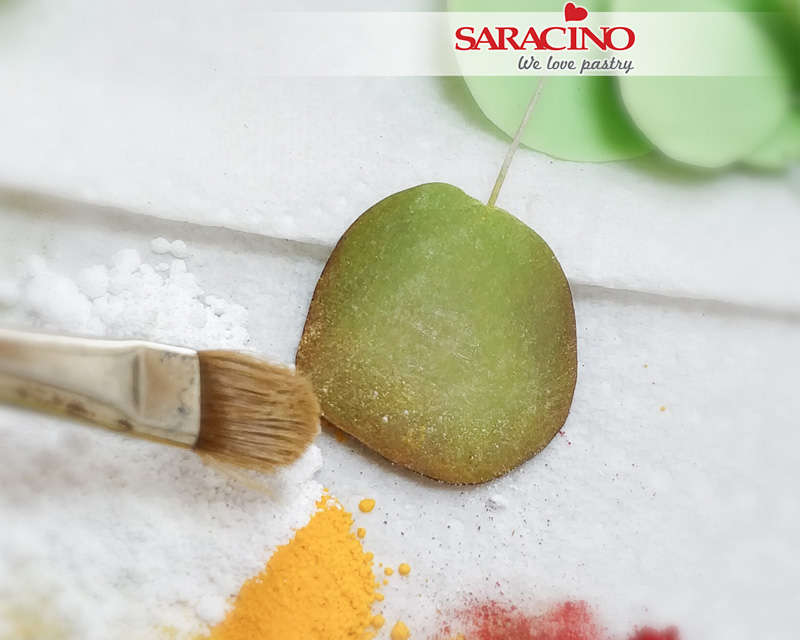
Step 15
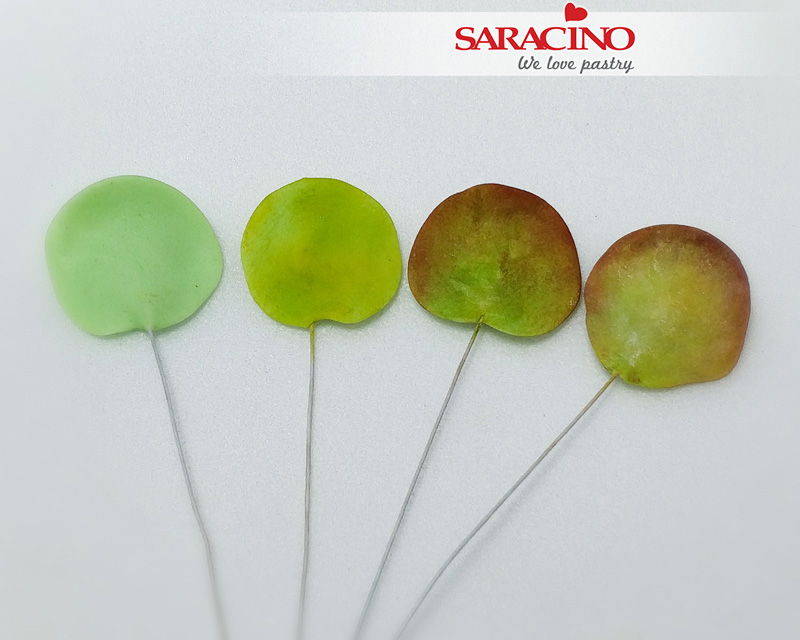
Here is what it looks like from start of colour to finish

Step 16
Here are all the leaves fully dusted and various sizes. Don’t worry about the white on the leaves, as later you will see how that all blends in
Step 17
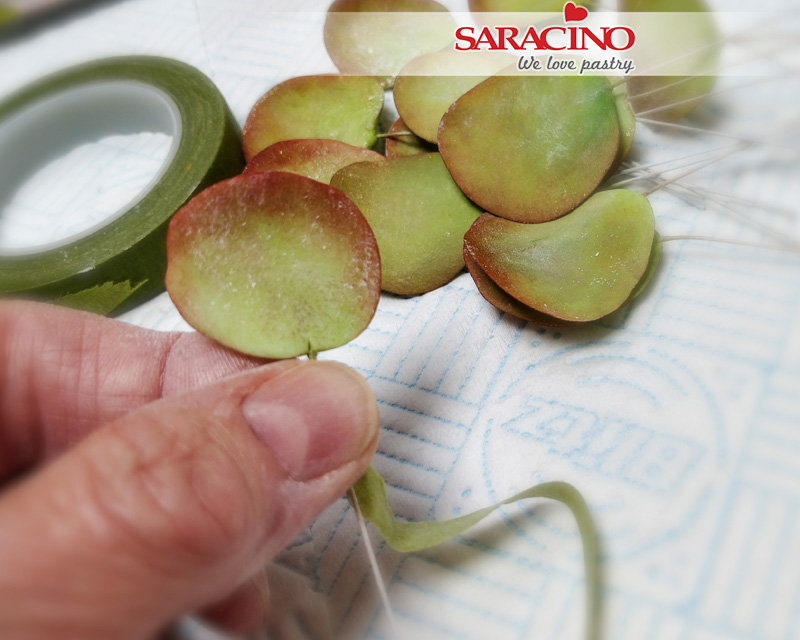
Take one of the smaller leaves and start taping the wire from base of leaf downwards for a short length
Step 18
Take two different sized petals and add them and fit them close together
Step 19
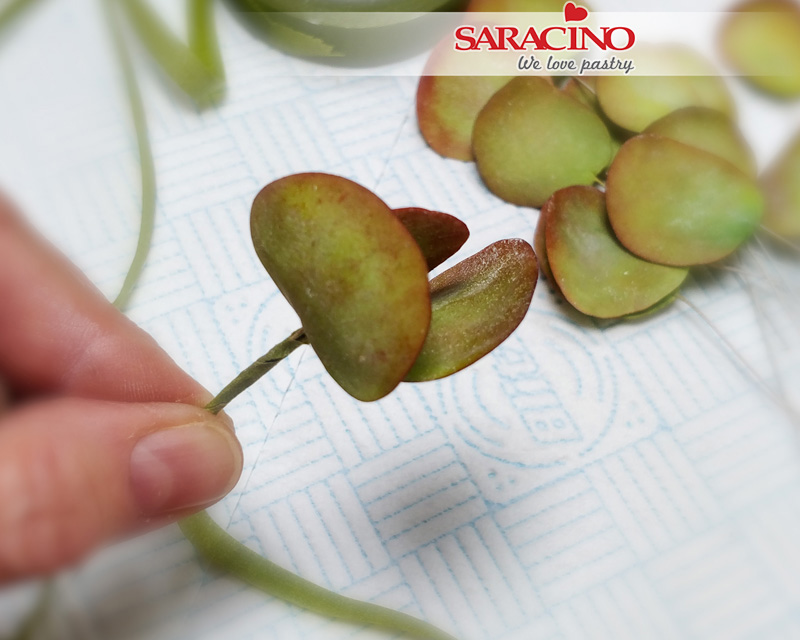
Add more petals to build up your succulent.
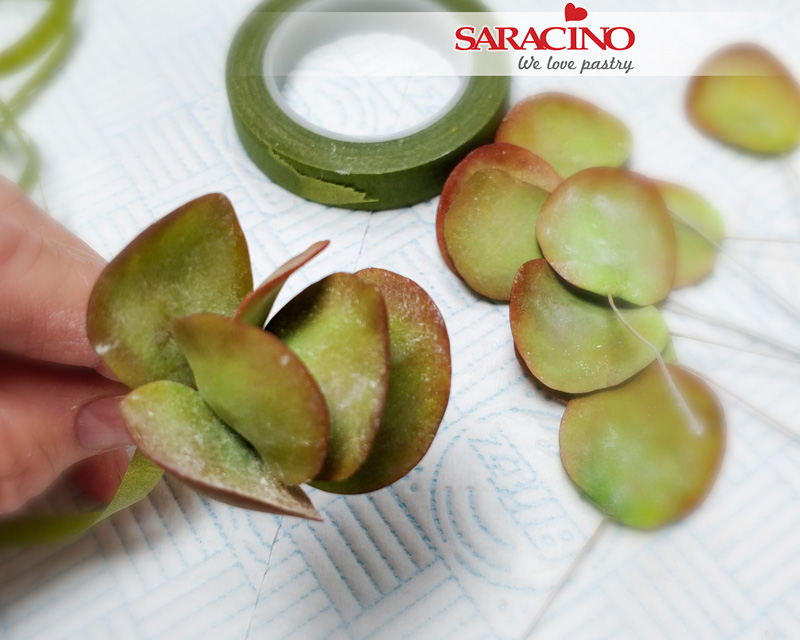
Step 20
Add more petals, fitting them close as close you can
Tip : Nature is not exact so random creates a more natural look
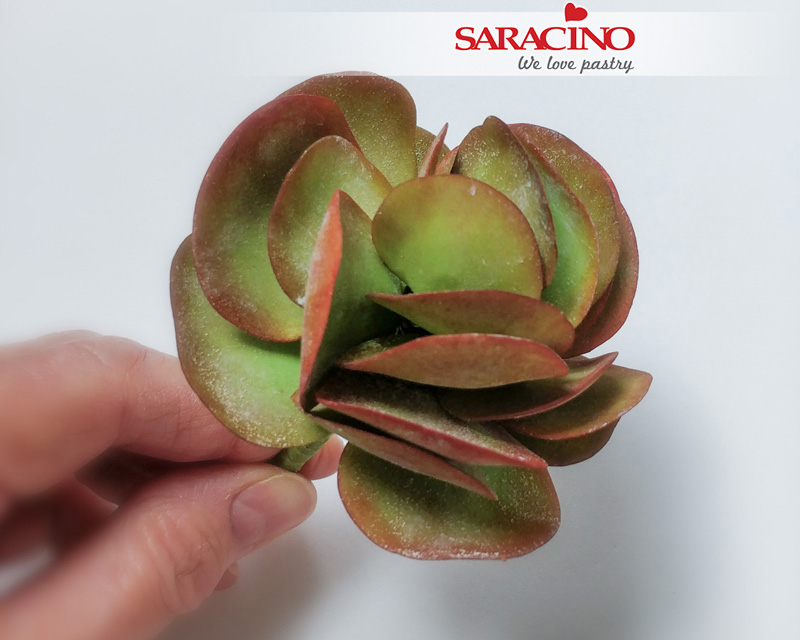
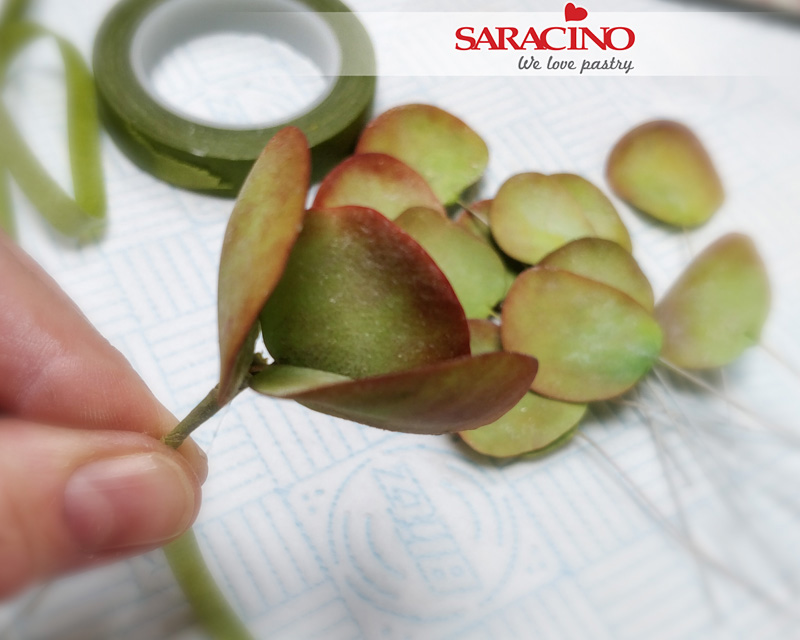
Step 21
Keep going till all the leaves are assembled in a roughly circular way
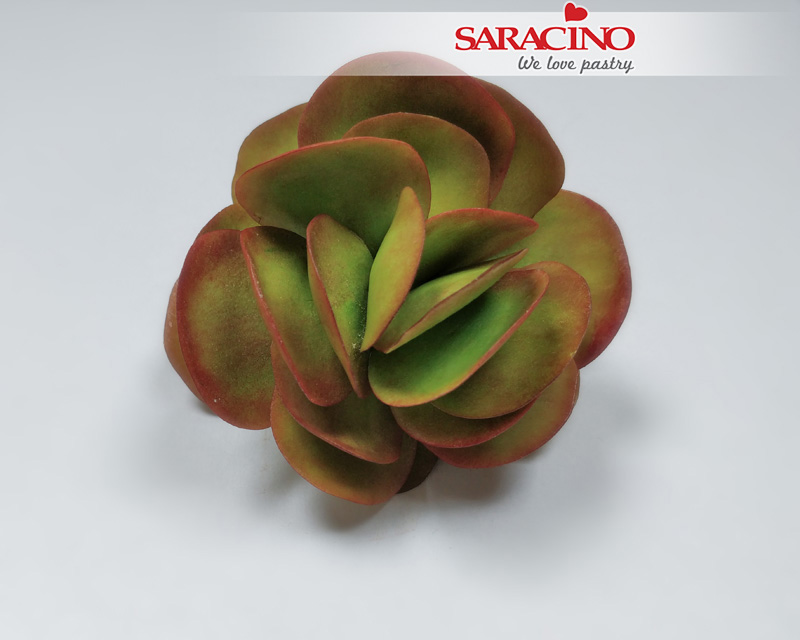
Step 22
And here is your succulent completed
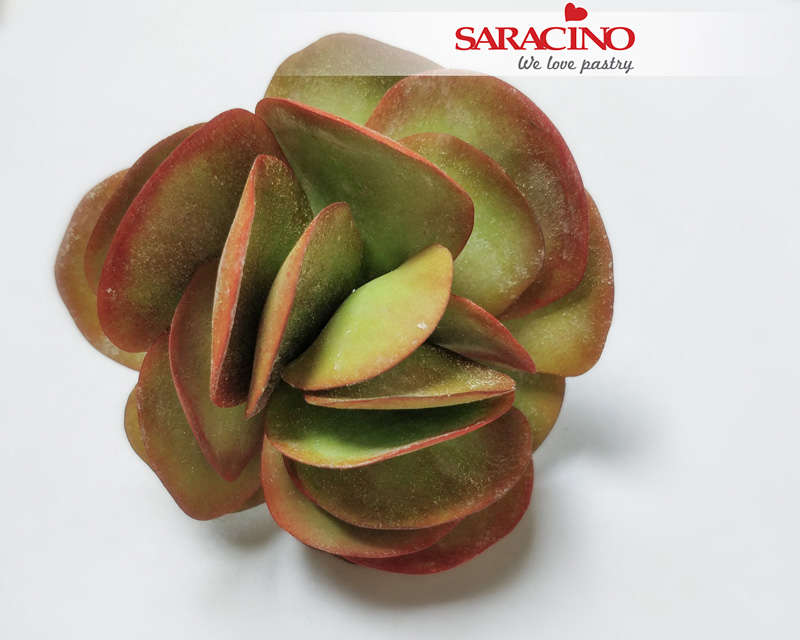
Step 23
Then you need to steam the succulent. I did this over the spout of a boiling kettle, being very careful not to get burnt from the steam, so don’t get too close as it could also melt your sugarpaste. This not only blends all the colours together, but gives it the succulent a waxy sheen too.
Tip : You can use a cake steamer if you have one.
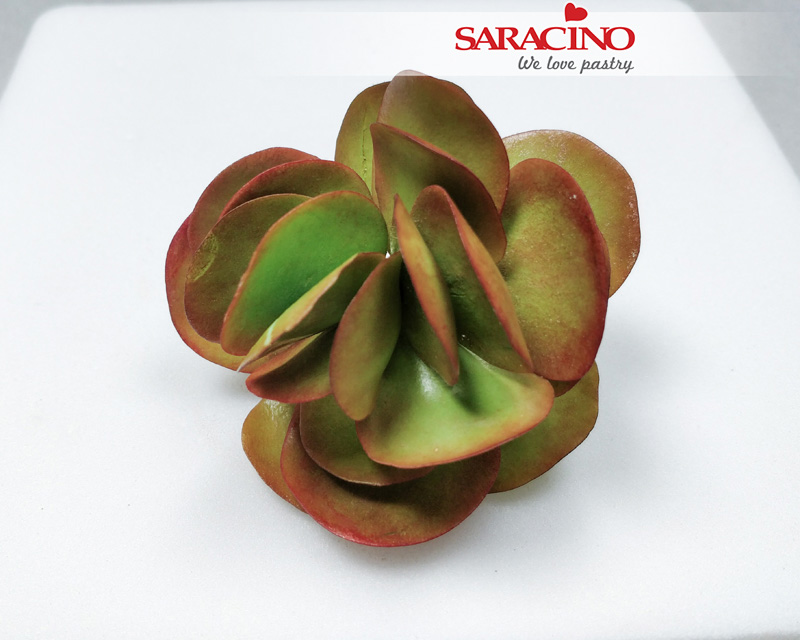
Step 24
To give you a better view, I’ve taken a picture from a different angle.

Step 25
I’ve added an African themed cake ( Ref: Sugar Art 4 Autism for more details) I created a few months ago, to show how the succulent sits with the theme. As an aside, the whole floral display was made using Saracino Pasta Bouquet and the colours as well as hand painted using Saracino cocoa butter and Saracino colour dusts.
