
You will need:
Pale pink modelling paste (Saracino white coloured using Saracino pink gel colour)
Pale green modelling paste (Saracino white mixed with turquoise modelling paste)
Pale brown modelling paste (Saracino white mixed with small amount of brown modelling paste)
Pale yellow modelling paste (Saracino white modelling paste mixed with small amount of yellow modelling paste)
100s and 1000s sprinkles
Edible black pen
Edible glue
Clear alcohol
Smoother
Sharp knife
Cocktail stick
Firm round ended silicon tool shaper
Paintbrush
Scribing tool
Rolling pin
Ruler
Dresden tool
Soft brush
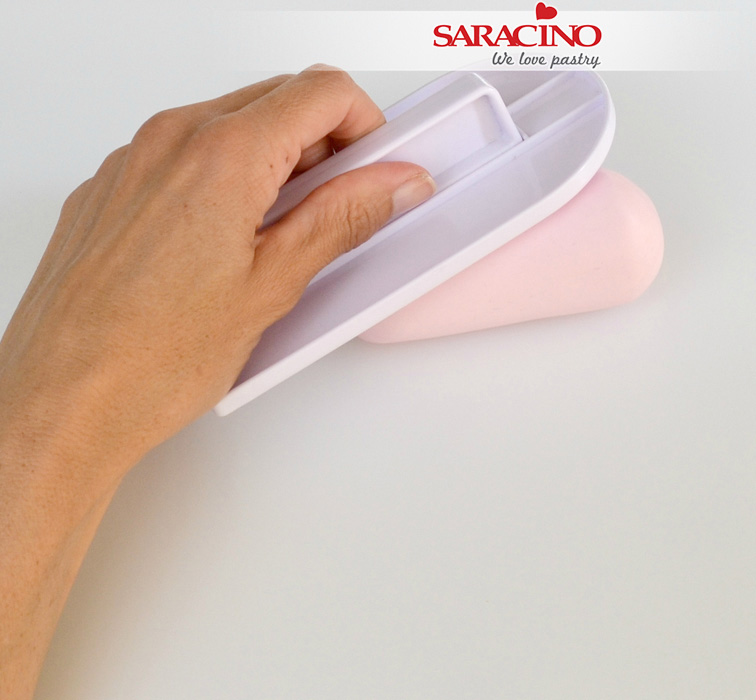
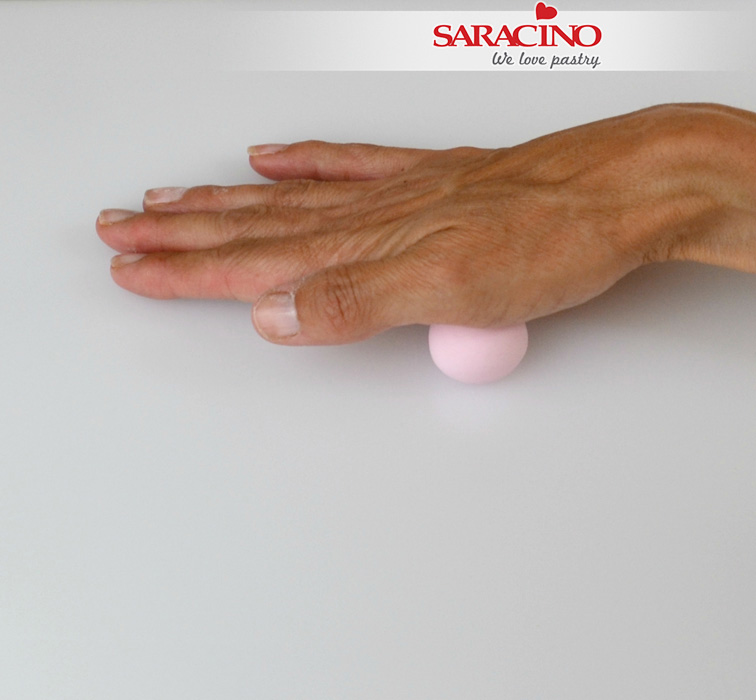
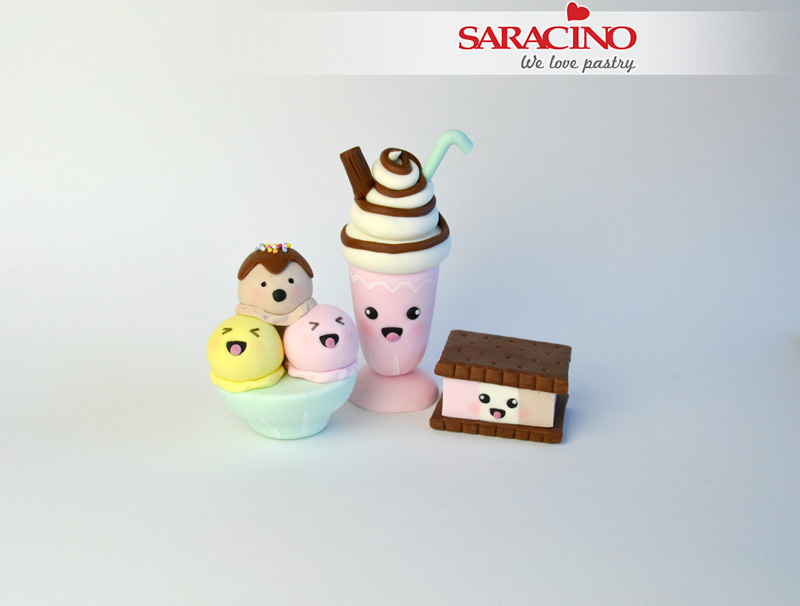
Step 1
Roll pale pink paste into a smooth ball in the palm of your hands. Use a smoother held at an angle to make a cone shape. Set aside for a few minutes to dry a bit.
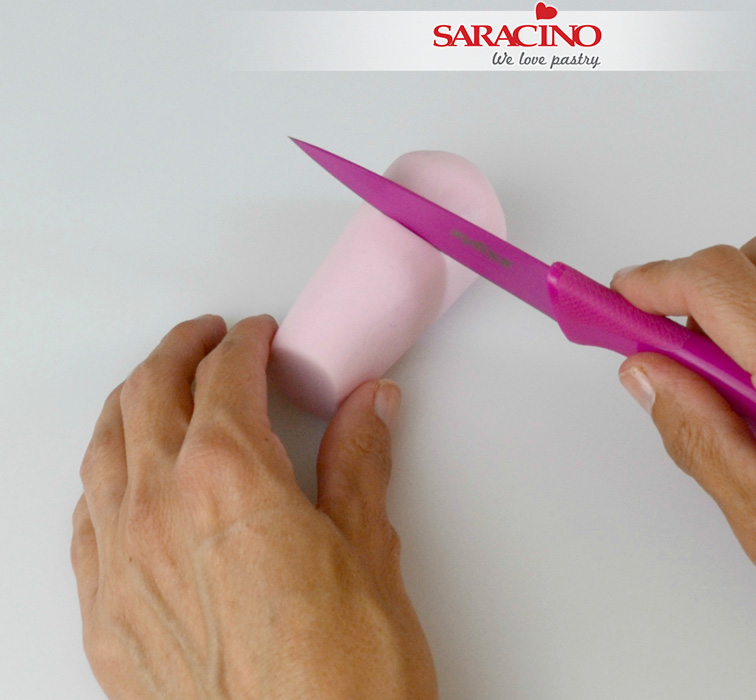
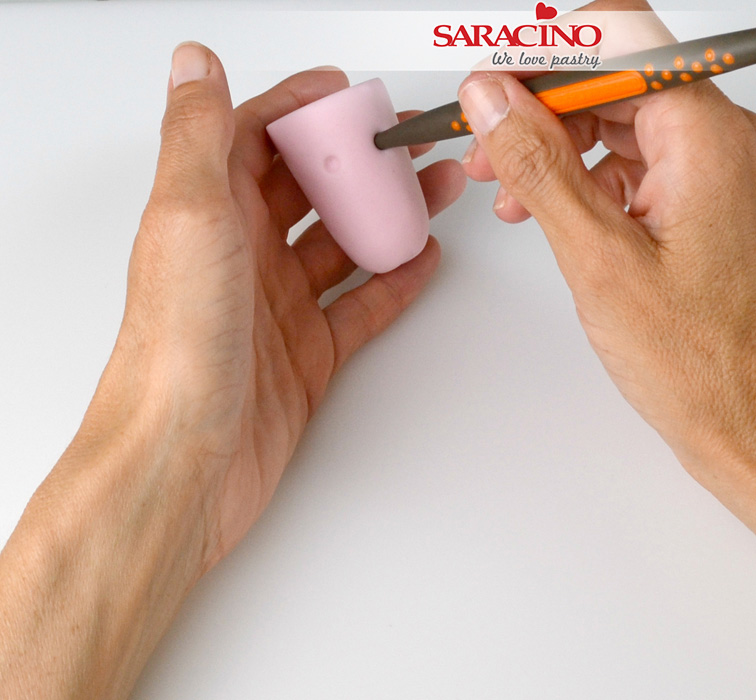
Step 2
Using a sharp knife, cut a section off each end so that it measures approx. 5cm in length.
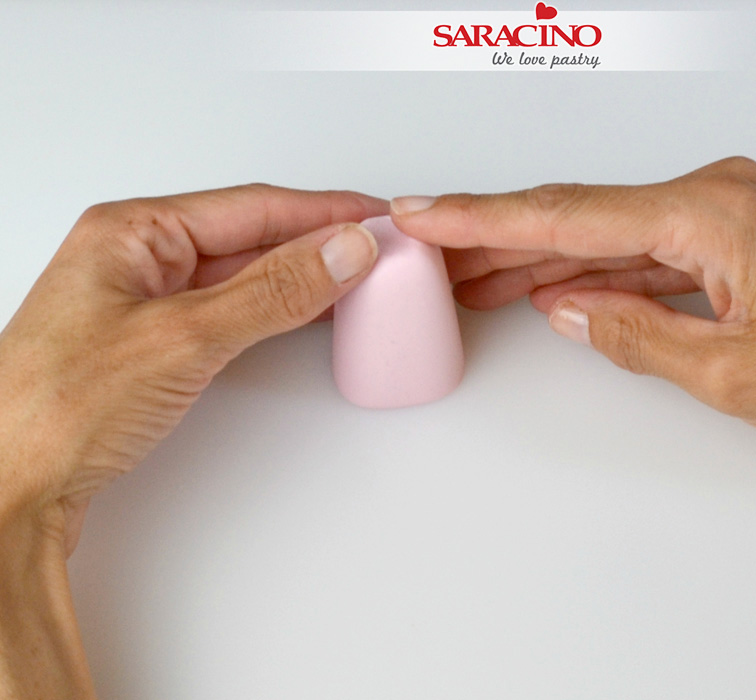
Step 3
Smooth and curve the narrow end using your fingers.
Step 4
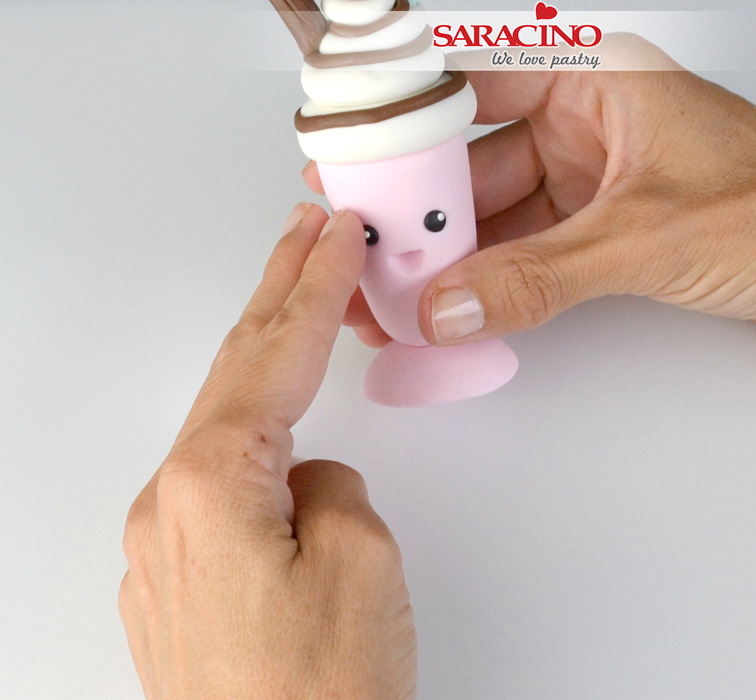
Roll a cherry tomato sized piece of pale pink paste into a ball. Place on the board and use the palm of your hand to flatten the base into the board, using your fingers to push the edges down to create a dome shape. Leave to firm up.
Step 5
Add holes for eyes using a rounded end firm silicon shaper tool (or the end of your paintbrush)
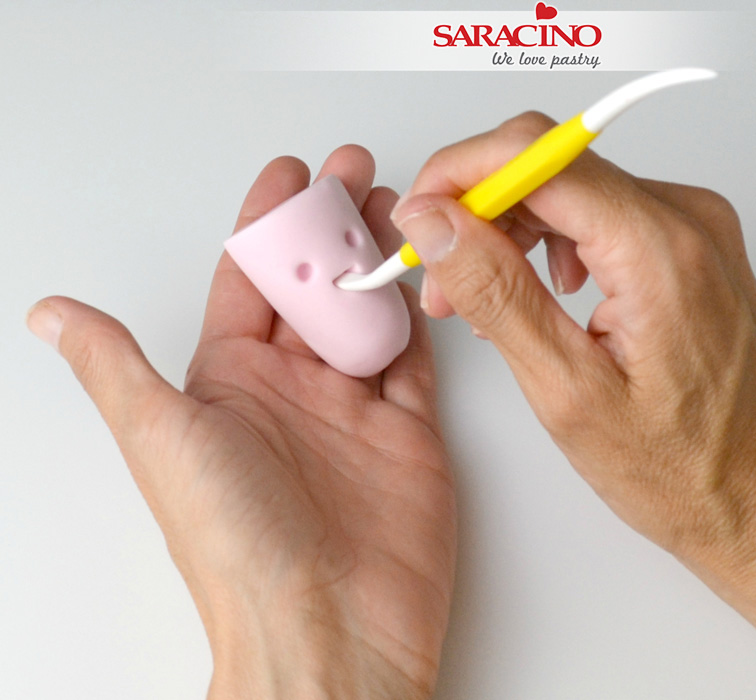
Step 6
Mark a space for the mouth using the wider end of the Dresden tool.
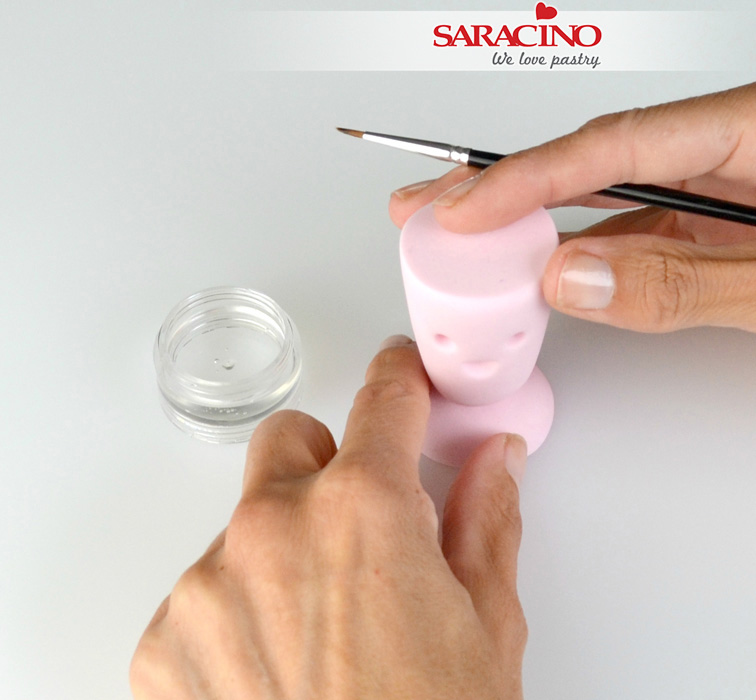
Step 7
Use sugar glue to attach the two pieces together. At this point you can insert a cocktail stick for extra support if necessary, for extra support.
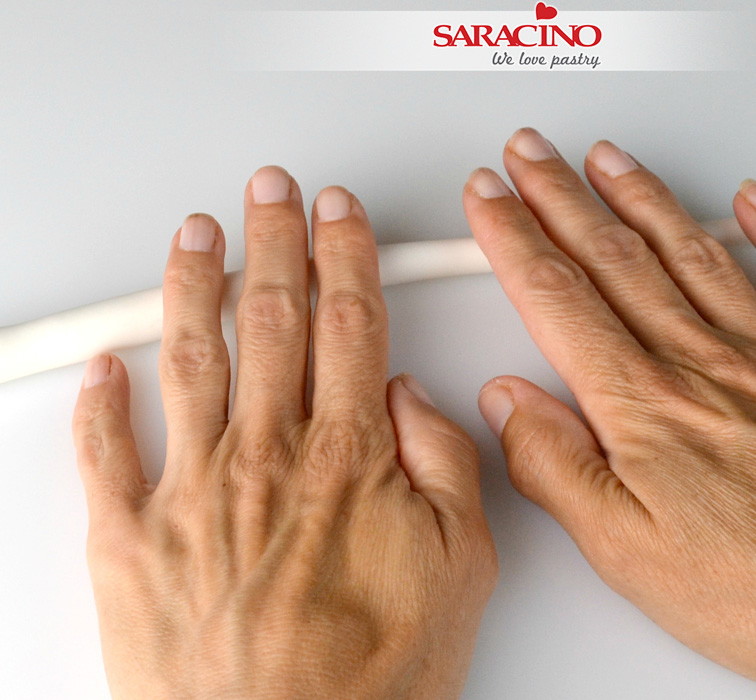
Step 8
To make the cream on the milkshake, roll a long snake of white modelling paste that tapers off at one end.
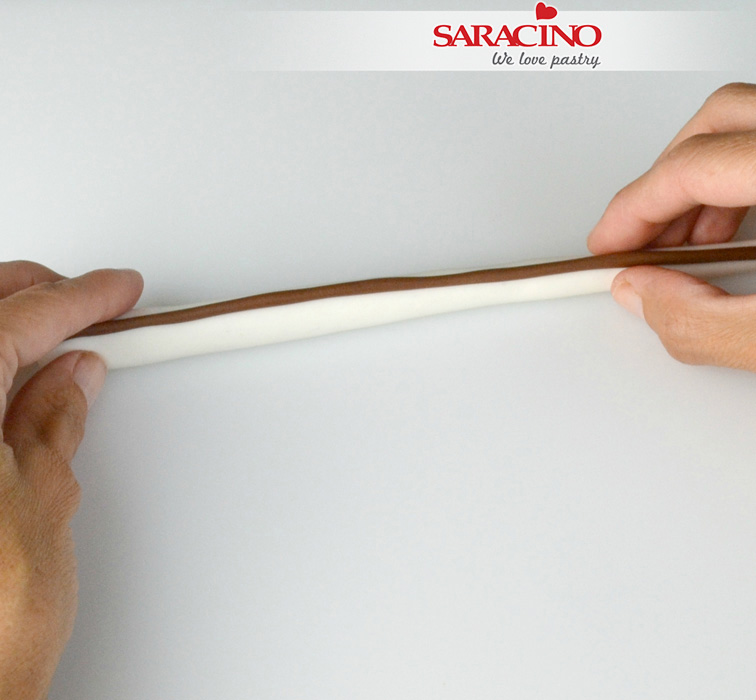
Step 9
Roll a thinner brown snake in the same way and gently press against the side of the white piece.
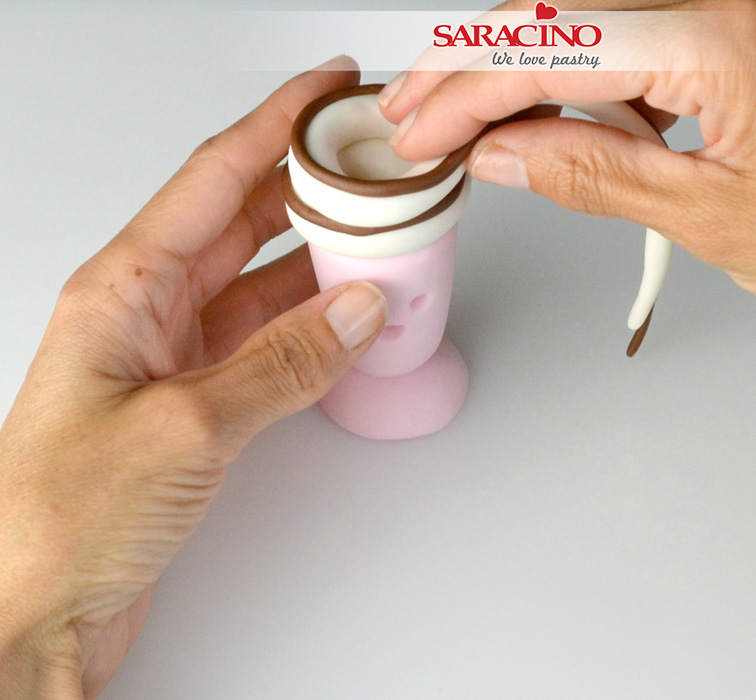
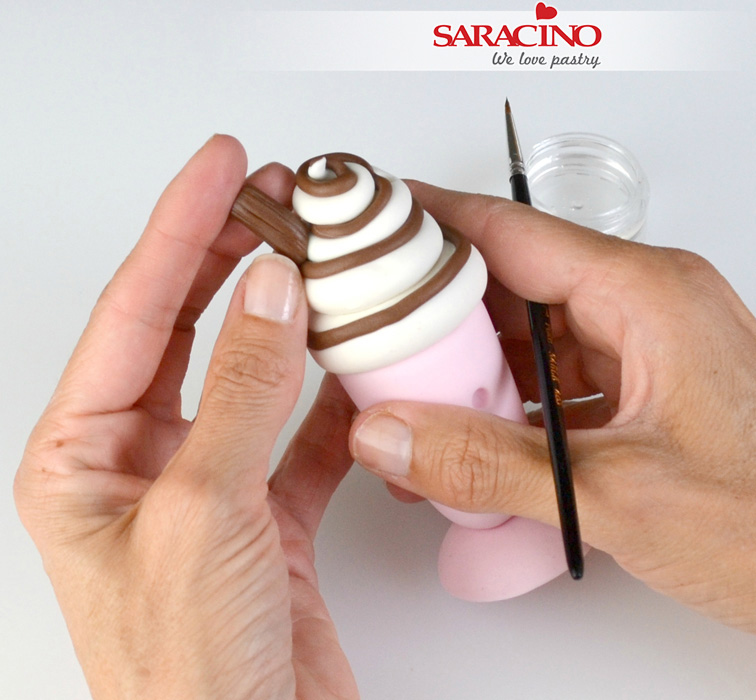
Step 10
Starting at the back of the glass wrap the white and brown piece around in a coil shape.
Step 11
Continue wrapping around until you reach the top.
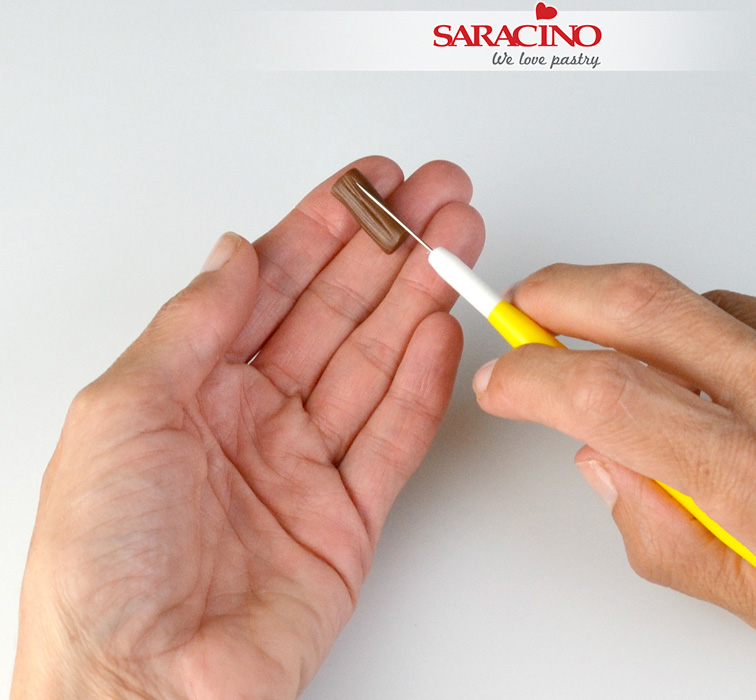
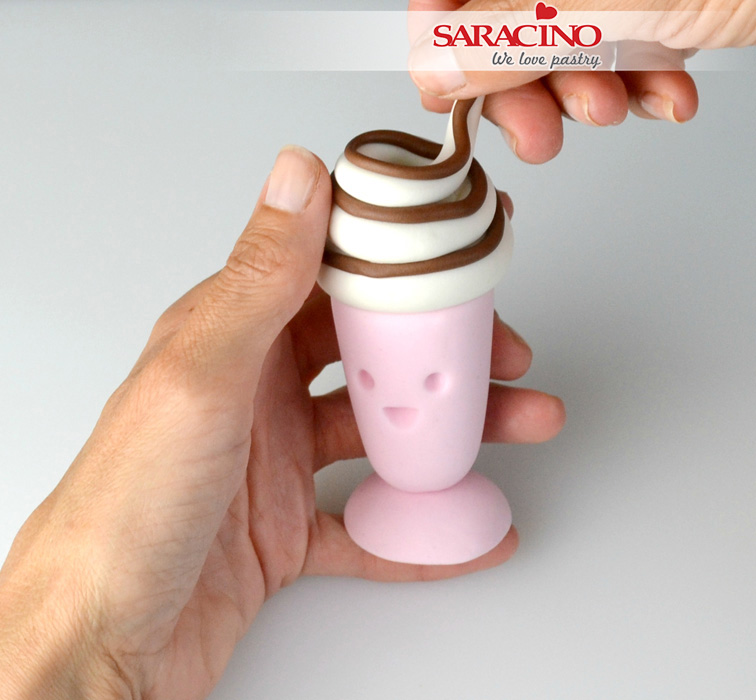
Step 12
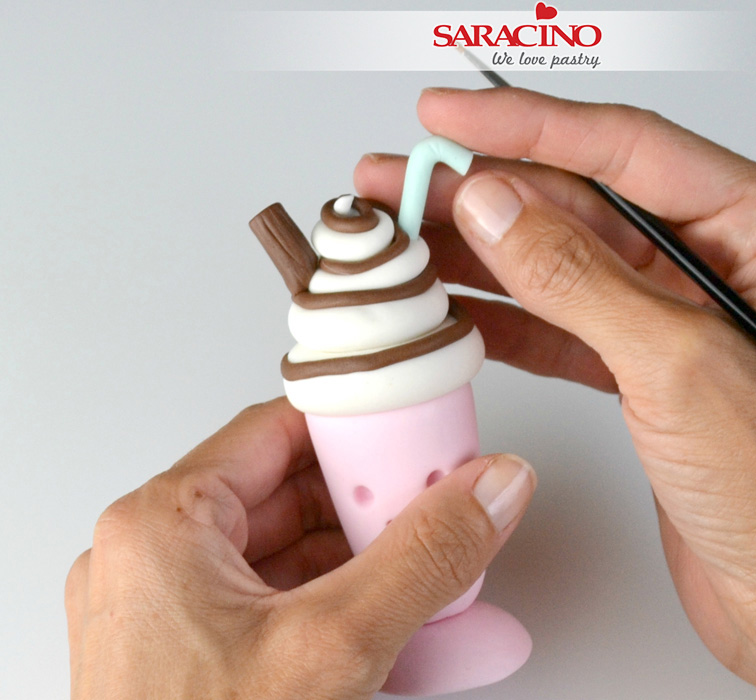
For the flake roll a small sausage shape of brown paste approx. 2cm in length and use a scribing tool to mark on lines.
Step 13
Remove a small diagonal section from one end and secure to the side using sugar glue if necessary. On the opposite side use the end of your paintbrush to make a dent (this is where the straw will go later)

Step 14
Roll a short sausage of pale green paste and cut to around 4cm.
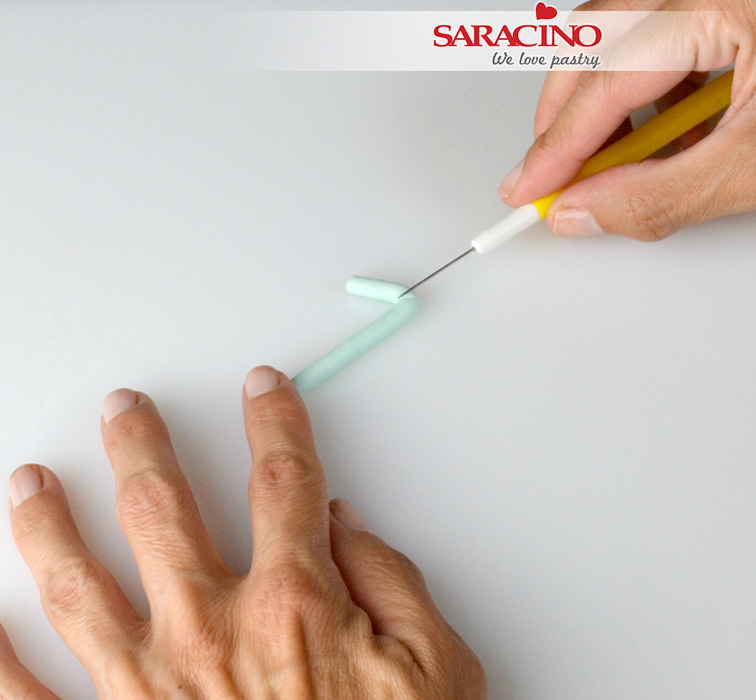
Step 15
Bend the top section over and mark on two lines in a ‘v’ shape on the bend using a scribing tool. Leave to dry completely.
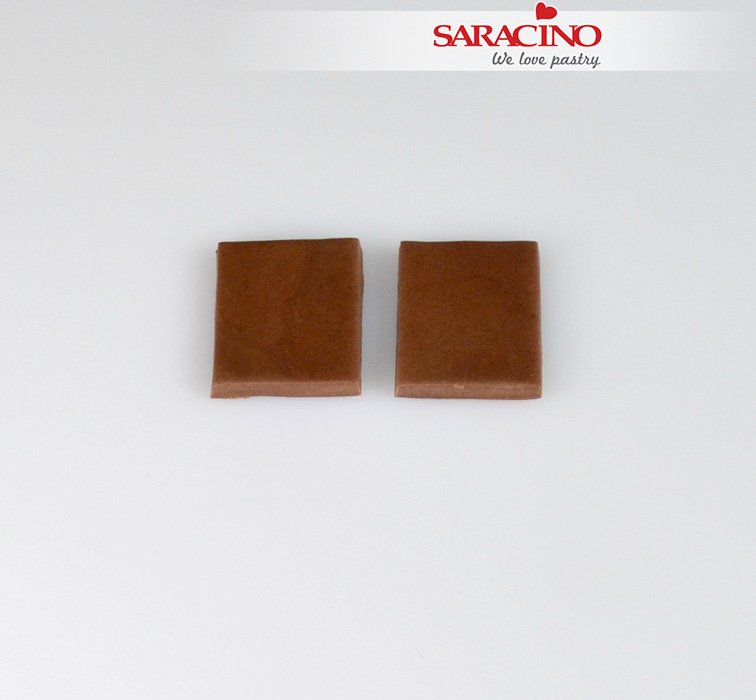
Step 16
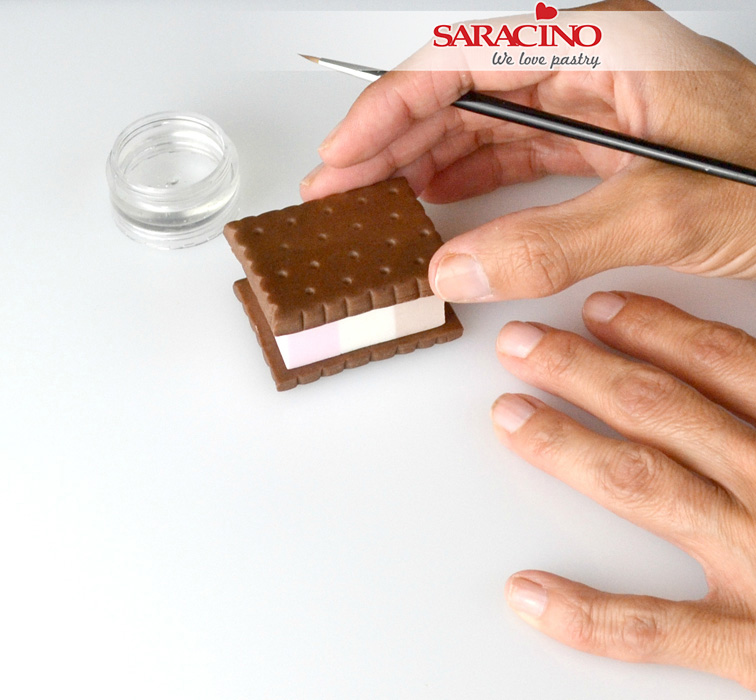
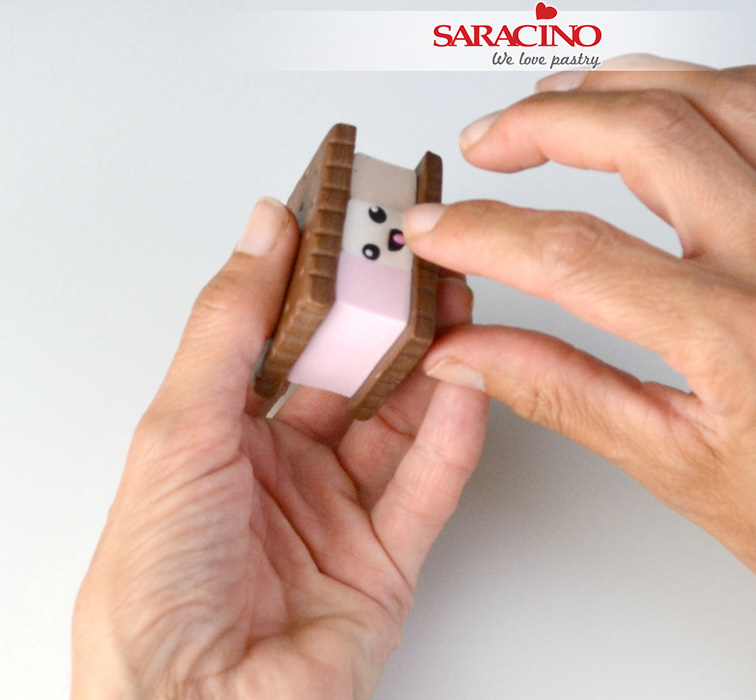
To make the ice cream sandwich, roll out brown paste to approx. 5mm in thickness and cut two rectangles 6cmx4cm.
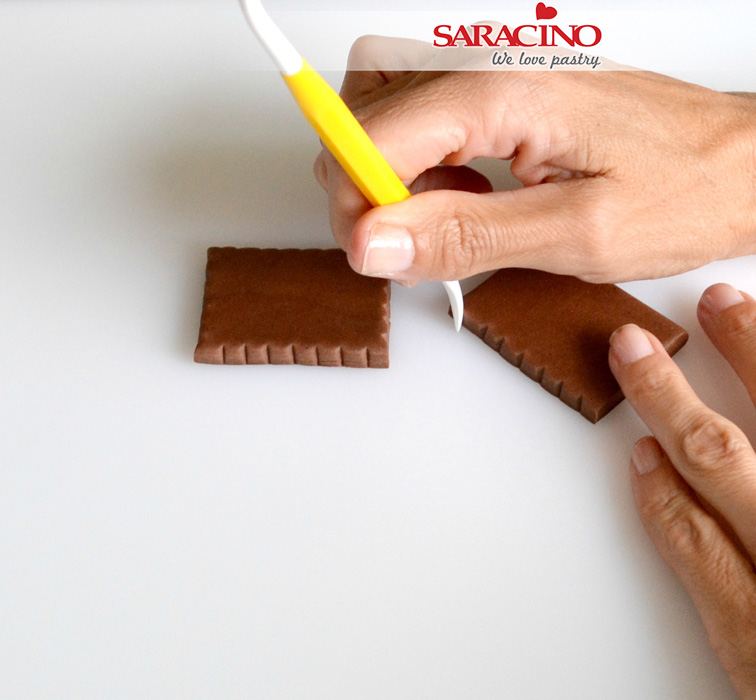
Step 17
Holding the narrow end of the dresden tool vertically, push into the sides of the paste to create a pattern. Set these aside to firm up.
Step 18
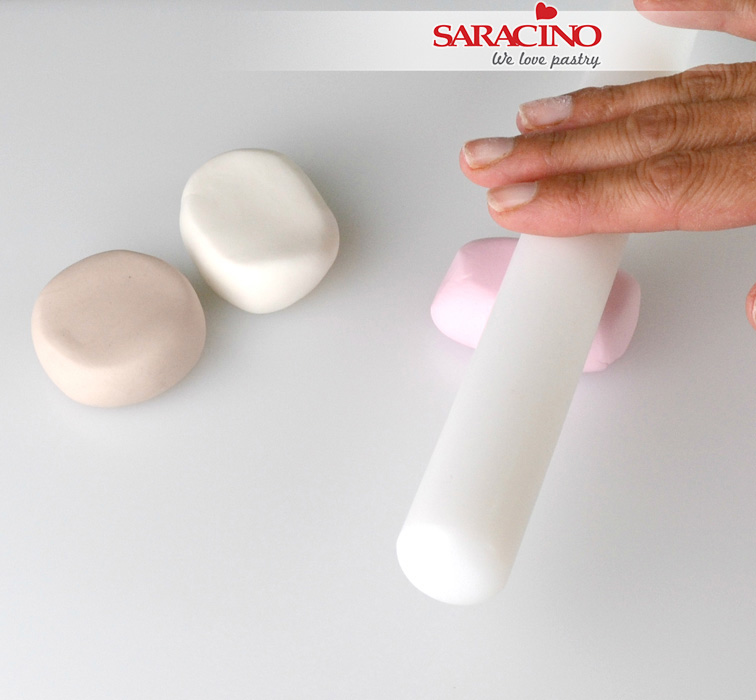
Roll pale brown, pale pink and white paste into pieces approx. 1.5cm thick
Tip: You can check they are all the same thickness by placing them next to each other and rolling them all at the same time
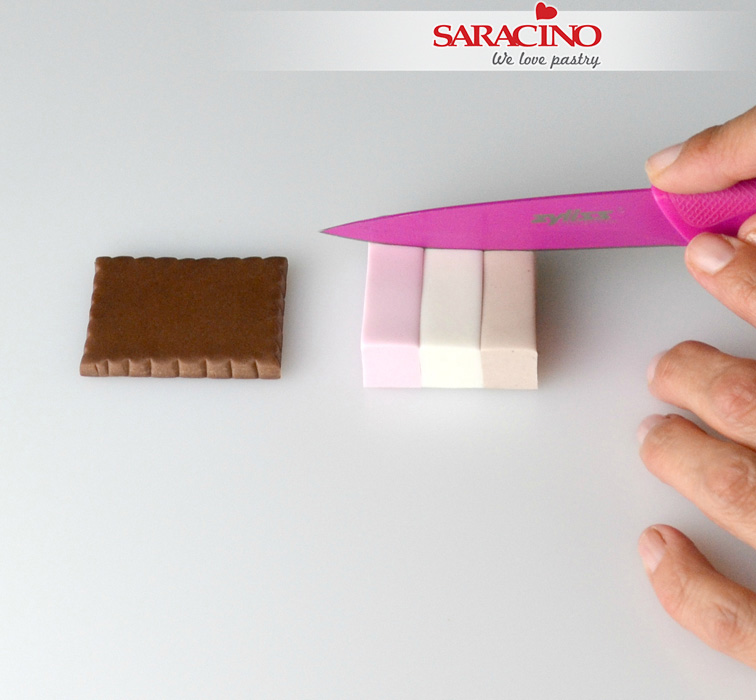
Step 19
Using a sharp knife, cut a strip of the white, pale brown, and pale pink paste so that they are roughly the same thickness and when pushed together are slightly shorter than the biscuits you made earlier.
Step 20
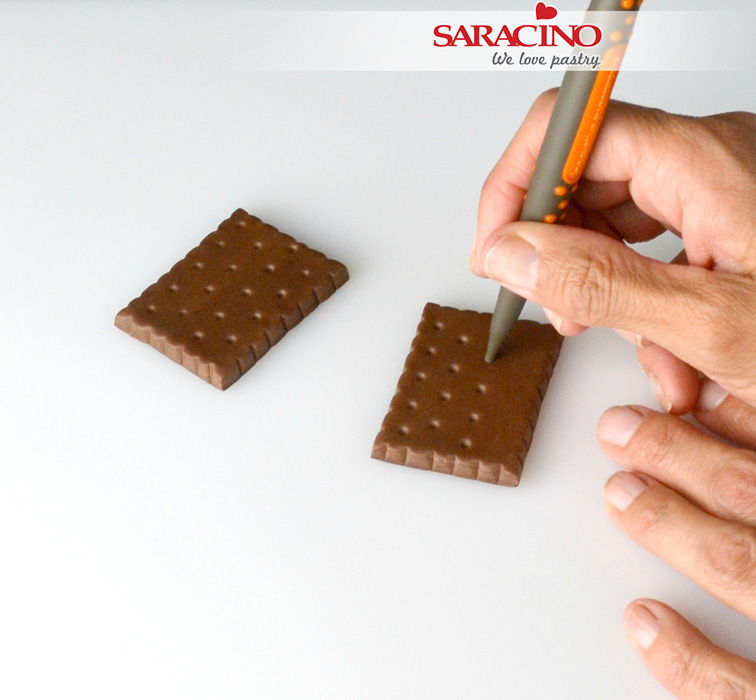
Using a rounded end firm silicon shaper tool (or the end of the paintbrush) mark a pattern of dots onto each biscuit.
Step 21
Assemble the ice cream cookie using sugar glue if necessary, to hold it together.
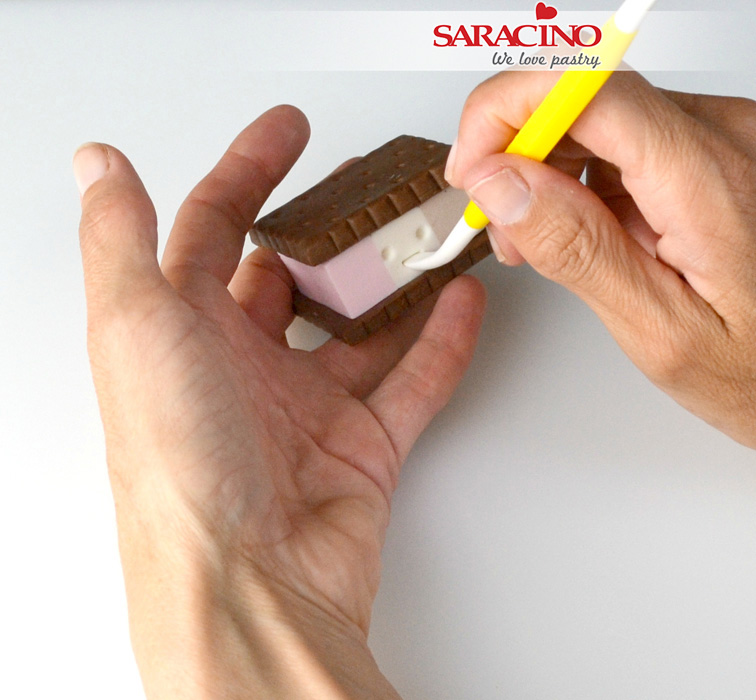
Step 22
To make the face on the side push the end of the paintbrush in for where the eyes will go and use the wide end of the Dresden tool to make the mouth.
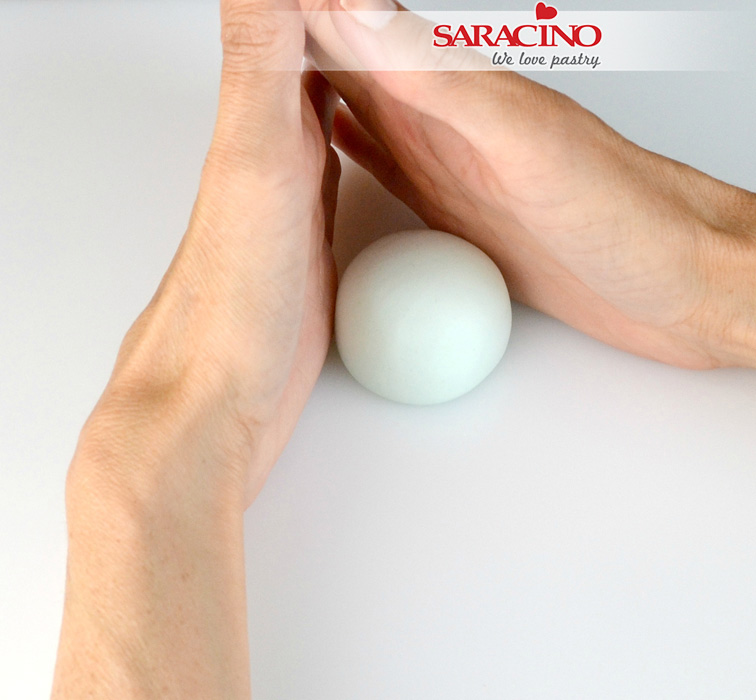
Step 23
For the ice cream sundae bowl roll a ball of pale green paste in the palms of your hands and press it down onto the board rotating as you do so. In this way you will flatten what will become the top of the sundae dish.
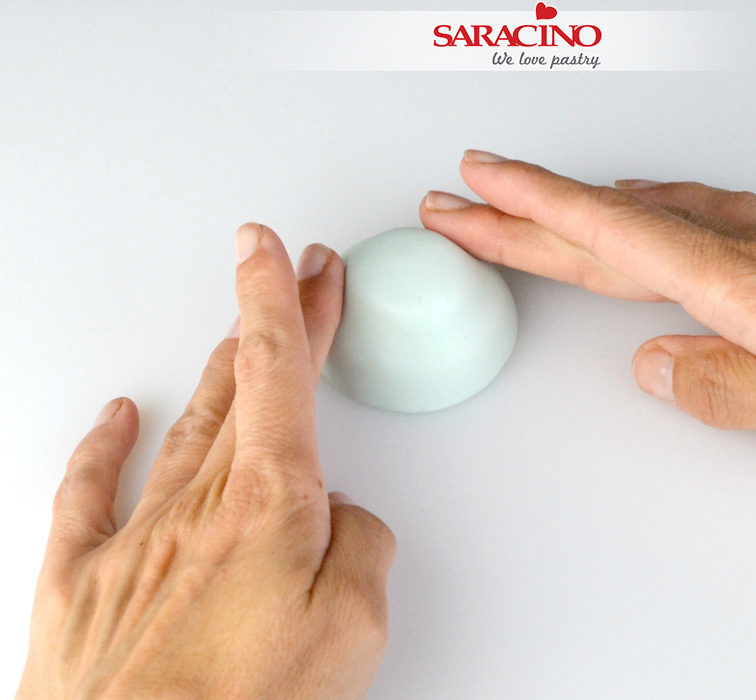
Step 24
Use your fingers to press inwards on the top section whilst rotating the paste to shape into a sundae dish, smoothing of any rough edges as you go.
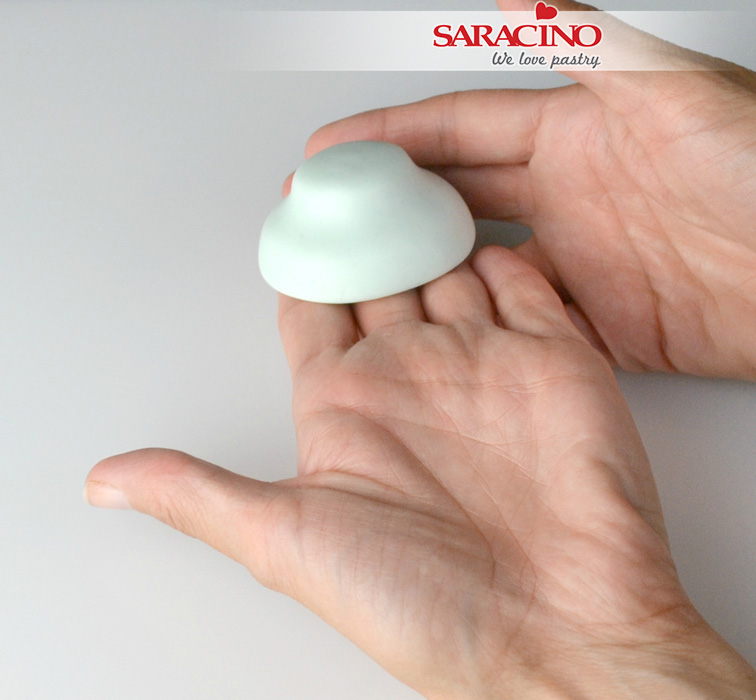
Step 25
Keep going until it resembles a sort of hat shape. Use a smoother to flatten off the top.
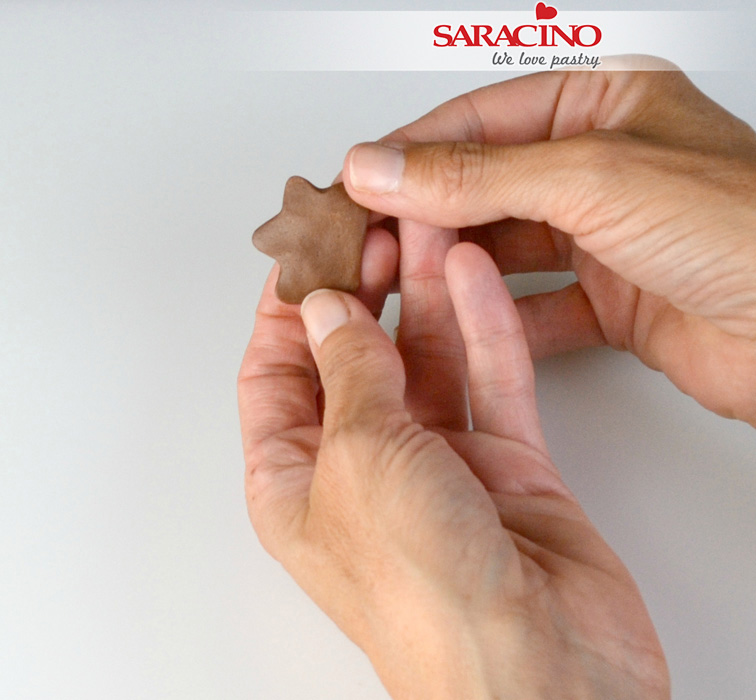
Step 26
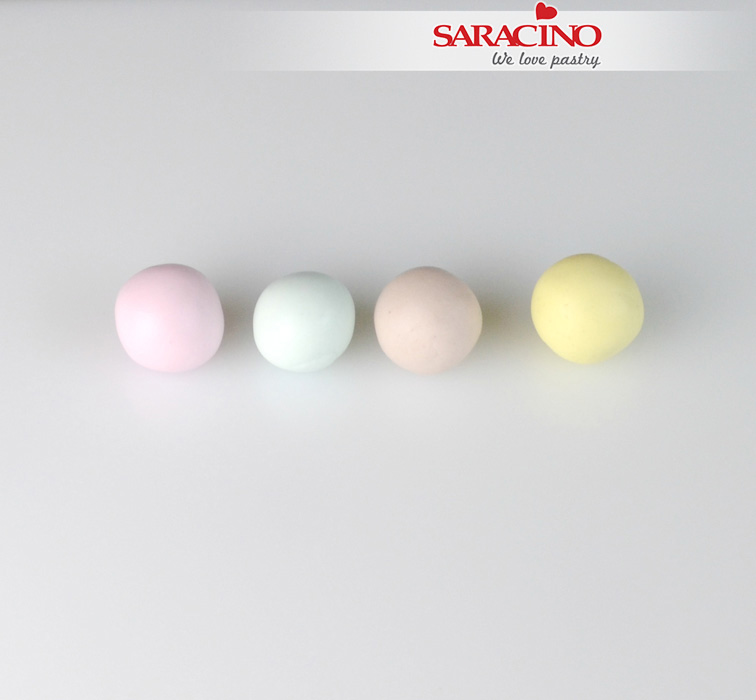
For the ice cream roll a cherry tomato sized piece of paste in pale yellow, pale pink, pale brown and pale green paste.
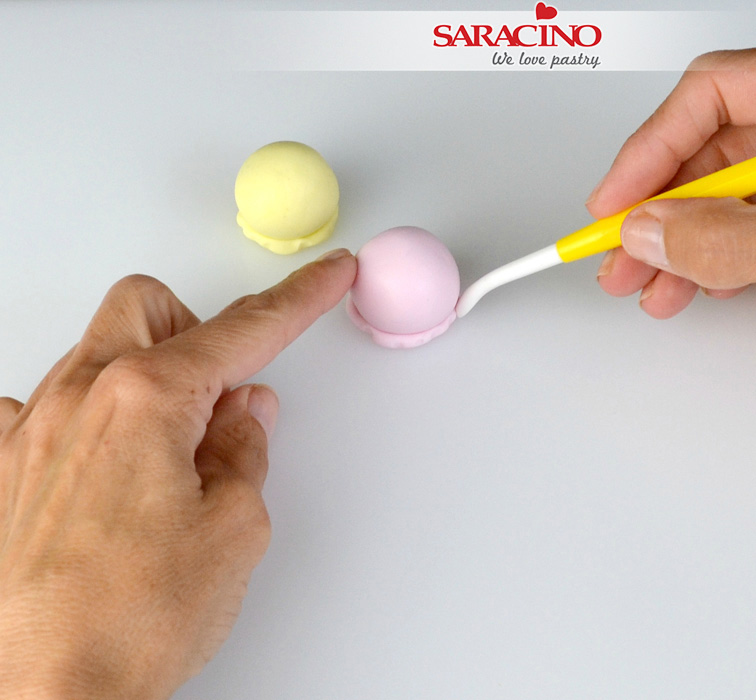
Step 27
Roll a thin piece of each colour paste and wrap around each ball of ice cream. Use a Dresden tool to make indents.
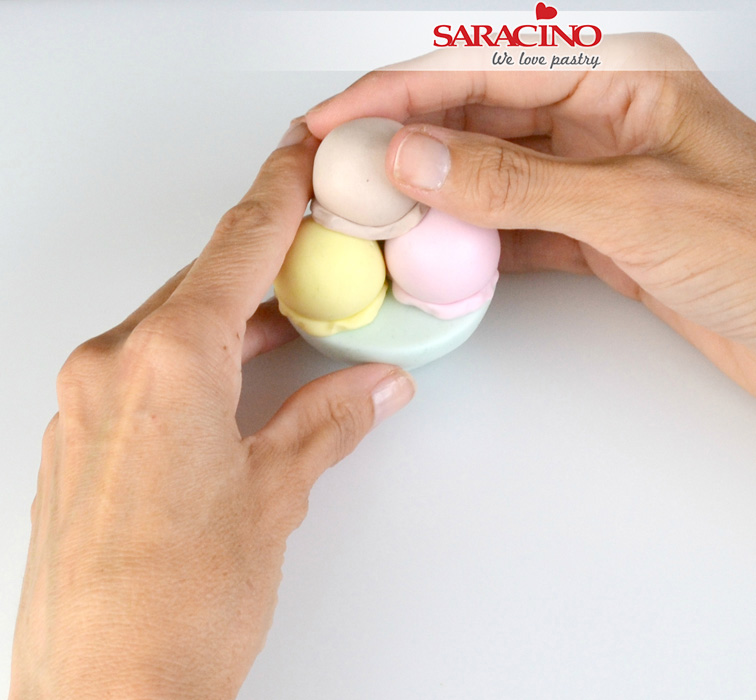
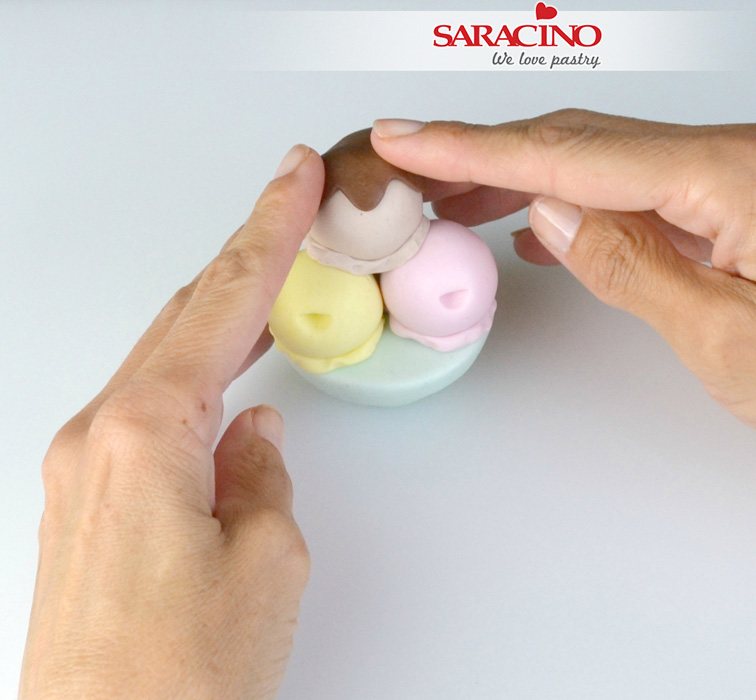
Step 28
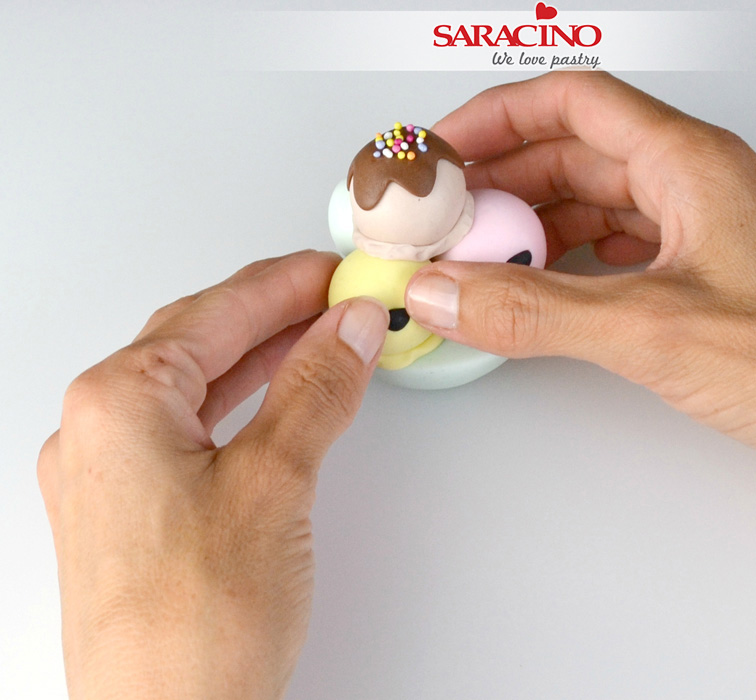
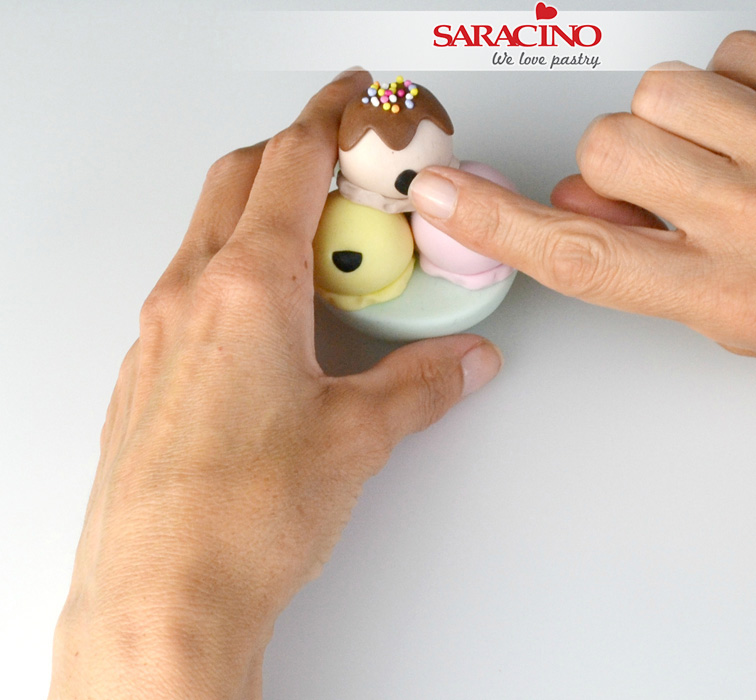
Put all balls of ice cream into the dish (I put the green one at the back just to support the others) and attach with sugar glue if necessary.
Step 29
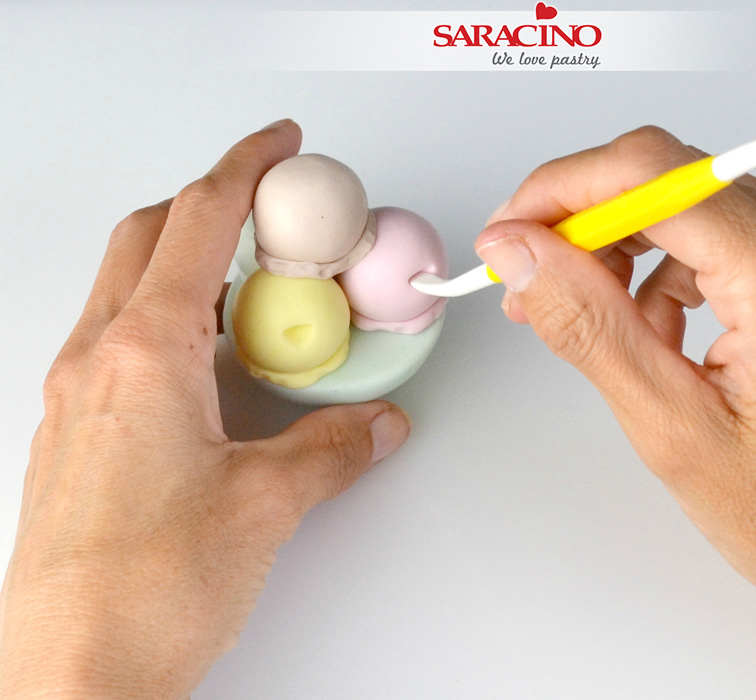
Use the Dresden tool to make the mouths of the bottom two balls.
Step 30
Take a small piece of brown paste and gently using your index finger and thumb pull the paste out to make the sauce for the top of the ice cream.
Step 31
Stick sauce onto the top ball of ice cream.
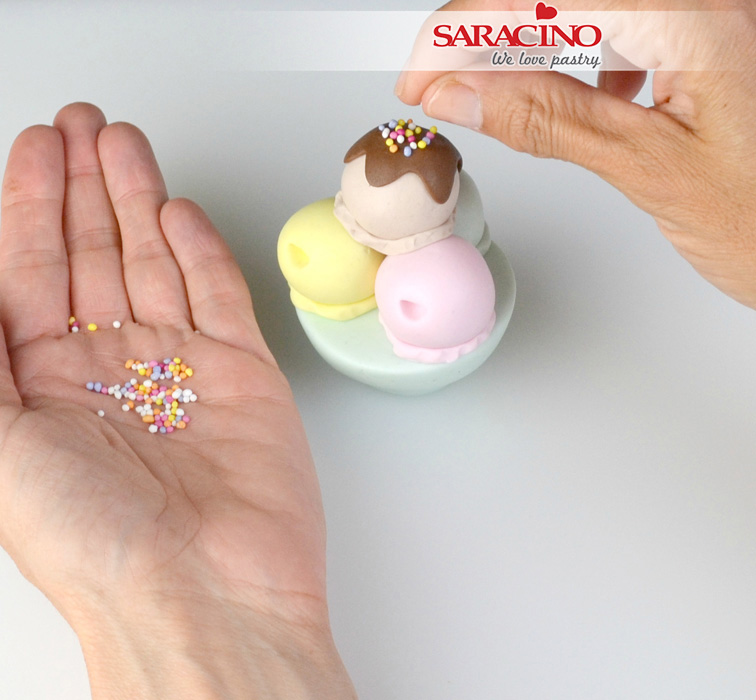
Step 32
Brush a small amount of sugar glue on to the sauce and sprinkle a few 100s and 1000s on.
Step 33
Use a bit of sugar glue to secure the straw into the hole made earlier. If it is too long trim to size.
Step 34
For the eyes on the milkshake roll two small black balls and push into the holes. Add two tiny balls of white paste for highlights
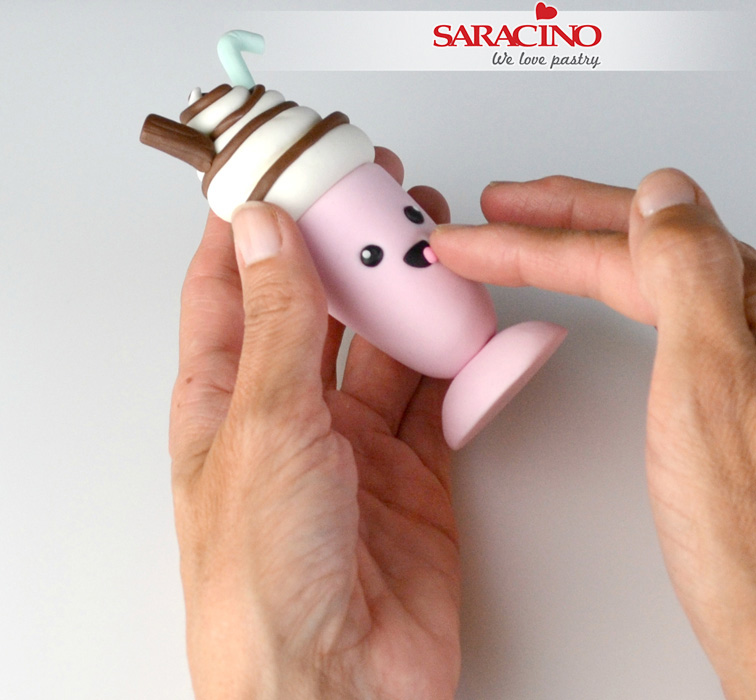
Step 35
Roll another small piece of black paste for the mouth. Add on a tiny piece of darker pink paste for the tongue.
Step 36
Add the eyes and mouth for the ice cream sandwich as on the milkshake.
Step 37
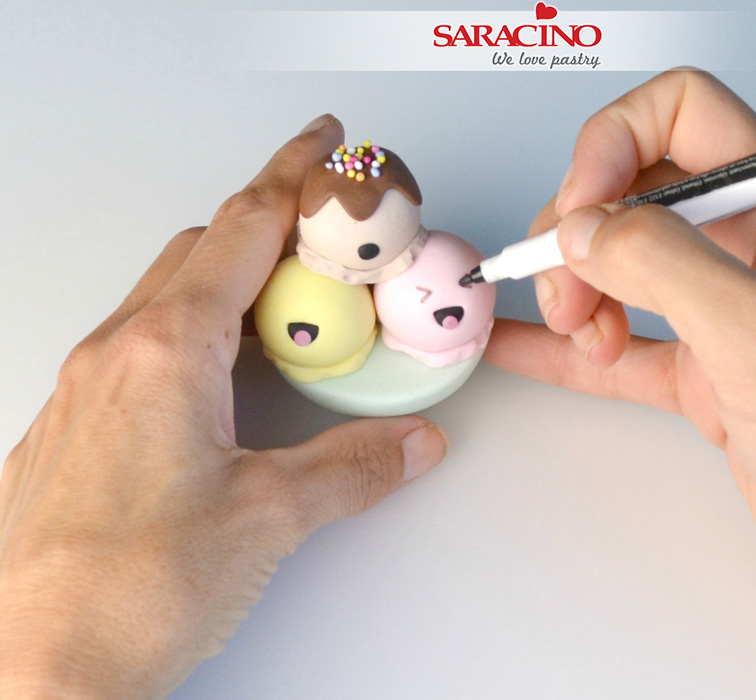
Fill in the mouths of the ice cream with small pieces of black paste. Add tiny pieces of darker pink paste for tongue.
Step 38
Roll a small piece of black paste into a little ball and add as the mouth of the ball of ice cream on top, just pressing on with your finger to secure.
Step 39
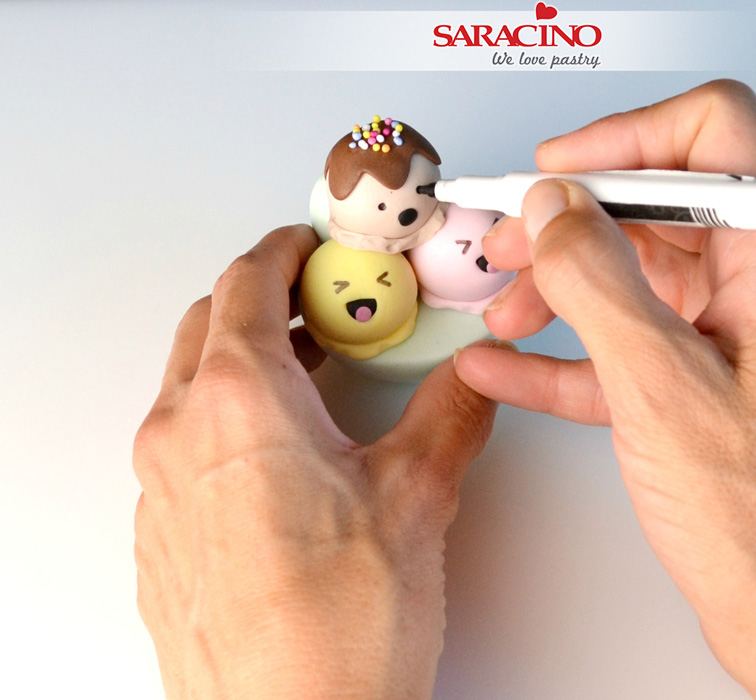
When completely dry use an edible black pen to mark on the eyes on the bottom two balls of ice cream in little arrow shapes.
Step 40
Draw dots for eyes on the top ball of ice cream using black edible pen.

Step 41
Using a soft brush and edible pink dust give each face rosy cheeks.

Step 42
To finish paint white details on both the pink glass and the ice cream bowl using edible white dust mixed with clear alcohol.
Step 43
Your toppers are ready to be placed on the cake
