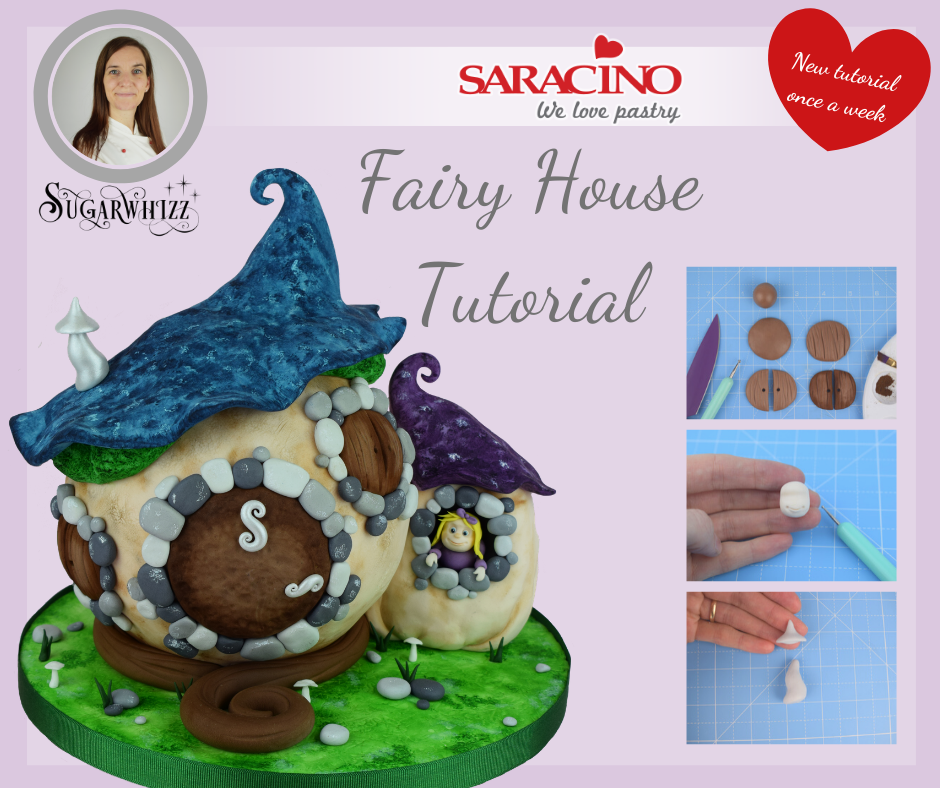
Author: Lynsey Wilton-Eddleston

FB: SUGARWHIZZ
Skill level: BEGINNERS
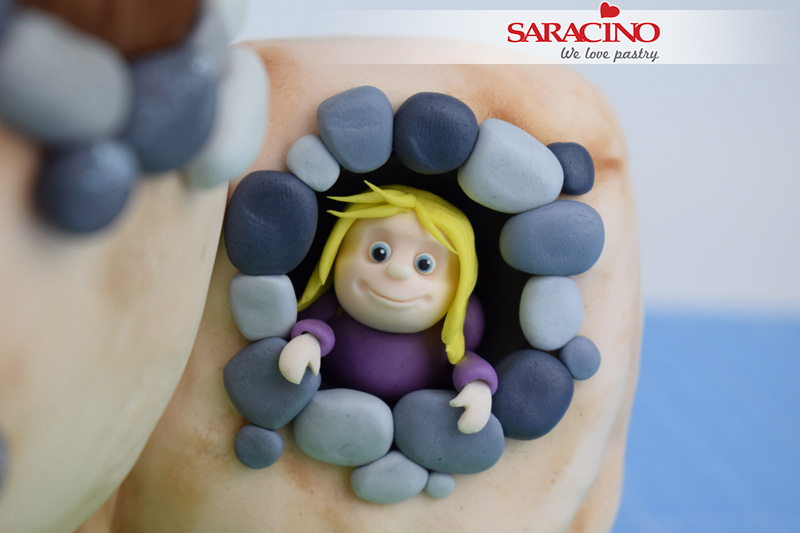
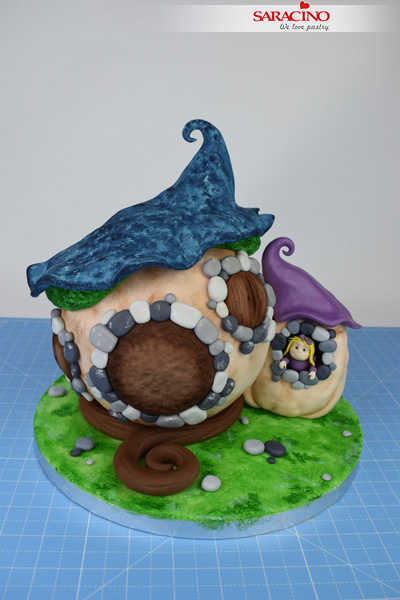
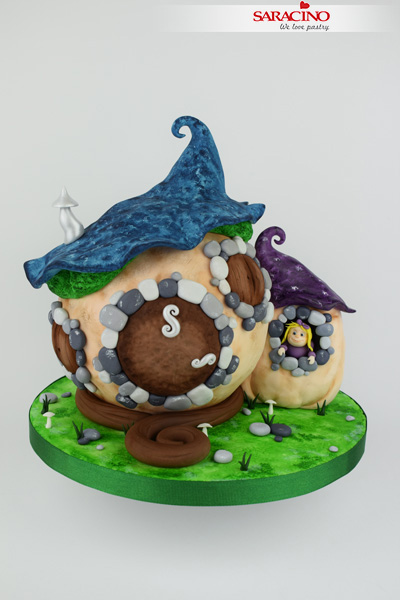
We do believe in fairies! And now you can too. Join our ambassador Lynsey from Sugarwhizz as she shows you step by step how to make this adorable magical fairy and her little house! Perfect for believers of all ages!
You will need:
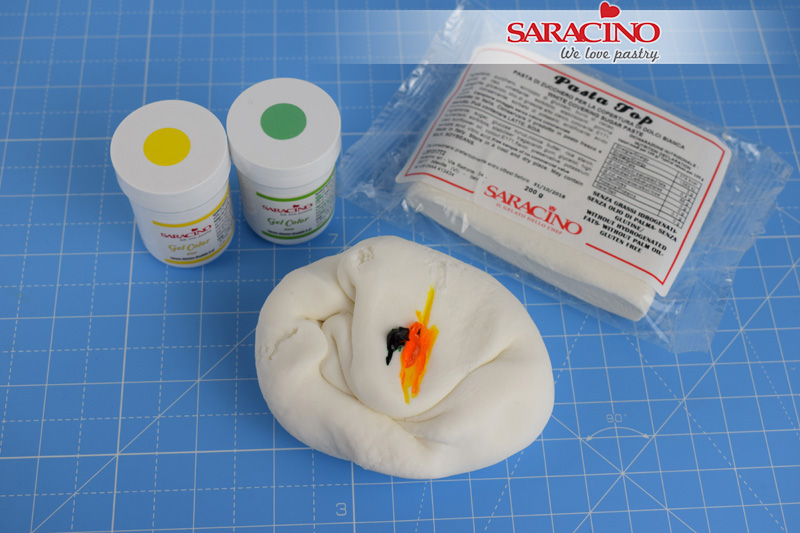
400g – Cream coloured Saracino top paste (Sugarpaste) To get cream add a tiny amount of Saracino skin tone gel colour to white paste.
200g – Green Saracino top paste (Sugarpaste)
711g – White Saracino Pasta Model (modelling paste) coloured and divided as follows
Saracino Colours Gel paste: Brown, Violet, Blue, Black, Green, Skin tone, Yellow. Colour and divide your paste as follows –
Brown Gel Colour – 120g – Branch around base, 25g – Door, 24g – Windows
Black Gel colour – 25g Dark grey – Stones, 25g Medium grey – Stones, 32g Light grey – Stones, chimney and door fixings, 7g Black – Window and eyes
Green Gel colour – 115g green – Moss under roof, 2g Dark green – Grass (add a touch of violet gel colour to the green paste to darken)
Blue Gel colour – 250g Pale blue for roof. (add a small amount of black to blue paste to create a pale navy colour), 1g Blue – Eyes
Violet Gel colour – 70g light purple – Small Roof, 5g dark purple – Body and arms
Yellow Gel colour – 2g Hair
Skin tone Gel colour – 5g – Girl
- White modelling paste – 3g
- Saracino powder – White, Brown, Green, Pearl and Silver Lustre
- A six-inch sphere cake
- 10in round cake drum
- Baking parchment
- Knife
- Rolling pin
- Balling tool (Cerart, K500, K501 & K502)
- Dresden tool (Cerart 301)
- Small Star tipped piping nozzle
- Cool boiled water/ edible glue
- Small paintbrush for gluing
- Small paintbrush for painting
- Small flat paintbrushes for dusting and painting
- Small stiff bristled paintbrush.
- Small amount of royal icing.
- 60g of rice crispy treats
- Green ribbon
Step 1
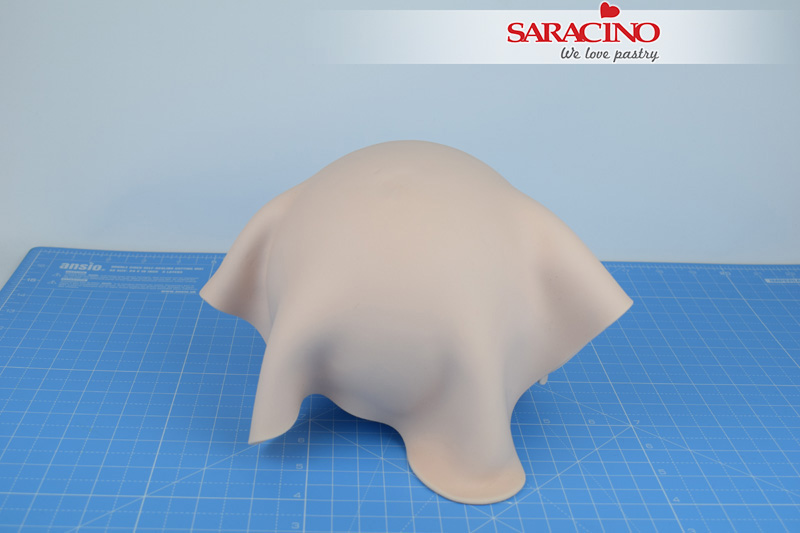
To cover cake – Roll out 250g of Cream Saracino top paste to a thickness of around 5mm. Carefully lift the paste and place it on top of your cake.
Step 2
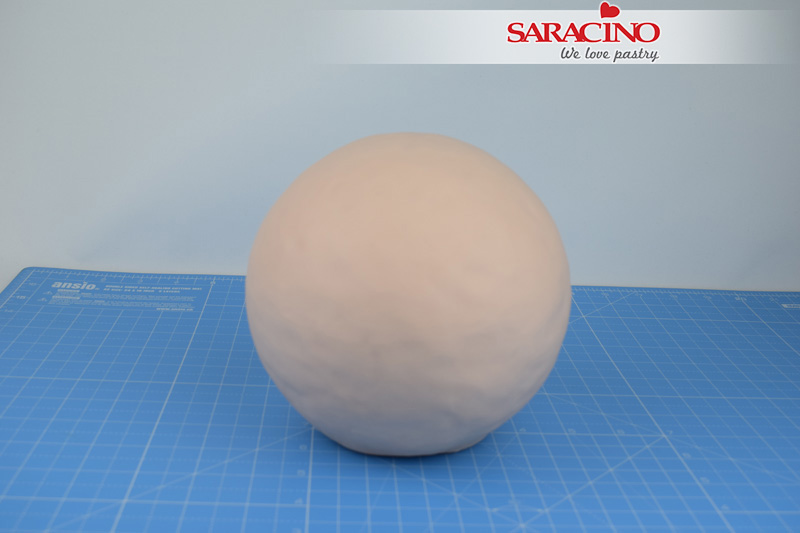
Smooth the paste down the sides, across the top and round underneath the sphere. Trim the excess paste away with a sharp knife. Don’t worry it doesn’t have to be perfectly smooth
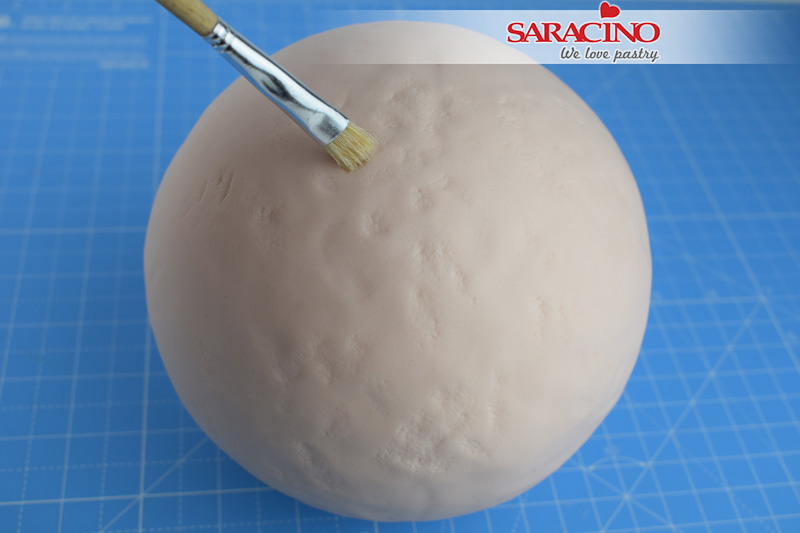
Step 3
Press gently with your fingertips all over the sphere to create a slightly uneven surface. Use a stiff bristled paintbrush to gently press in and texture the whole surface of the sphere. TIP: Stiff bristled paintbrush – Trim the bristles of a pastry brush to make a stiff bristled brush perfect for texturing paste.
Step 4
To cover board – Take 200g of white Saracino top paste and add a small amount of yellow Saracino gel colour along with a tiny amount of green Saracino gel colour. Knead together until the paste is evenly coloured.

Step 5
Roll out the green paste and cover the board. Trim any excess from around the edge with a sharp knife. Take a small piece of baking parchment and screw into a ball. Dab the ball gently across the board to texture the paste.
Step 6
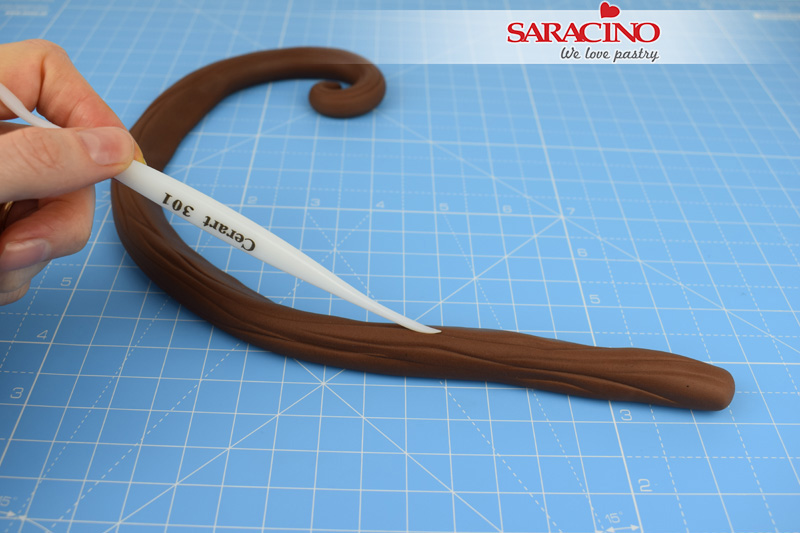
To make the branch – Take 120g of brown modelling paste, roll into a long thin sausage, tapered to a point at one end (approximately 20inches long). Use the veining end of the Dresden tool (Cerart 301) to gently score lines along the length of the paste. Gently curl the tapered end into a spiral.
Step 7
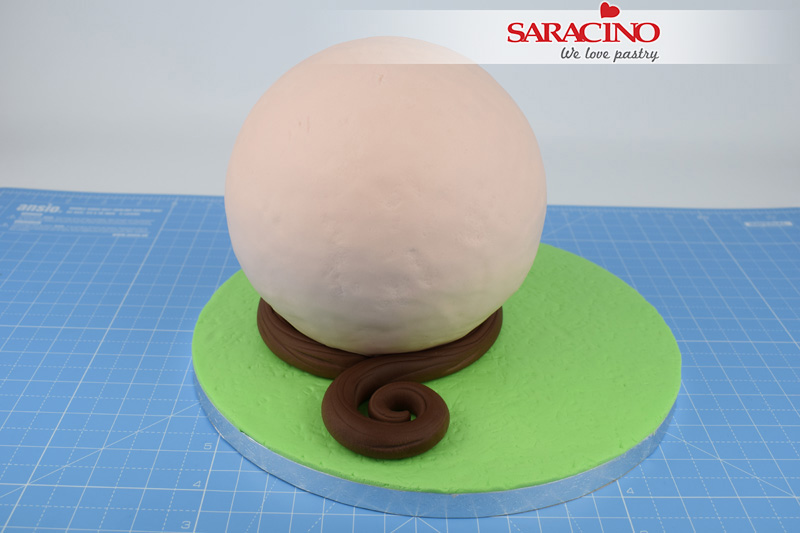
Stick the cake into place on the left side of the board with a small amount of royal icing. Wrap the branch around the base of the cake. Start at the front with the thickest end and continue around until the spiral end overlaps and is front and central to the cake. Stick into place with a small amount of cool boiled water.
Step 8
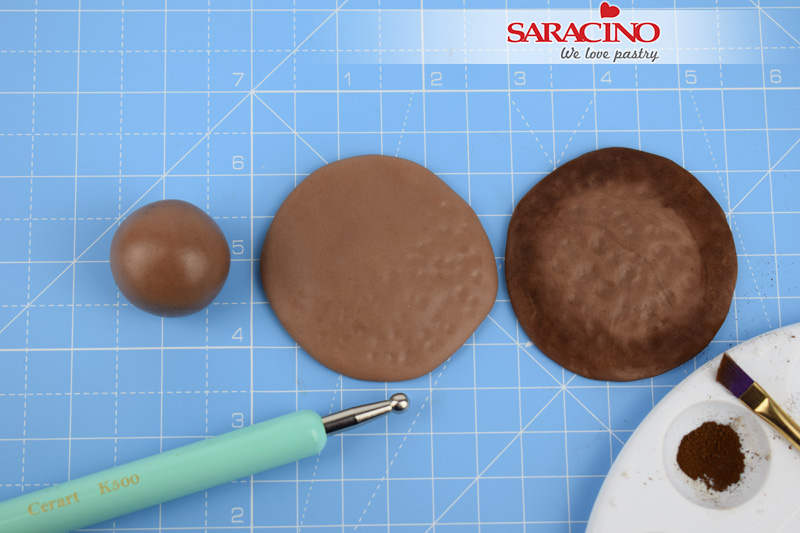
Door – Take 25g of brown modelling paste, roll into a ball and then flatten gently with the palm of your hand. Rub around the edge with your fingertips to thin the paste slightly. Use the balling tool (Cerart 500) to texture the surface of the door. Apply a small amount of Saracino Brown powder around the edge of the door to shade as shown.
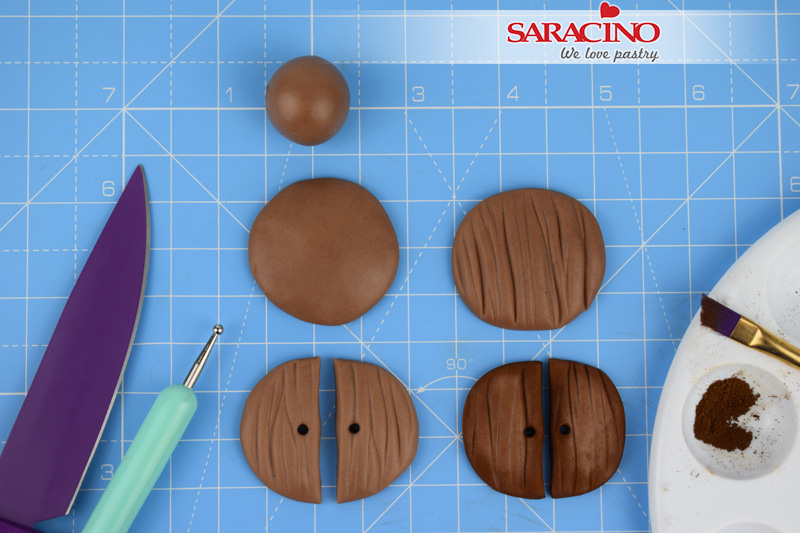
Step 9
Windows – Divide 24g of brown modelling paste equally into three pieces. Roll each piece into a ball, flatten with the palm of your hand and thin the edges with your fingertip as before. Use the veining end of the Dresden tool (Cerart 301) to mark vertical lines and grooves across each piece. Using a sharp knife cut each piece equally in half. Use the small end of the balling tool (Cerart 501) to create a hole in each window shutter as shown. Lastly shade around the edge of each window shutter with brown Saracino dust as before.
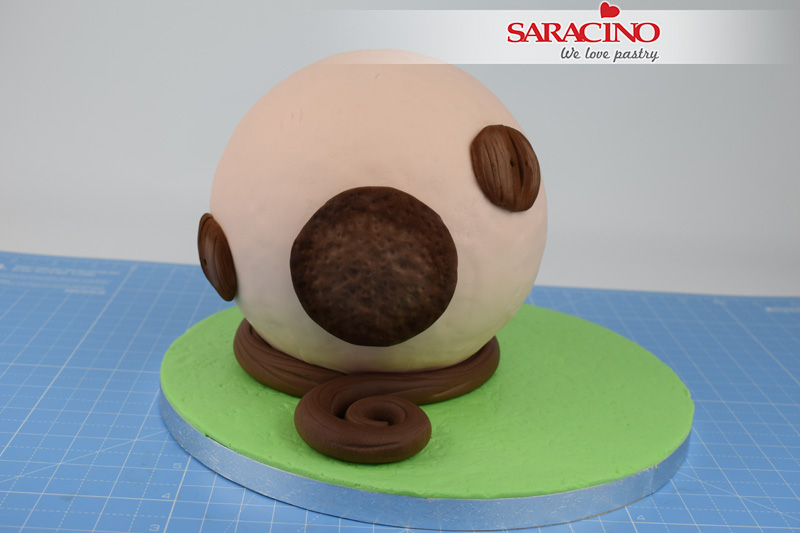
Step 10
Apply a small amount of water to the back of the door and each window shutter. Stick the door into place above the spiral of the branch. Stick two windows into place on the front of the cake as shown.
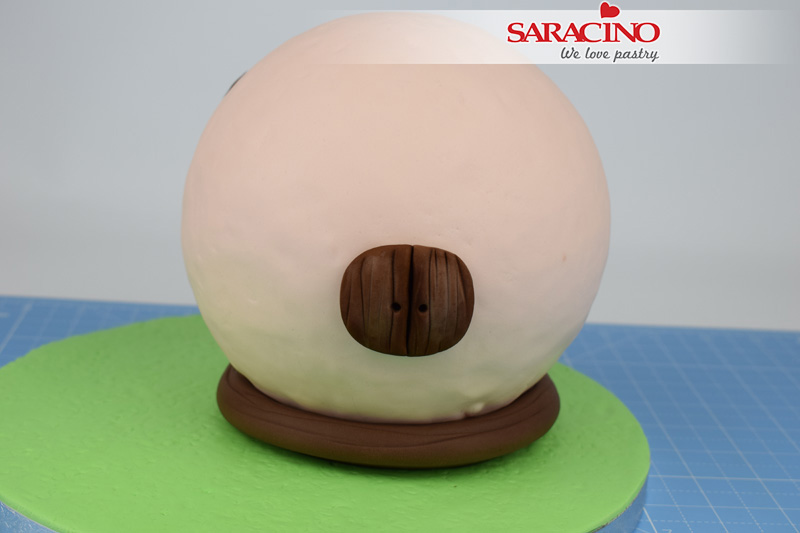
Step 11
Stick the final third window into place on the back of the cake as shown.
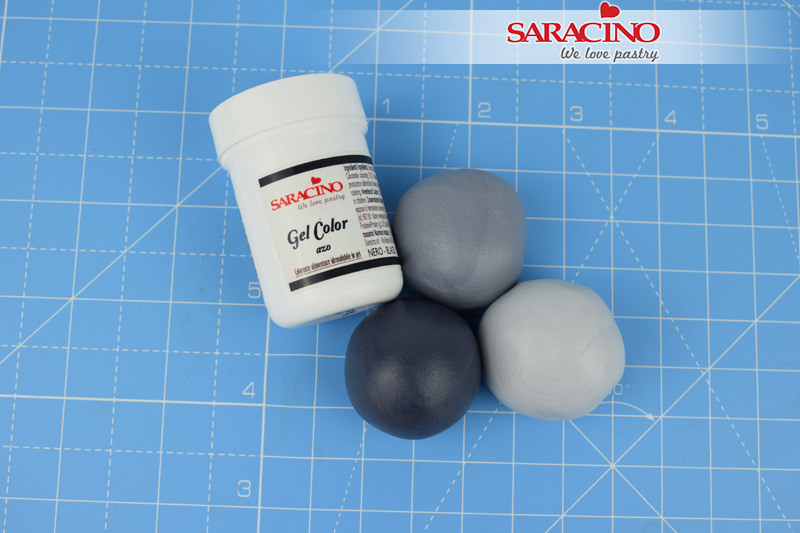
Step 12
Apply a small amount of Saracino black gel colour to 32g of white paste to create a light grey colour. Increase the black gel colour added to 25g of white paste to create a medium grey colour, and a further 25g of white paste to create a dark grey colour as shown.
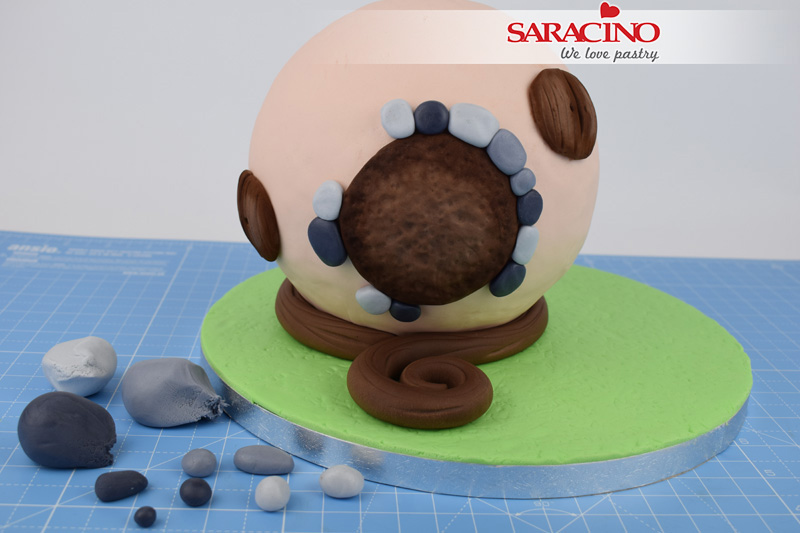
Step 13
Take 20g of each of the light, medium and dark grey pastes. Roll various sizes and shapes of stones and stick around the outside of the door and all three windows to frame as shown.
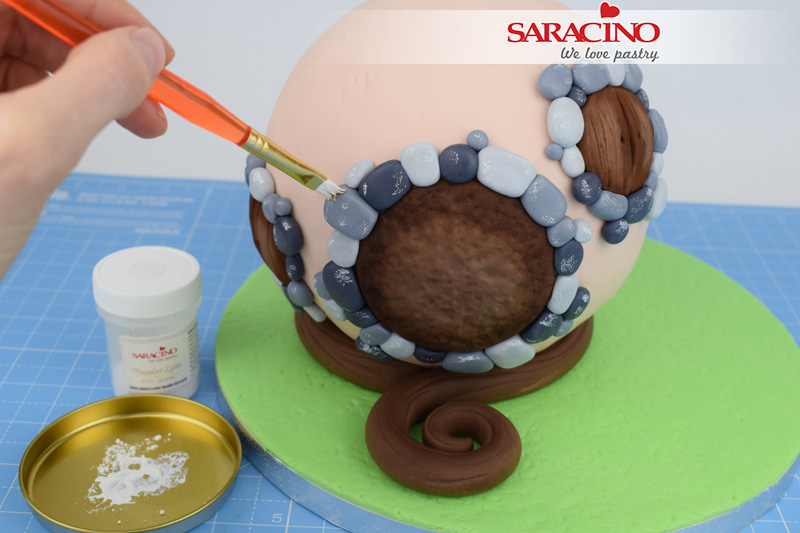
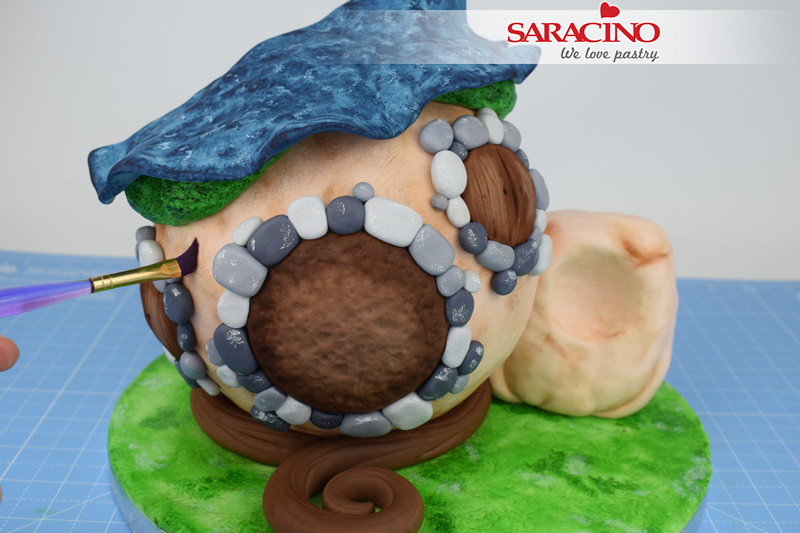
Step 14
Mix a small amount of Saracino white powder with a couple of drops of water to create a paste. Dip a paintbrush into the paste and wipe off the excess, so that the paintbrush is almost dry. Dab the stones with the paintbrush to transfer a small amount of colour as shown.
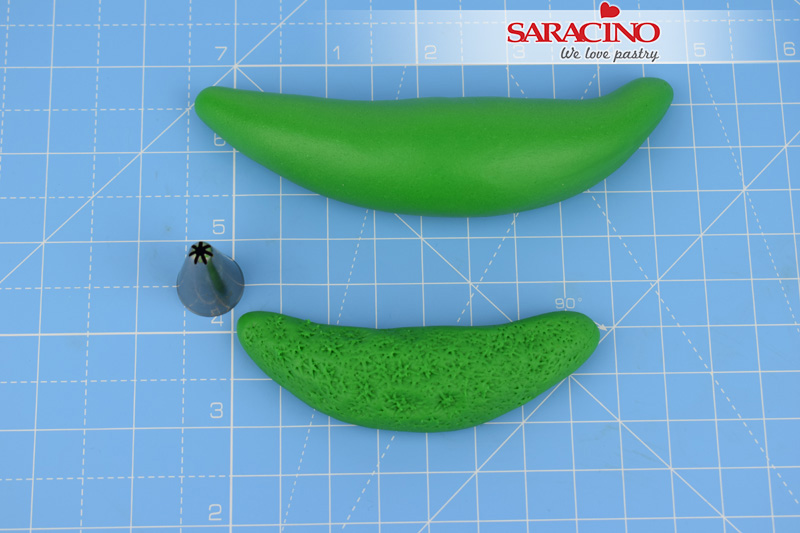
Step 15
Moss – Divide the 115g of green modelling paste into two pieces. One 80g and the other 35g. Roll the 80g piece into a sausage tapered at each end, and roughly 5.5 inches long. Roll the 35g piece into the same shape roughly 3.5 inches long. Use the small star tip piping nozzle to gently press in and texture each piece to look like moss as shown.
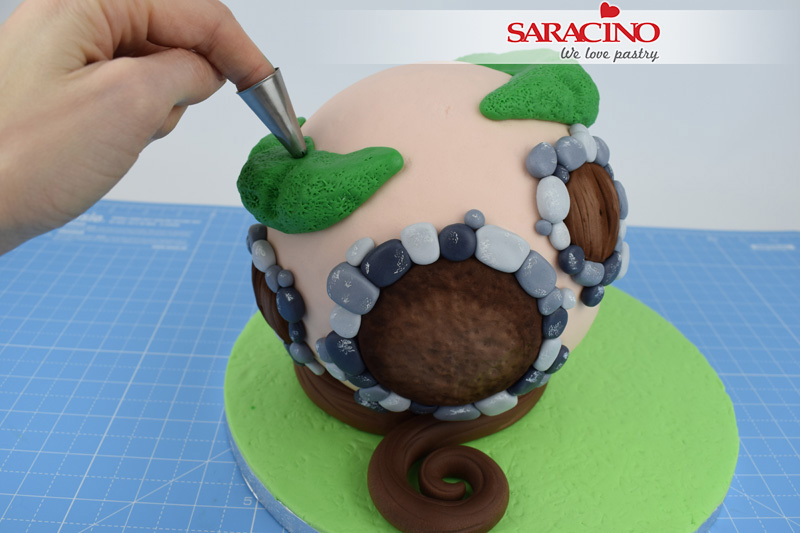
Step 16
Gently bend each piece into a curve. Stick the largest piece to the top right of the cake, and the smallest piece lower down on the left-hand side of the cake as shown. Smooth the top of the paste level with the cake using your fingertips. Retexture the paste with the star tip if needed once attached.
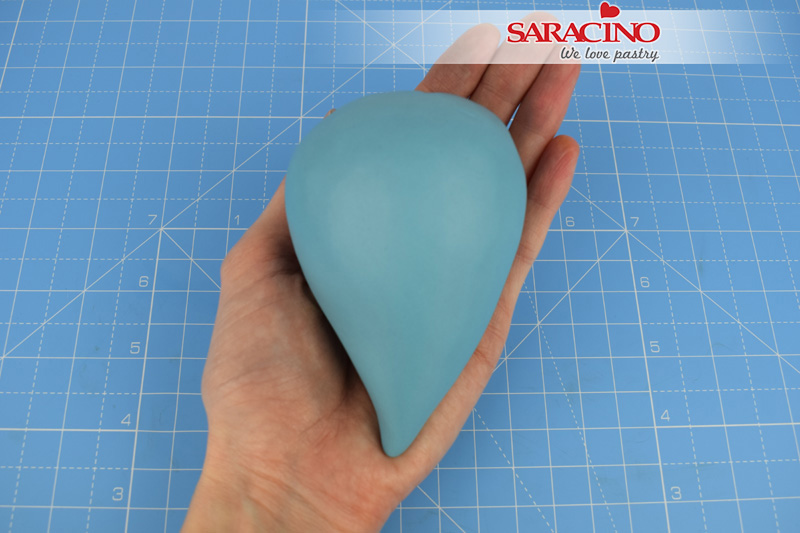
Step 17
Roof – Roll 250g of light blue modelling paste into a teardrop shape as shown.
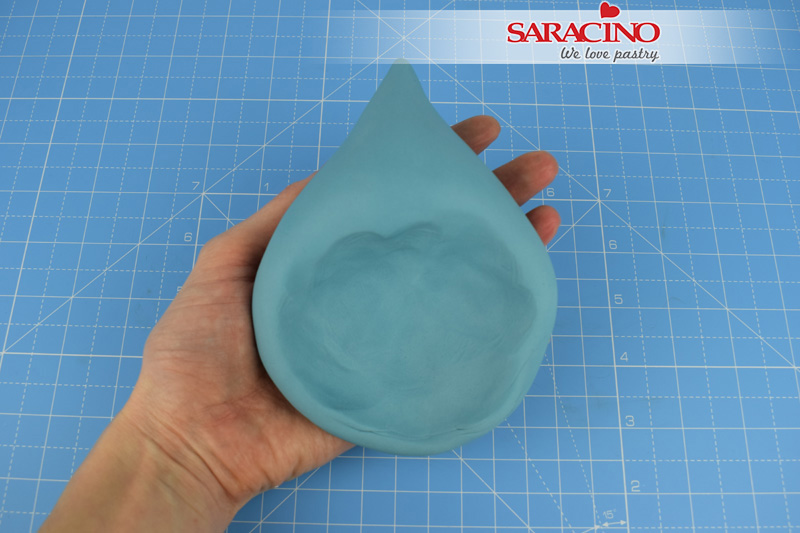
Step 18
Use your thumb and fingers to pinch out the paste at the fattest end of the teardrop.
Step 19
Keep pinching and thinning the paste until it is large enough to cover the top of the cake. Pinch around the edge of the roof to thin and smooth the paste to a point.

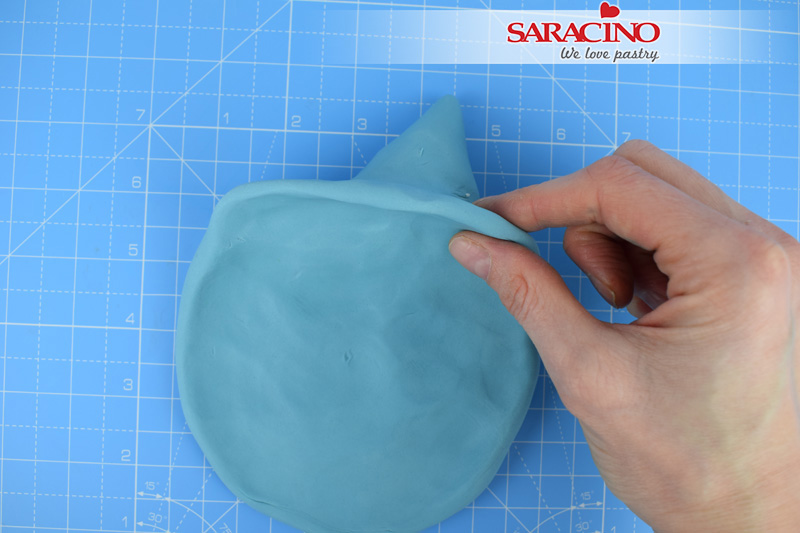
Step 20
Stick the roof into place with a small amount of water. Gently curl over the top of the roof as shown. Use your fingertips to gently pinch and shape around the edge of the roof as shown.
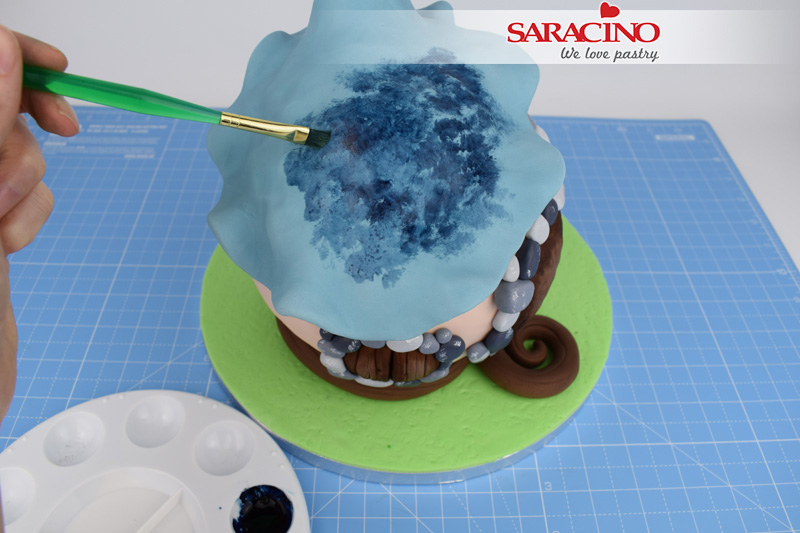
Step 21
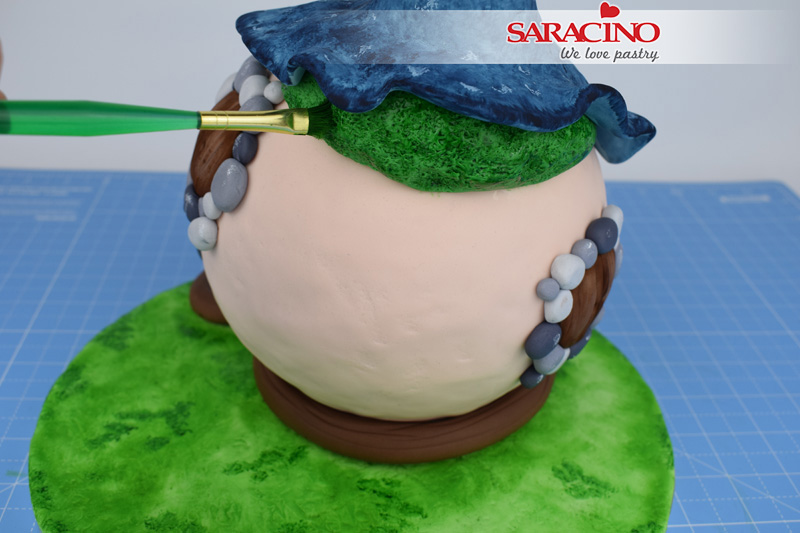
Mix 3 drops of blue Saracino gel colour, 1 drop of black Saracino gel colour with a teaspoon of clear alcohol. Use a flat paintbrush to dab the colour unevenly across the surface of the roof as shown.
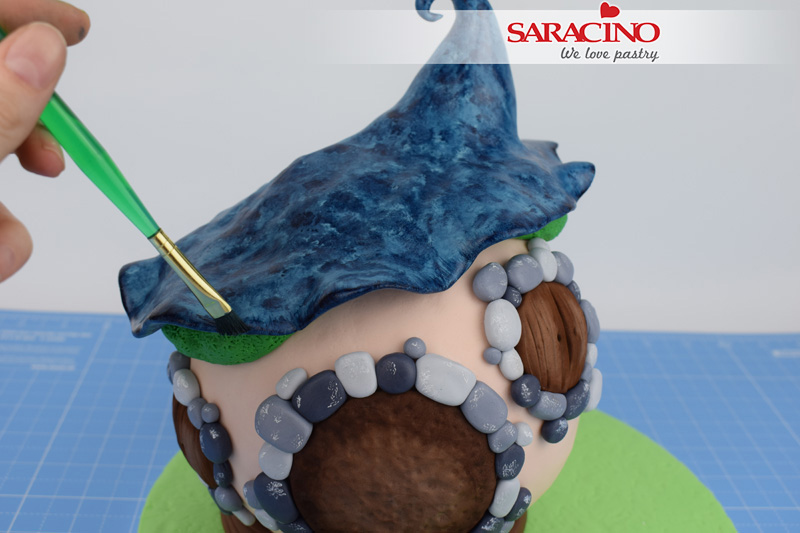
Step 22
Once the whole roof is painted unevenly (including where the roof is visible underneath) Shade around the edge of the roof with more paint to darken.
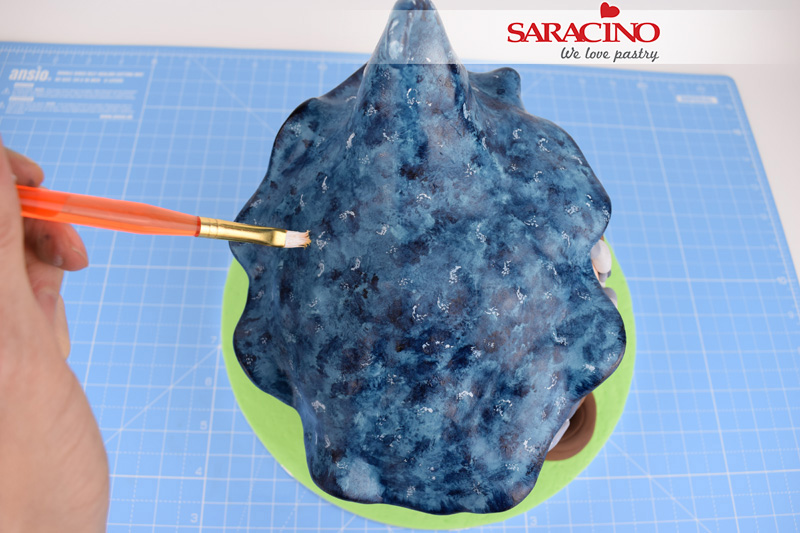
Step 23
Paint white highlights in the same way you painted the stones earlier on.
Step 24
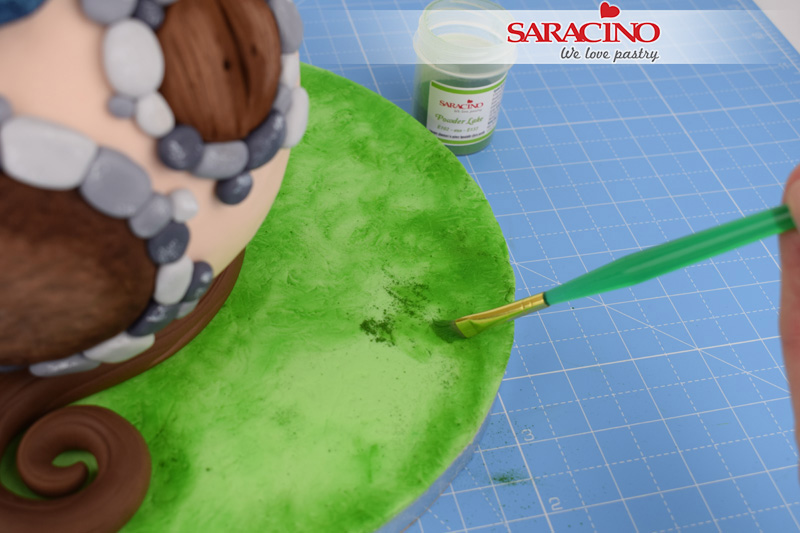
Take a small amount of Saracino green powder and using a small flat paintbrush, carefully rub a little dust at a time around the surface of the board, creating an uneven pattern
Step 25
Repeat the process on the board, only this time add a couple of drops of water to the green dust to darken and create a paint.
Step 26
Use the dark green paint to shade each section of moss under the roof.

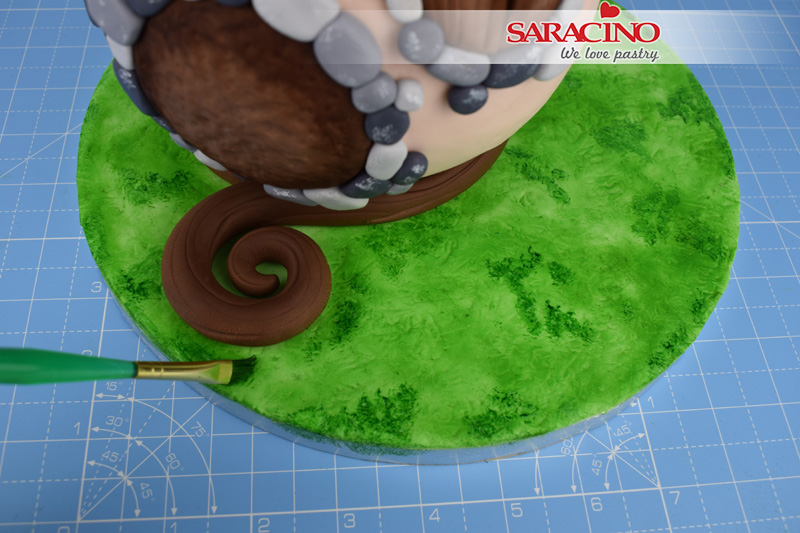
Step 27
Add white highlights to the grass using the paint from earlier
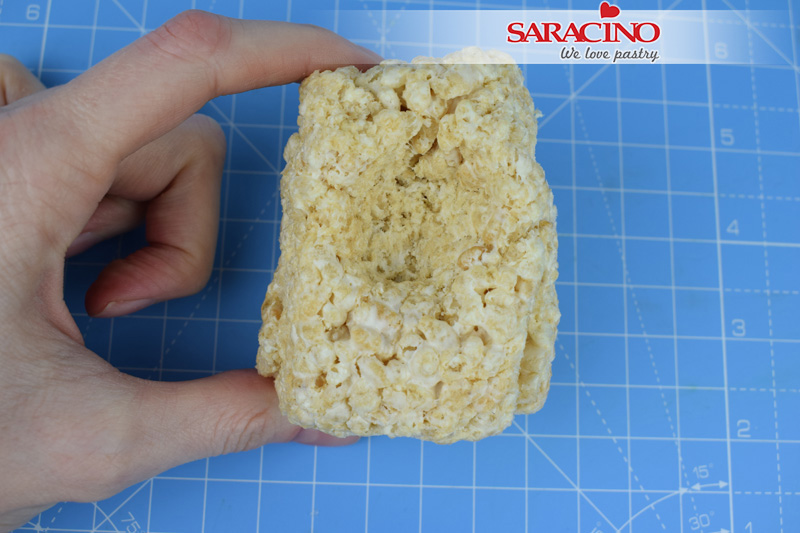
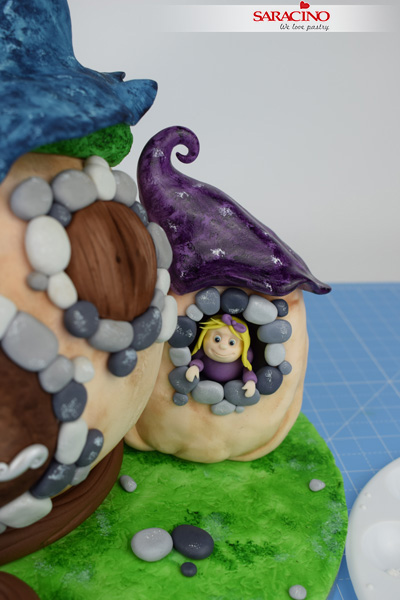
Step 28
Small house – Roll 60g of rice crispy treats into a rough cylinder shape. Use your thumb and fingers to gently push in and shape the window, (where the fairy will sit later) as shown.
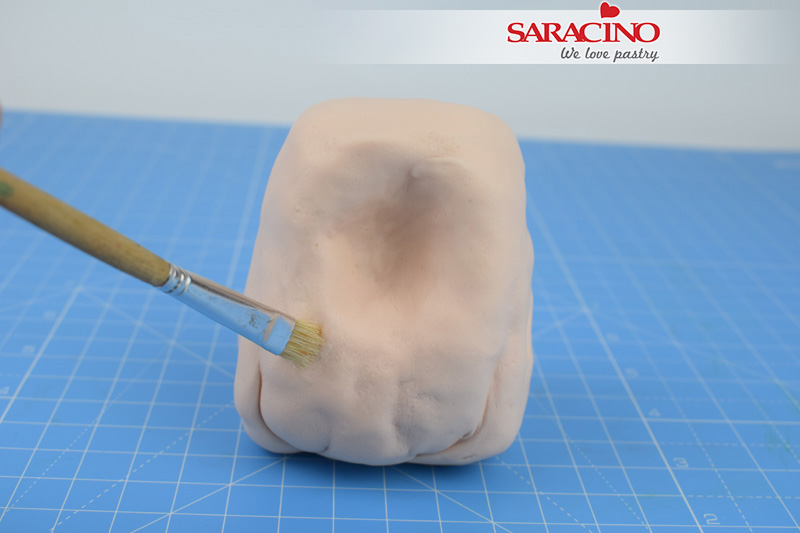
Step 29
Roll out 150g of cream Saracino top paste to a thickness of around 5mm. Carefully lift the paste and cover the rice crispy house. Gather any excess paste underneath and trim off with a sharp knife. It doesn’t need to be perfect or smooth, lumps and bumps will add to the character of the house. Texture the surface in the same way you did for the first house in step 3.
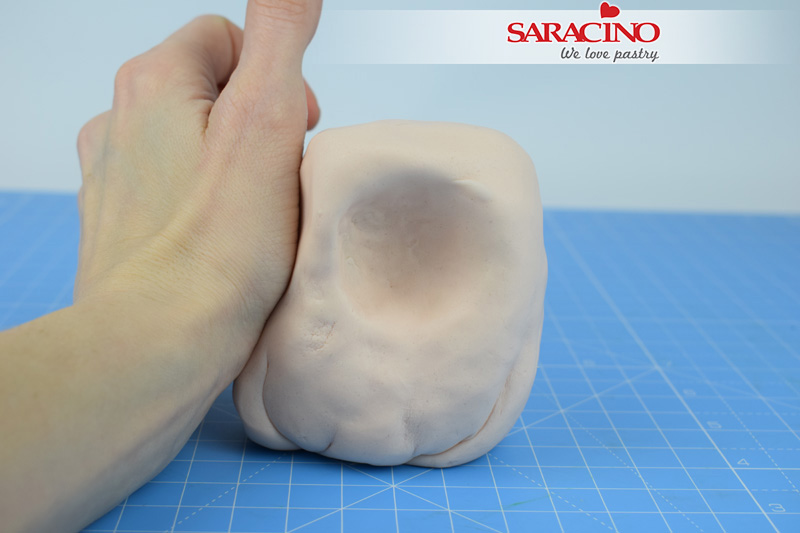
Step 30
Use the side of your hand to gently press the left side of the house and shape to a curve. This will ensure it fits snuggly to the main house.
Step 31
Stick the small house onto the larger house and board with a small amount of water. Shade and colour both houses using a flat paintbrush and a small amount of Saracino brown dust.
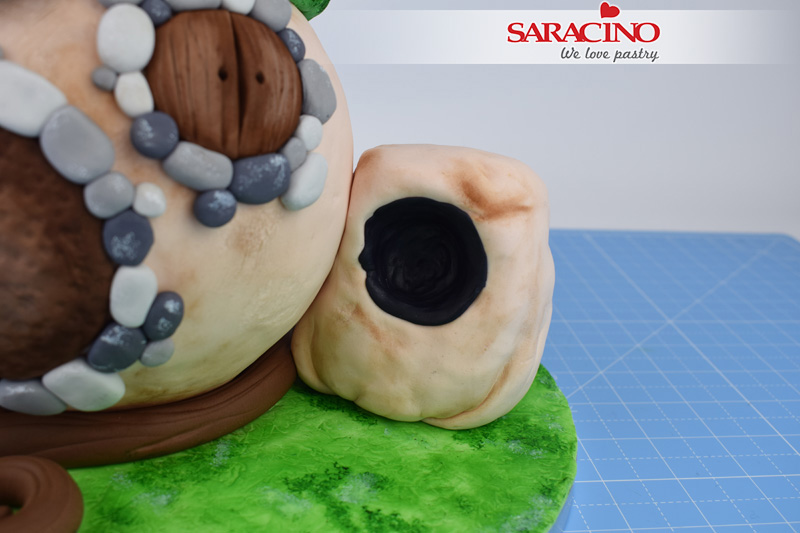
Step 32
Roll out 5g of black modelling paste into a circle. Stick into place on the back of the open window on the small house as shown
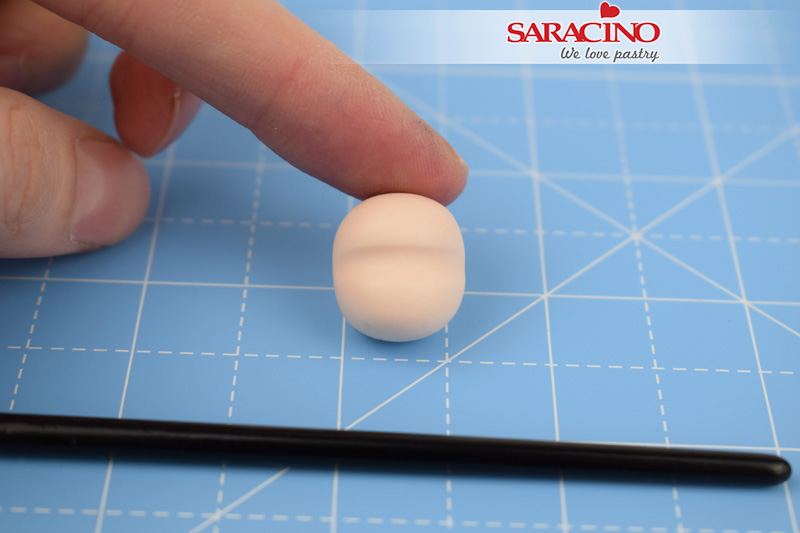
Step 33
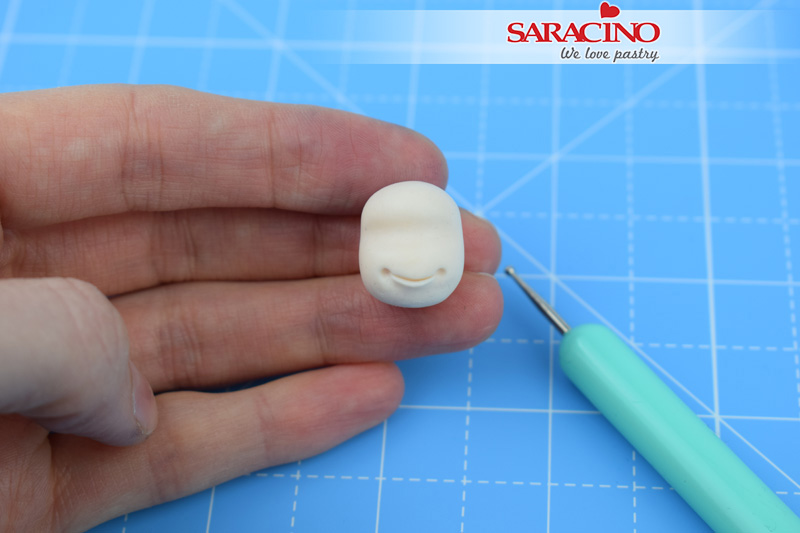
Fairy head – Take 3g of flesh coloured modelling paste, roll into a small ball. Gently press the handle of a paintbrush into the paste to create a shallow groove just above the middle of the face as shown.
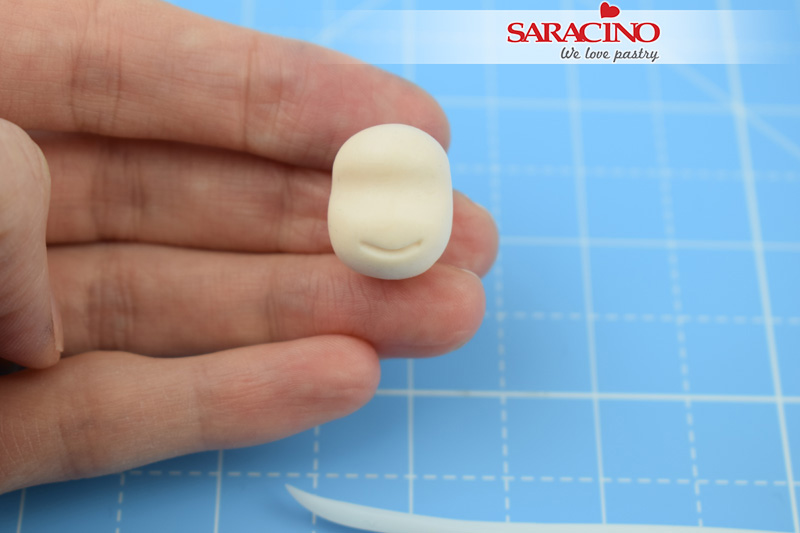
Step 34
Use the veining end of the Dresden tool to carefully mark the mouth.
Step 35
Rub the smoothing end of the Dresden tool (Cerart 301) under the mouth to shape the bottom lip. Use the small end of the balling tool (Cerart 502) to indent each corner of the mouth as shown.
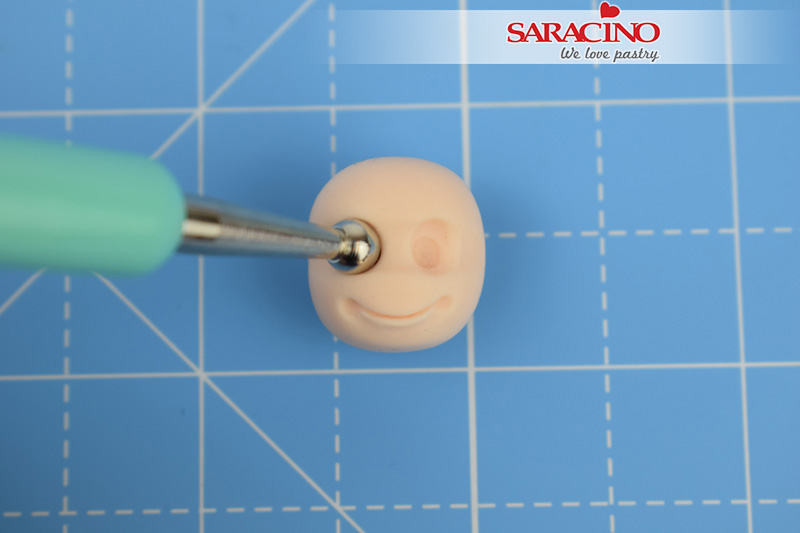
Step 36
To shape the eyes – First use the largest end of the balling tool (Cerart 501) to indent the paste.
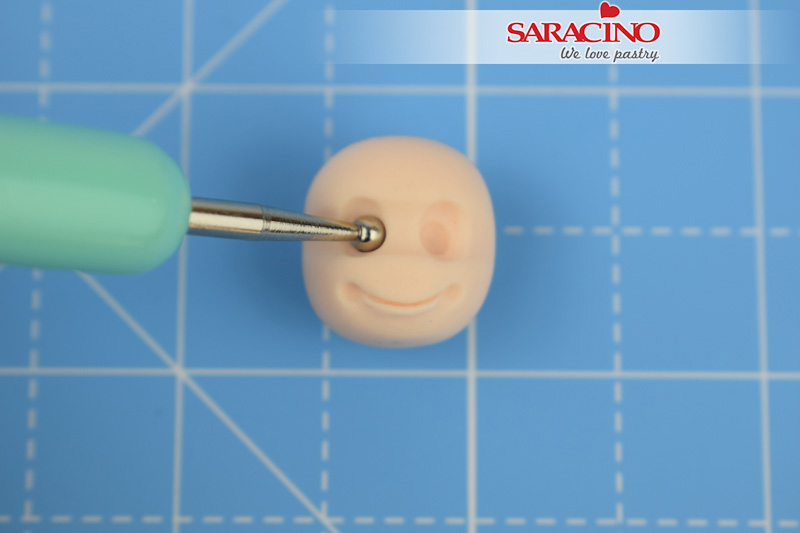
Step 37
Then using the smallest end of the balling tool (Cerart 501) create a smaller indent within the larger one you made previously. Repeat for each eye. TIP: Use a small paintbrush to make lifting and positioning small elements such as the iris and pupil into place easier.
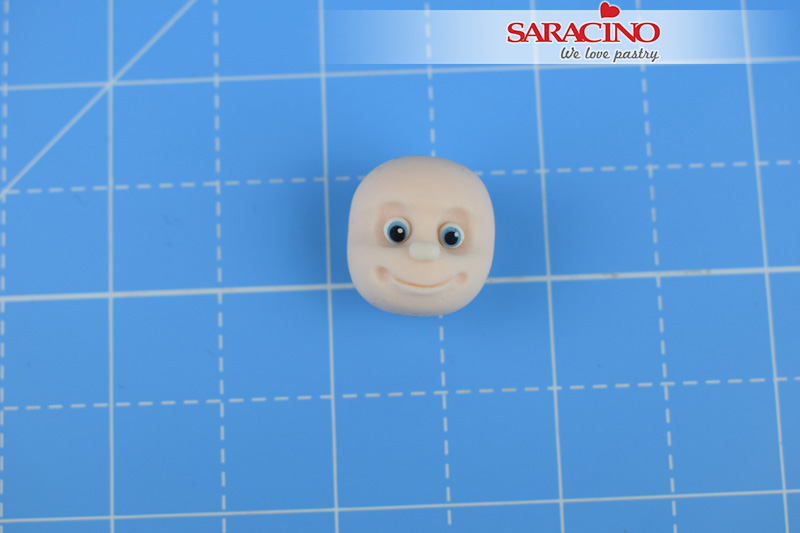
Step 38
Eyes – Roll two tiny balls of white paste and stick them into place using a tiny amount of water. Roll two tiny balls of blue paste, two smaller balls of black paste and two even smaller balls of white paste. Flatten each one gently with your fingertip. Stick them into place on the whites of the eyes, blue first, followed by black and finally the white. Roll a tiny ball of flesh coloured paste for the nose and stick into place as shown.
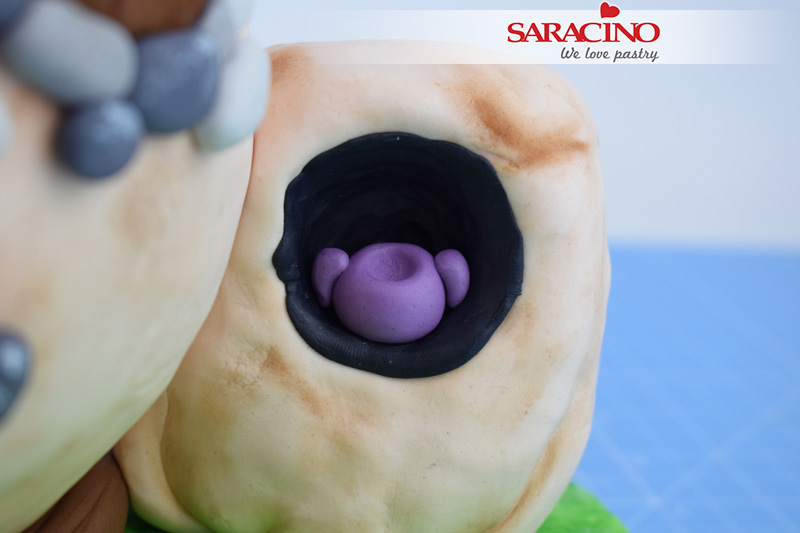
Step 39
Body – Roll 2g of purple paste into a ball and stick into the open window. Use the large end of the balling tool (Cerart K500) to gently indent the top of the paste ready for the head. Take 1g of purple modelling paste and divide equally in half. Role each piece into a small teardrop and stick into place each side of the body (widest end at the top)
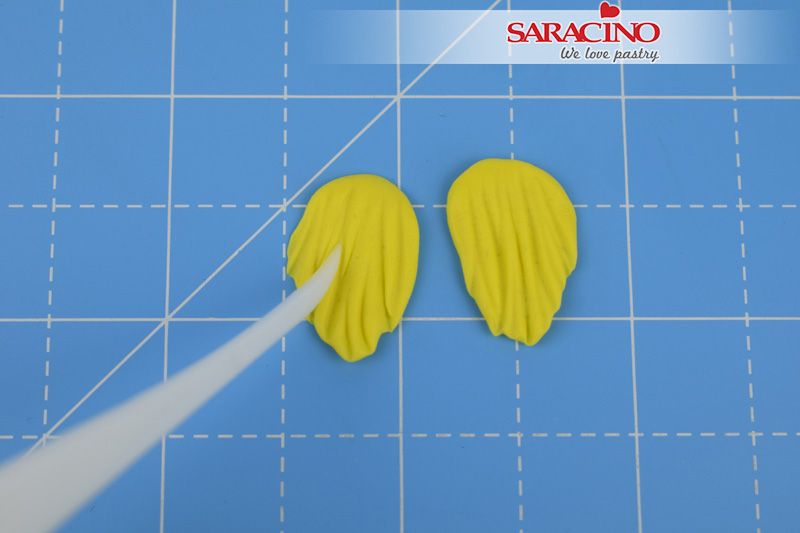
Step 40
Hair – Take 1g of yellow modelling paste, divide equally in half. Roll each piece into a teardrop and flatten with your fingertip. Use the veining end of the Dresden tool (Cerart 301) to gently mark grooves and texture the hair as shown.
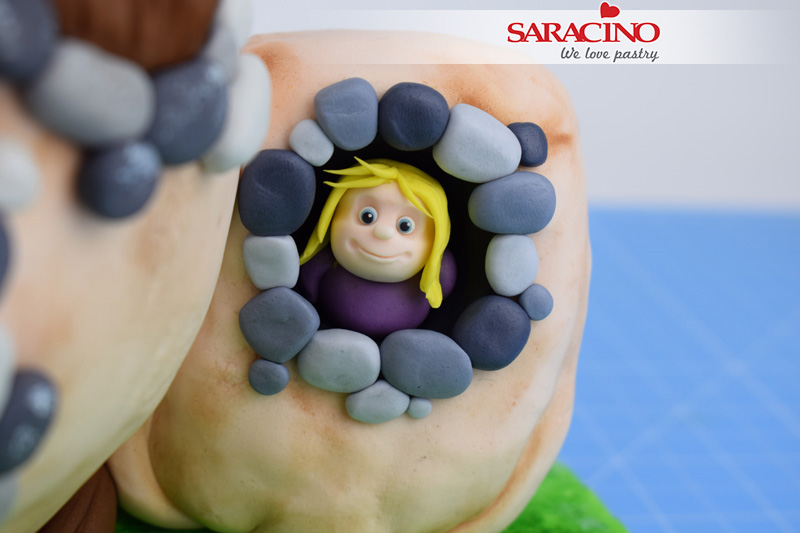
Step 41
Stick the head and hair into place as shown. Roll 4 tiny strands of yellow paste for the fringe and stick into place also. Make and stick into place stones around the outside edge of the window with some of the remaining grey paste. (remember to save 9g of light grey paste for later)
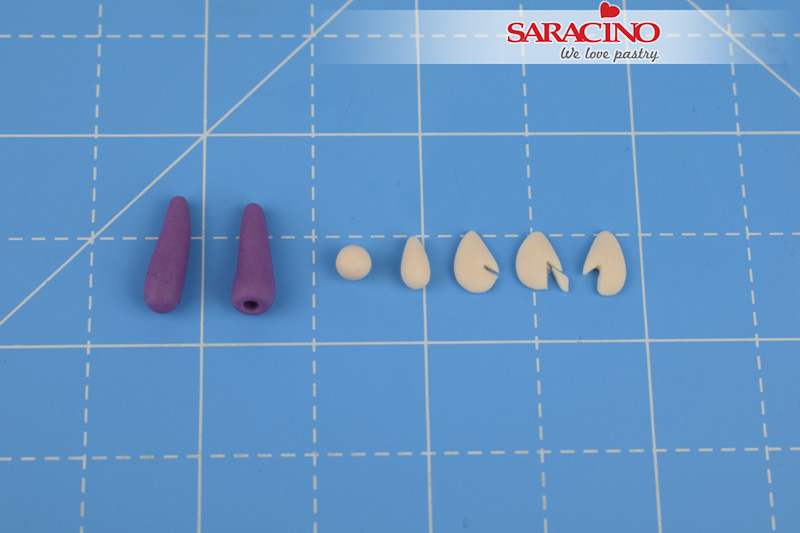
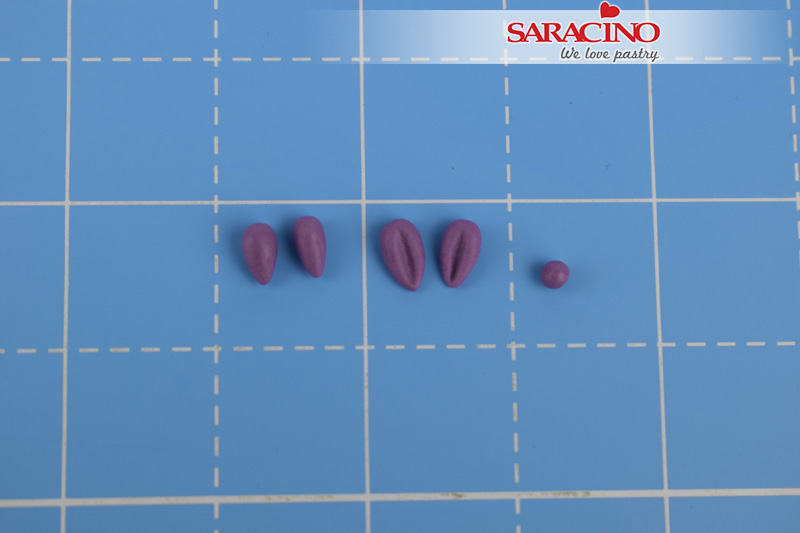
Step 42
Arms – Take 2g of purple modelling paste and divide equally into two. Roll each piece into an elongated teardrop. Use the small balling tool (Cerart K502) to gently indent a hole into the widest end of each arm. Hands – Roll two tiny balls of flesh modelling paste into teardrops. Flatten each gently with your fingertip. Use a sharp knife to cut out the thumb on each hand. Smooth any knife marks with your fingertip. TIP: Remember when cutting the hands to cut thumbs on the opposite sides to ensure you end up with a left and right hand.
Step 43
Attach the arms to the side of the body. Apply a tiny amount of water to the hole at the end of each arm and attach the hands. Curl the hands over gently to ‘hold’ the window frame.
Step 44
Bow – Roll two tiny teardrops of purple modelling paste and one tiny ball. Use the veining end of the Dresden tool (Cerart 301) to mark a grove in each teardrop.

Step 45
Stick two teardrops to the top of the head (pointed ends touching each other) and then stick the tiny ball in the centre to create and finish the bow.
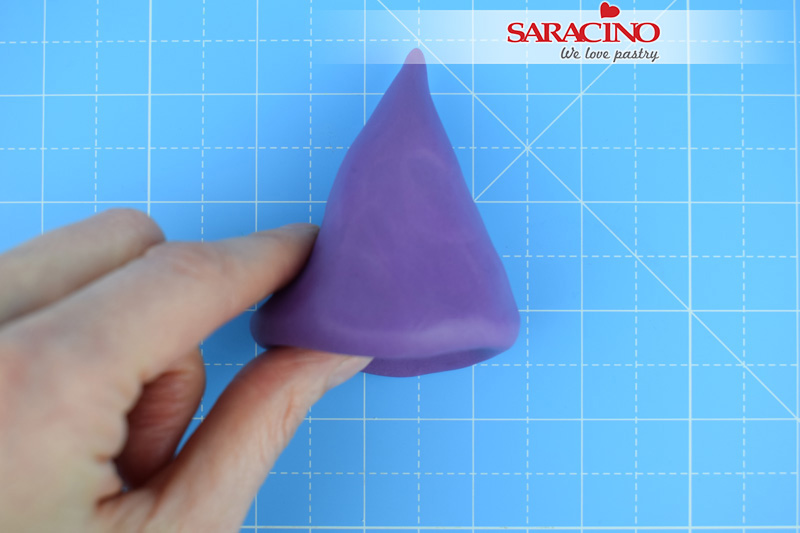
Step 46
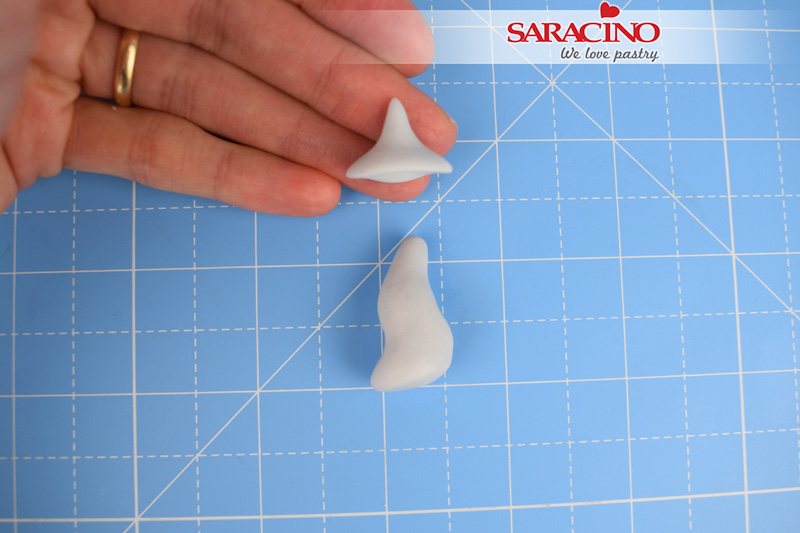
Small roof – Roll 70g of purple modelling paste into a teardrop shape and pinch around the base to widen and thin the paste.
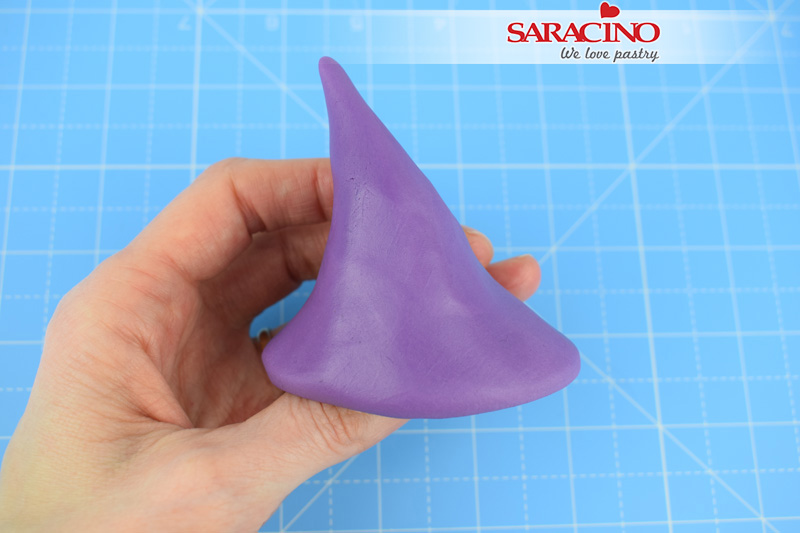
Step 47
Continue to pinch and smooth until the paste is big enough to cover the roof.
Step 48
Curl the top of the roof over and stick into place. Shape and thin around the edge of the roof. Decorate the board with any additional stones.
Step 49
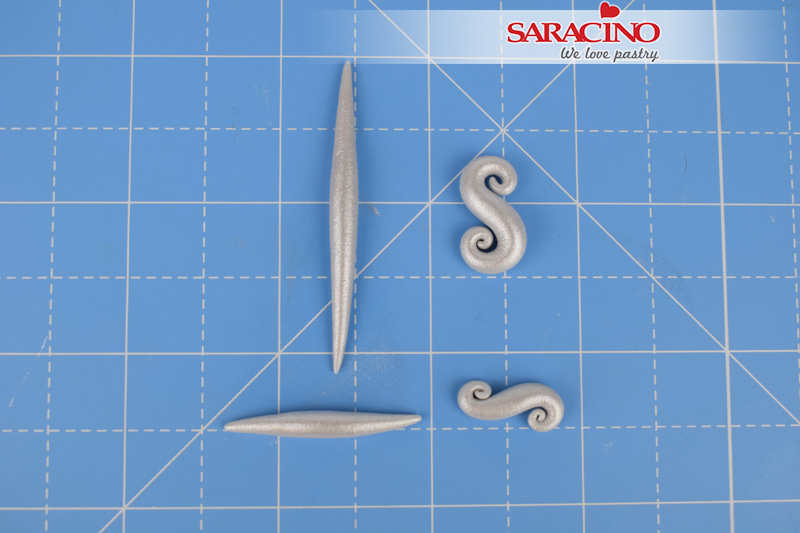
Chimney – Roll 5g of light grey modelling paste into a sausage tapered at one end, bend the paste gently into the shape shown. Roll 1g of light grey modelling paste into a teardrop. Pinch and thin the bottom of the paste, like you did for the roof to create the chimney top.
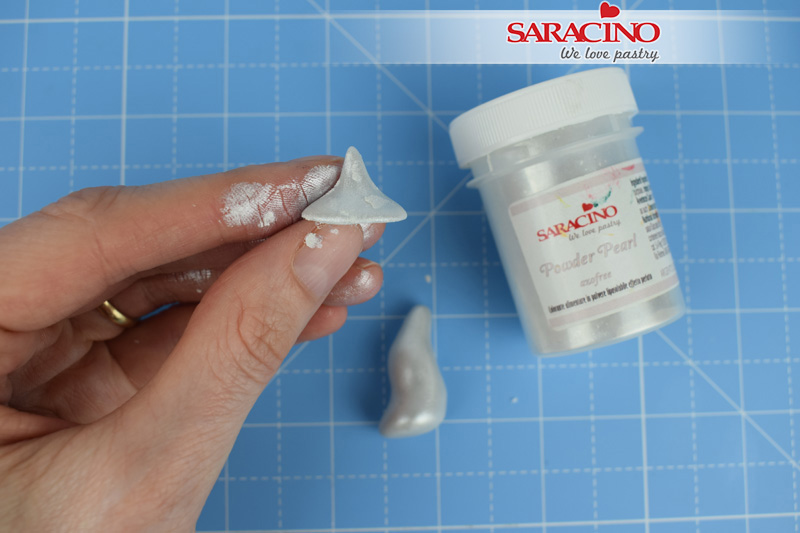
Step 50
Dust the chimney pieces by rubbing a small amount of the Saracino Powder Pearl, sliver lustre, onto each piece with your fingertips.
Step 51
Door fixtures – Take 2g of light grey modelling paste and roll into a long sausage tapered at each end, dust with sliver lustre and curl over each end to create the large S shape. Repeat with 1g of grey modelling paste to create the smaller S shape
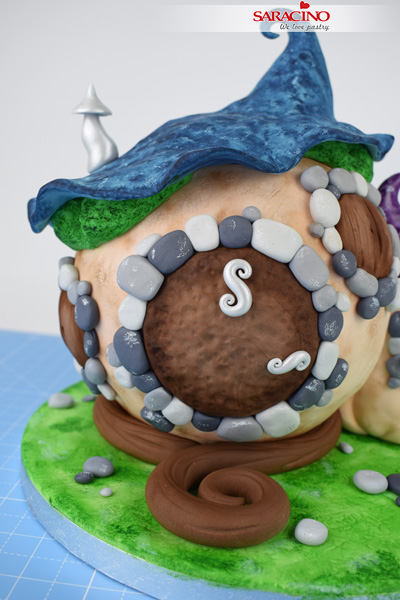
Step 52
Stick the chimney onto the roof as shown. Stick the large S to the top of the door and the smaller S as a handle on the right-hand edge of the door as shown.
Step 53
Mix 2 drops of Saracino purple gel colour with a small amount of clear alcohol and paint the smaller roof the same as you did in steps 21 and 22 for the larger roof. Highlight the roof and stones on the board again with white paint as before.
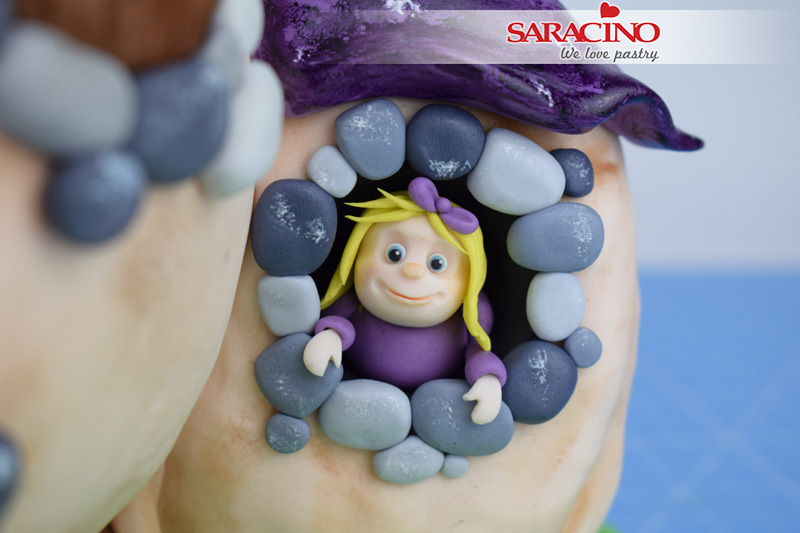
Step 54
Face – Mix one drop of Saracino skin gel colour with two drops of clear alcohol. Use a small paintbrush to paint the nose, bottom lip and cheeks of the fairy.

Step 55
Grass – Take 2g of dark green modelling paste and roll several tiny strands of paste. Group them together and stick randomly across the board as shown.
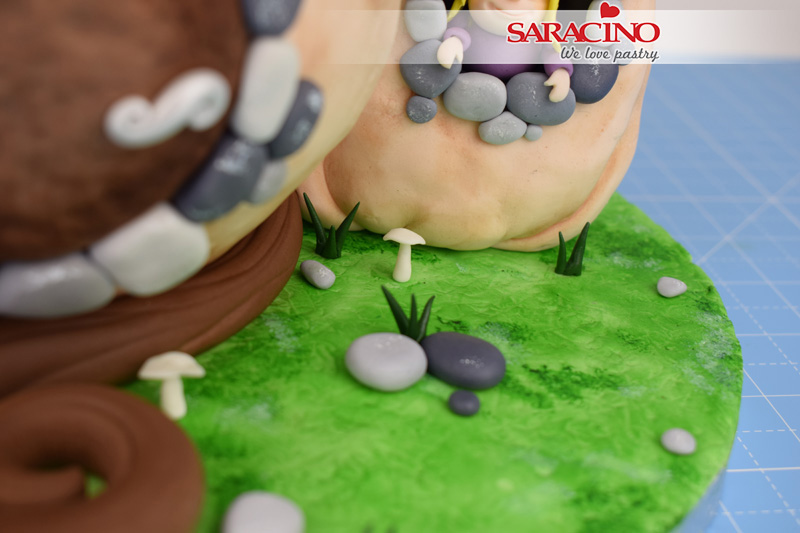
Step 56
Mushrooms – Use 1g of white modelling paste to create several mushrooms and stick randomly across the board as shown. The stem of each mushroom is made from a teardrop and the top of each mushroom is made from a tiny ball flattened with your fingertip.
Step 57
Finish by covering the edge of the board with a length of green ribbon.
