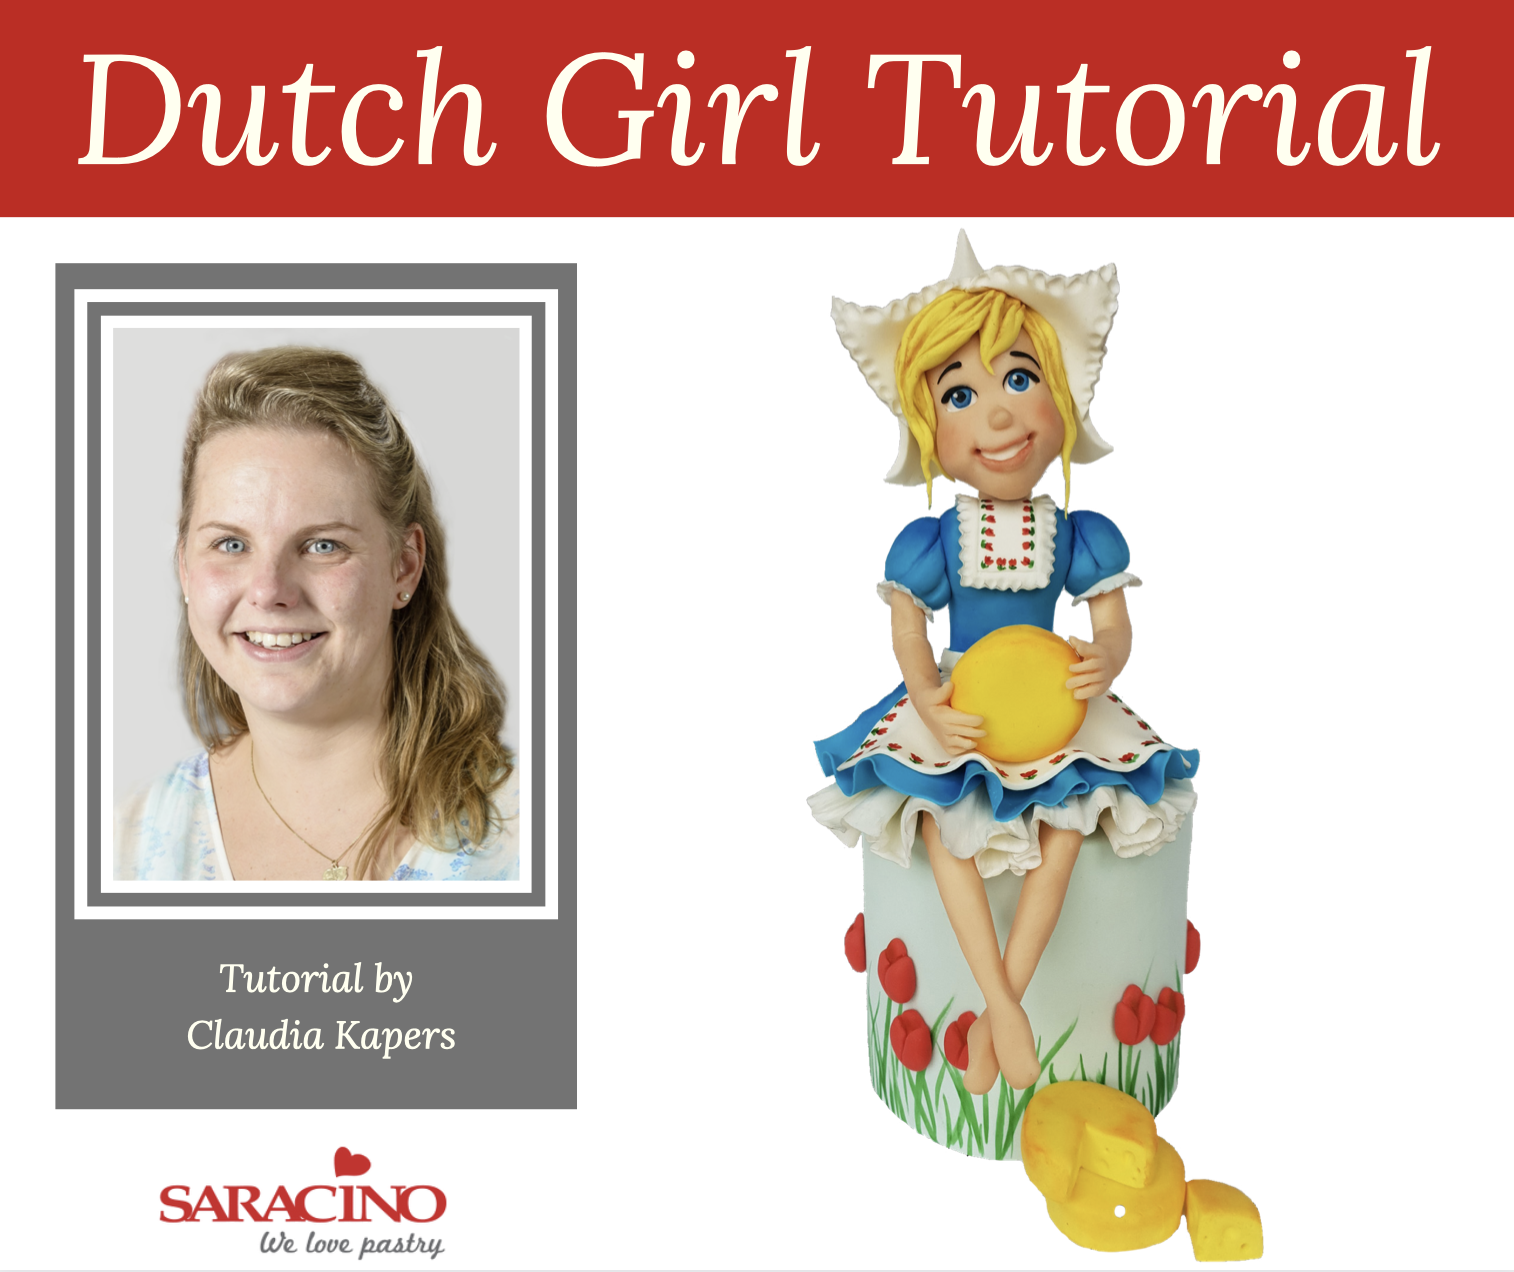

You will need:
- Saracino modelling paste white
- Saracino modelling paste skin tone
- Saracino modelling paste black
- Saracino modelling paste red (optional)
- Saracino powder colours Orange, Blue, Light Blue, Red, Green and Black
- Small rolling pin
- Circle cutter
- Frill tool
- Ball tool
- Dresden tool
- Silicone modelling tools
- Small paintbrushes
- Exacto knife
- Edible glue
- Clear alcohol
- Skewers or uncooked spagetti
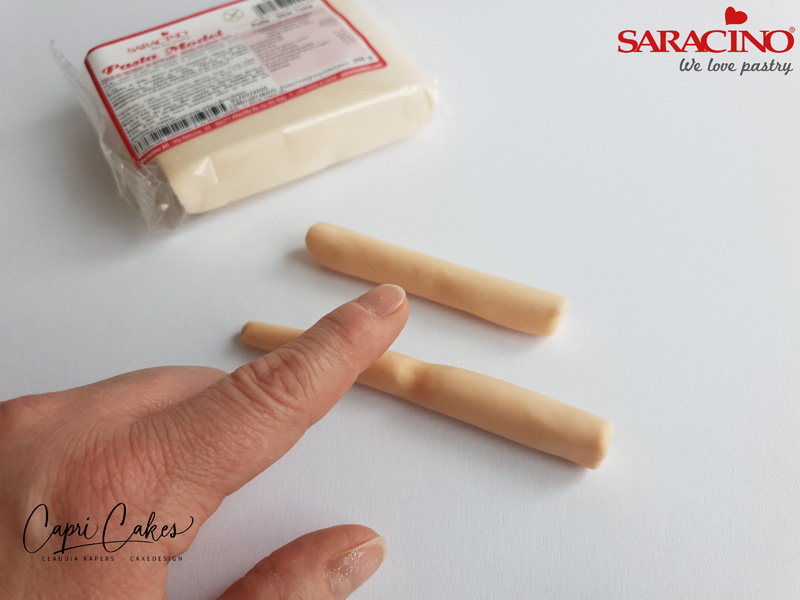
Step 1
For the legs take two lengths of skin tone modelling paste (about 10cm each). Roll the knee cavity in the middle with your finger.
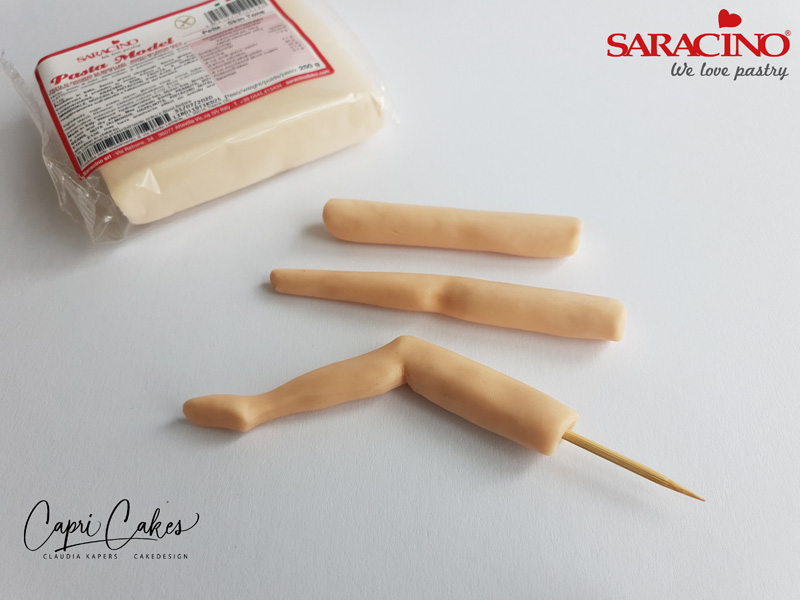
Step 2
Model the foot and bend the leg at the knee. Put a skewer in the top of the leg.
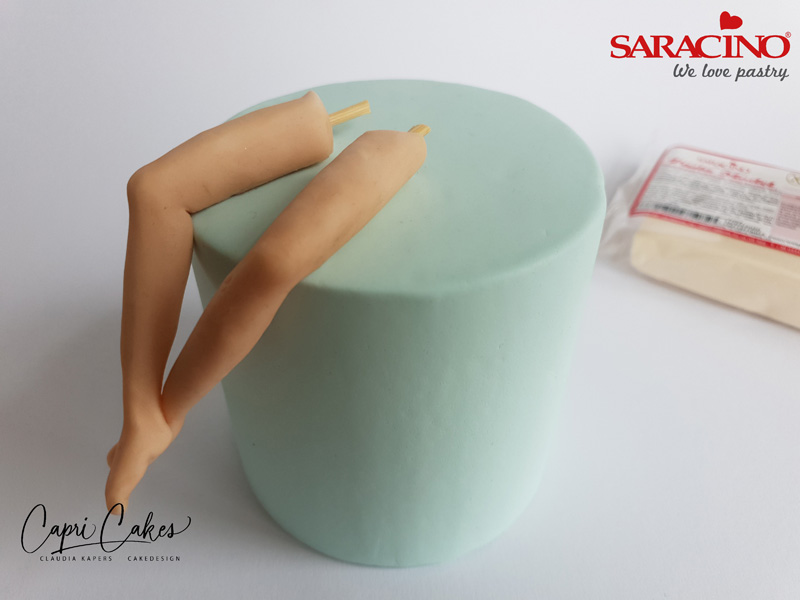
Step 3
Place the legs on a surface. Cross the feet.
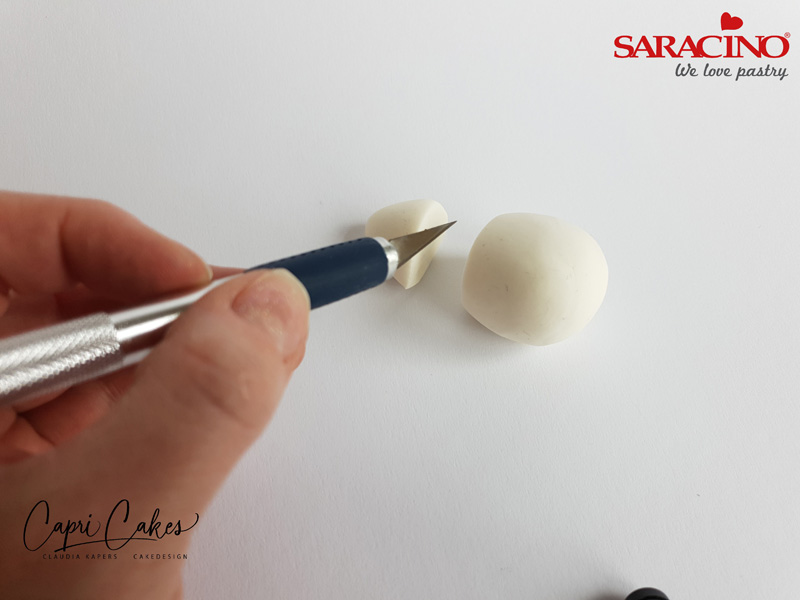
Step 4
Form a 3cm ball of white modelling paste and cut the top off with a knife.
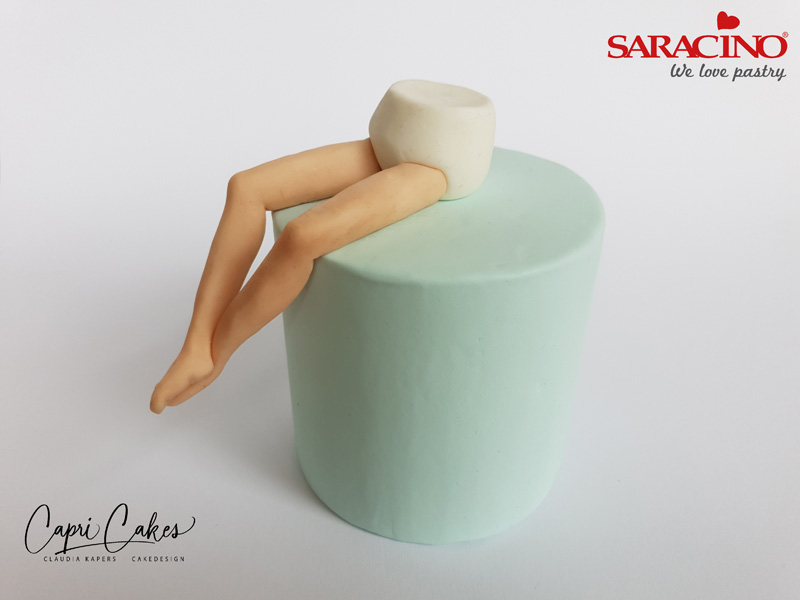
Step 5
Attach to the legs with the flat side up.

Step 6
Thinly roll out white modelling paste approximately 30cm long x 6cm wide. Frill with the veining tool.
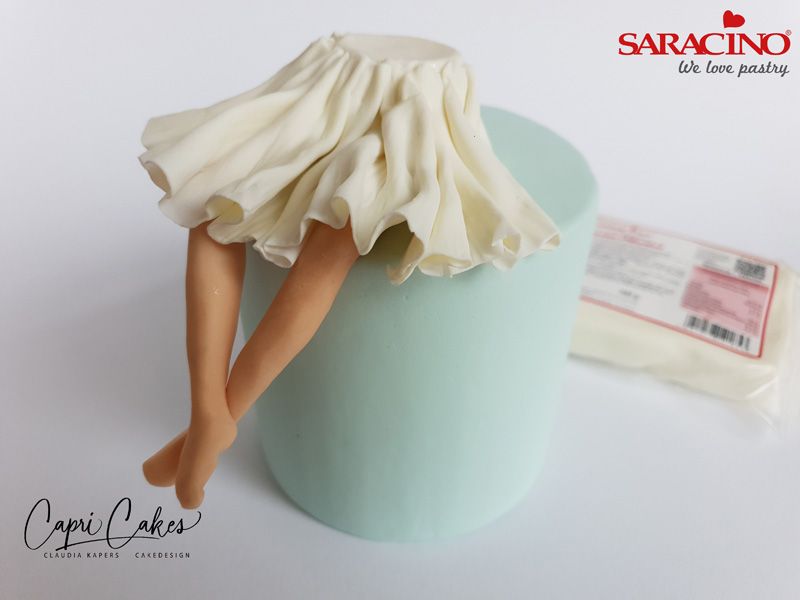
Step 7
Attach to the lower body
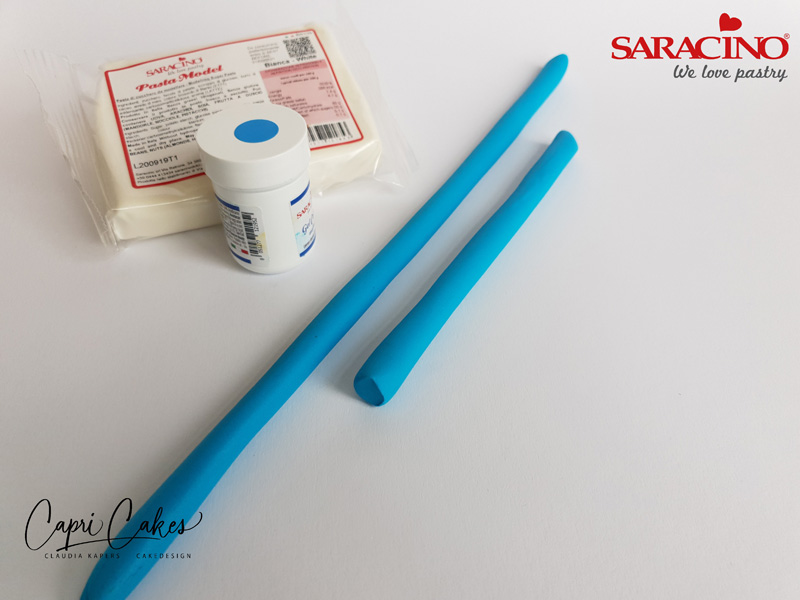
Step 8
Roll out two lengths of blue modelling paste. 30cm and 15cm.
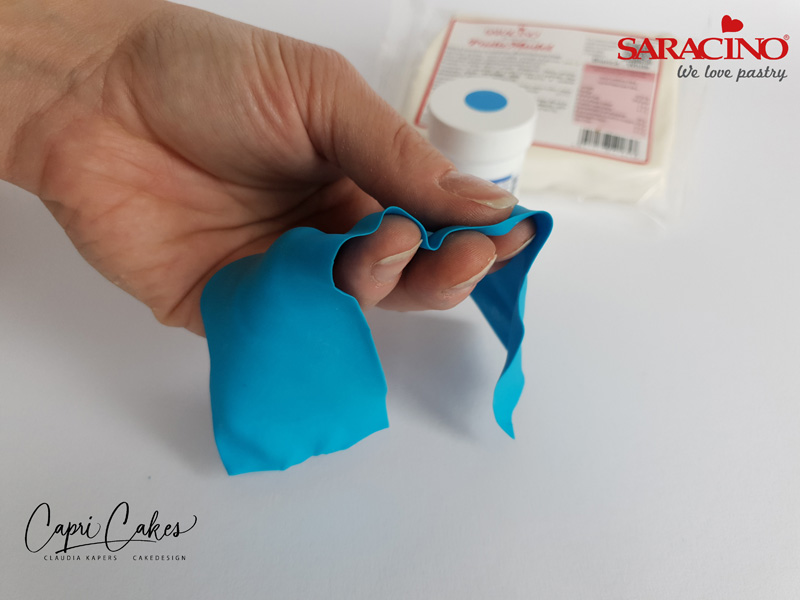
Step 9
Roll this wafer thin to a width of approximately 5cm.
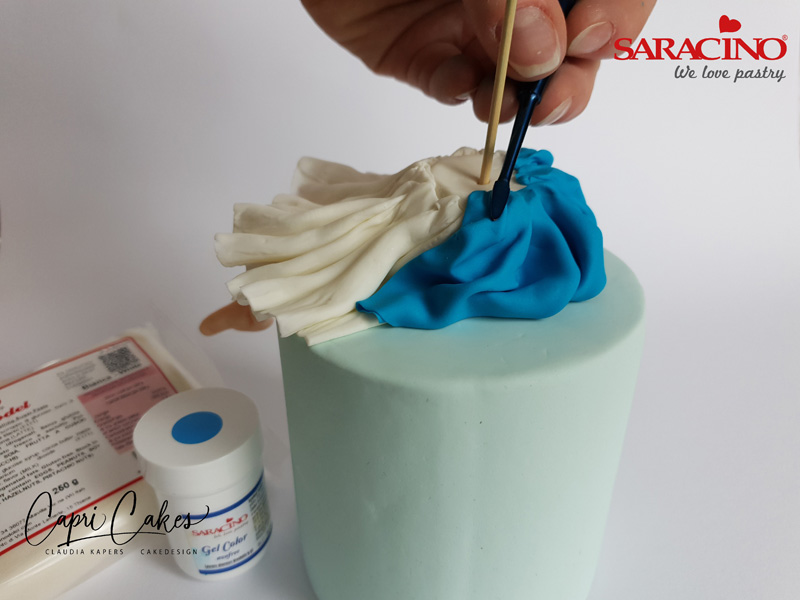
Step 10
Insert a skewer in the middle of the body. Attach the shorter 15cm strip of blue modelling paste to the back. Make folds.
Step 11
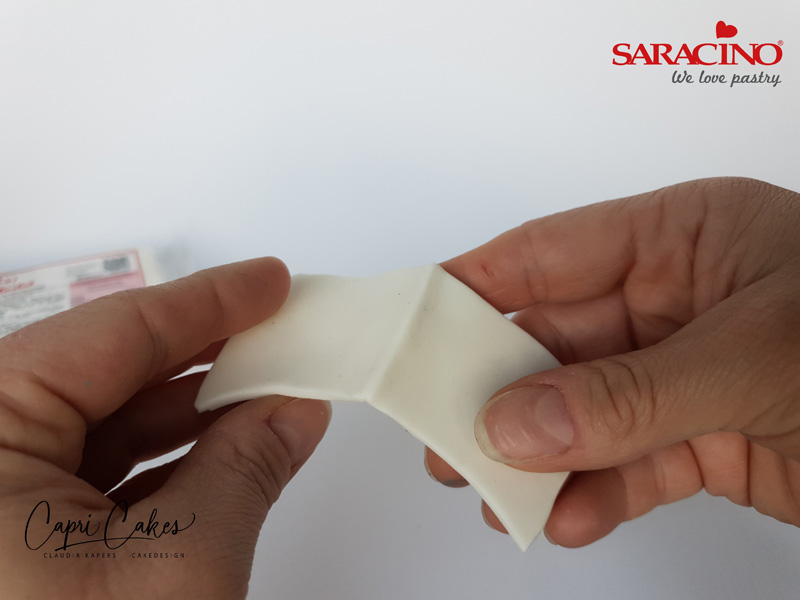
Attach the 30cm length of rolled out blue paste to the front and make folds here too.
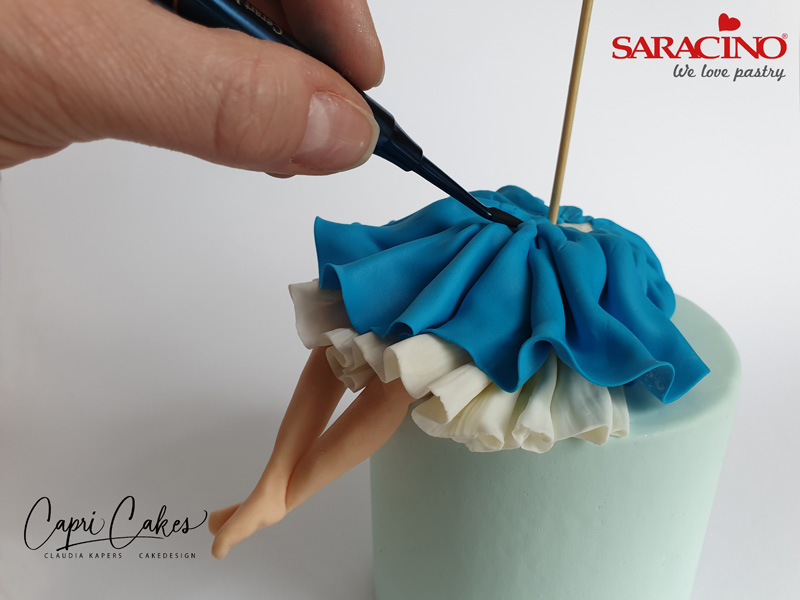
Step 12
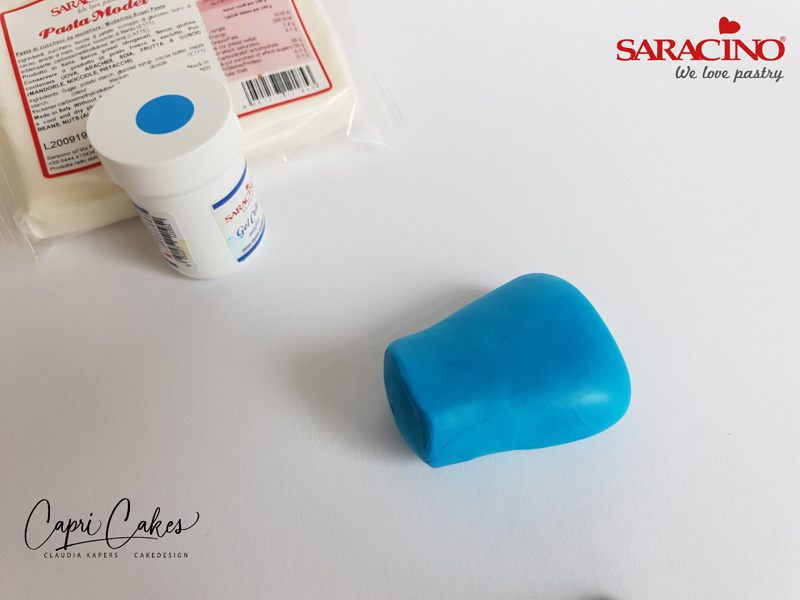
Form a ball of blue modelling paste and flatten slightly to form a torso. The piece needs to be approximately 5cm high.
Step 13
Attach the Torso to the lower body.
Step 14
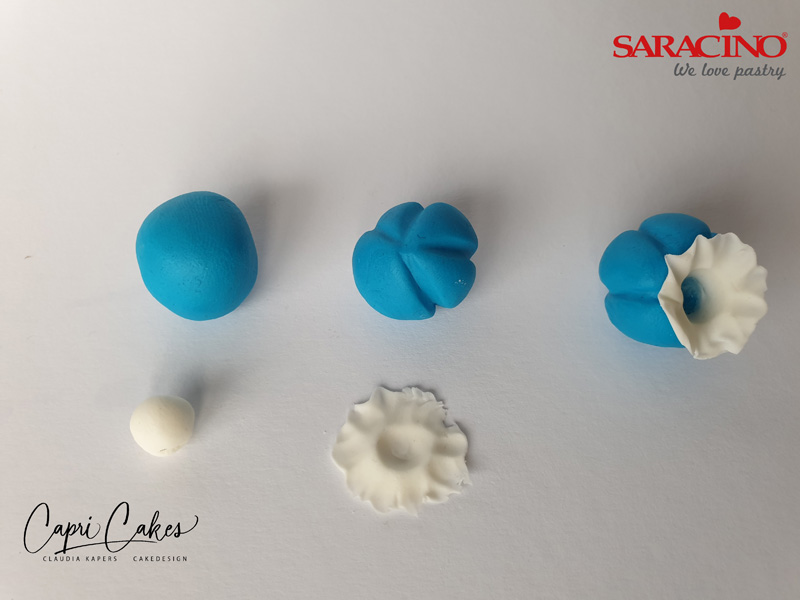
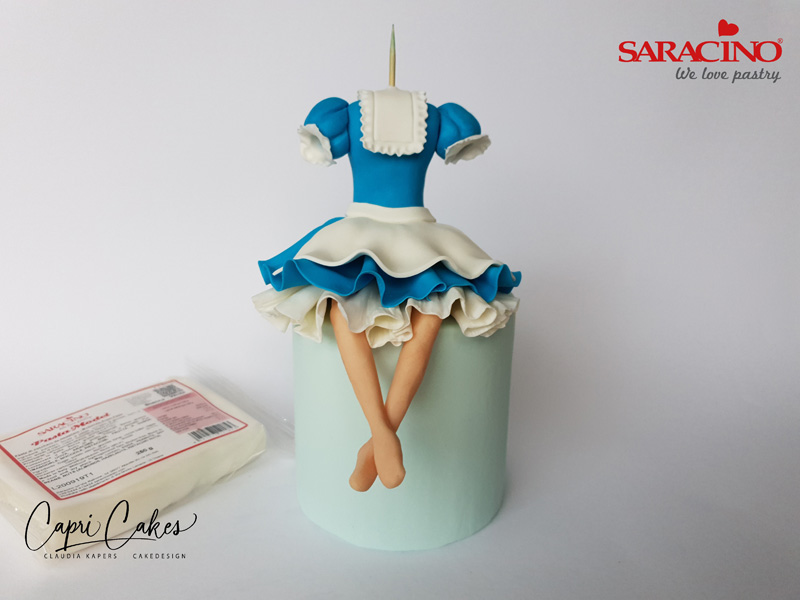
Form two 2cm balls of blue modelling paste. Press lines into the balls with the Dresden tool. Form two smaller balls of white modelling paste and press flat. Frill the edge with a ball tool to create a lace border. Press the white lace into the blue sleeve with the ball tool.
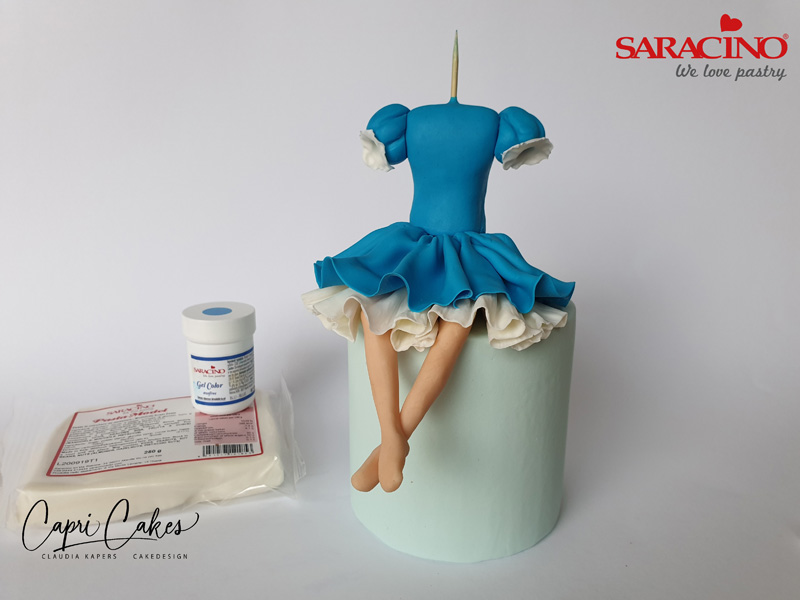
Step 15
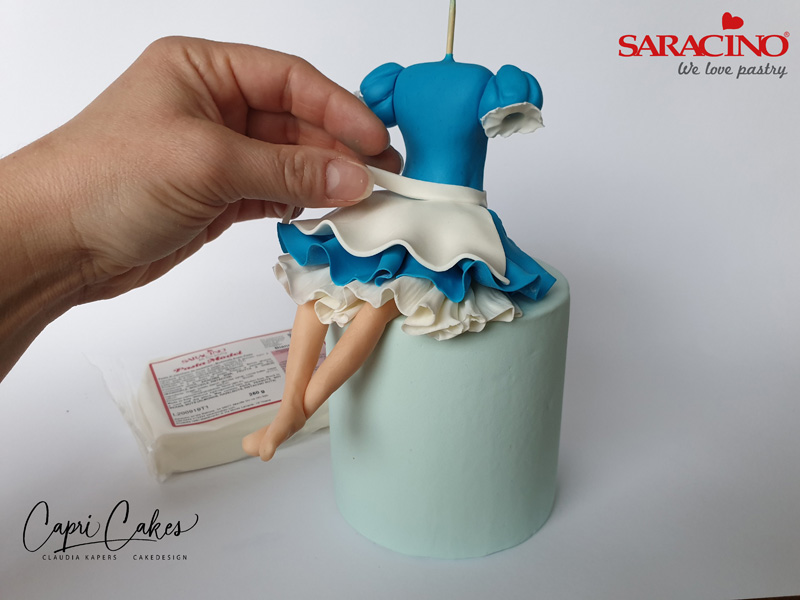
Attach the puff sleeves to the torso with edible glue
Step 16
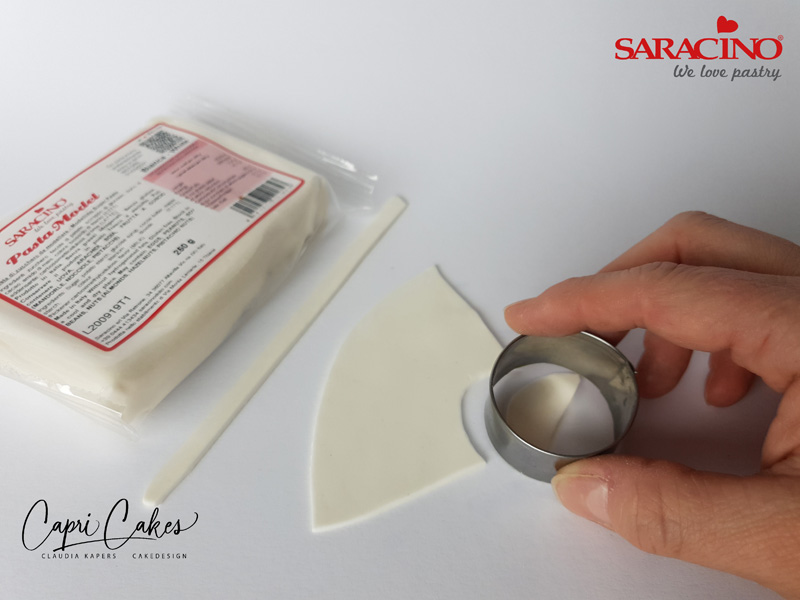
Cut out a triangular piece of thinly rolled white modelling paste for the apron. Using a round cutter remove the top of the triangle. From the rolled out white paste cut a thin strip 8mm wide for the belt of the apron.
Step 17
Attach the apron and thin strip to the torso.

Step 18
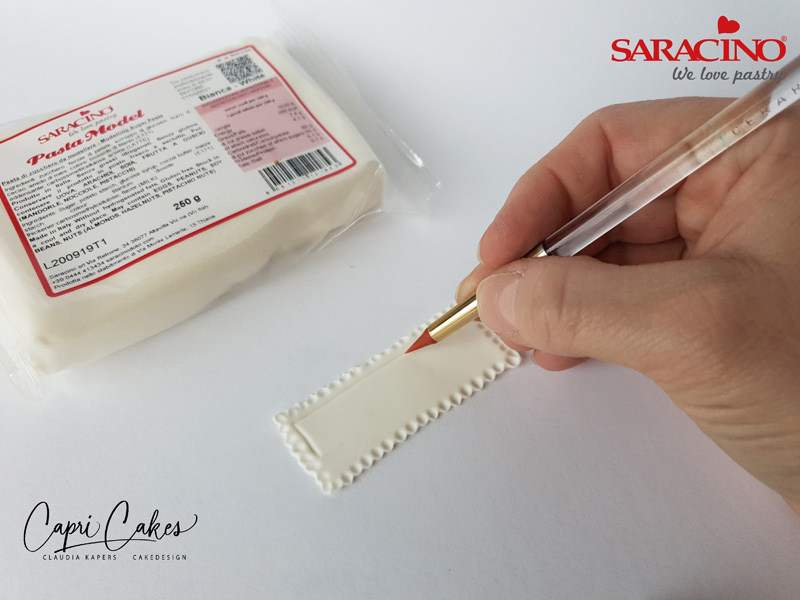
Using thinly rolled out white modelling paste cut out a 7cm long x 2.5cm wide rectangle. Make a patterned border with the ball tool.
Step 19
Draw a line around with the silicone modelling tool.
Step 20
Press in the middle of the skewer.

Step 21
For the cheese take a 1.5cm thick piece of yellow modelling paste and cut out a circle with the circle cutter. Dust with orange dust powder.

Step 22
Roll out skin tone modelling paste for the arms. You will need two at 6.5cm long. Press to form the wrist and hand shape. Cut out fingers to make the hand.

Step 23
Attach the arms in the puff sleeve with edible glue. Place the cheese on the apron between the hands.
Step 24
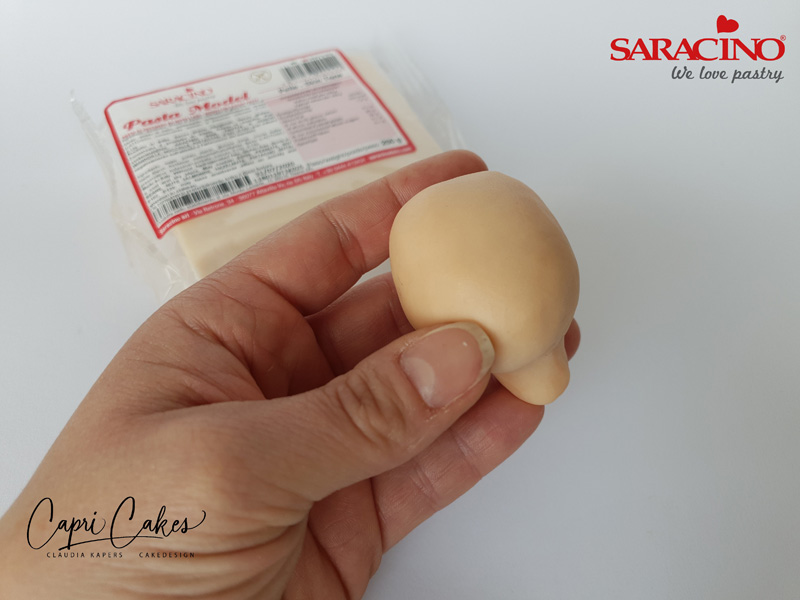
Roll a 4.5cm ball using skin tone modelling paste. Using your fingers form the neck.
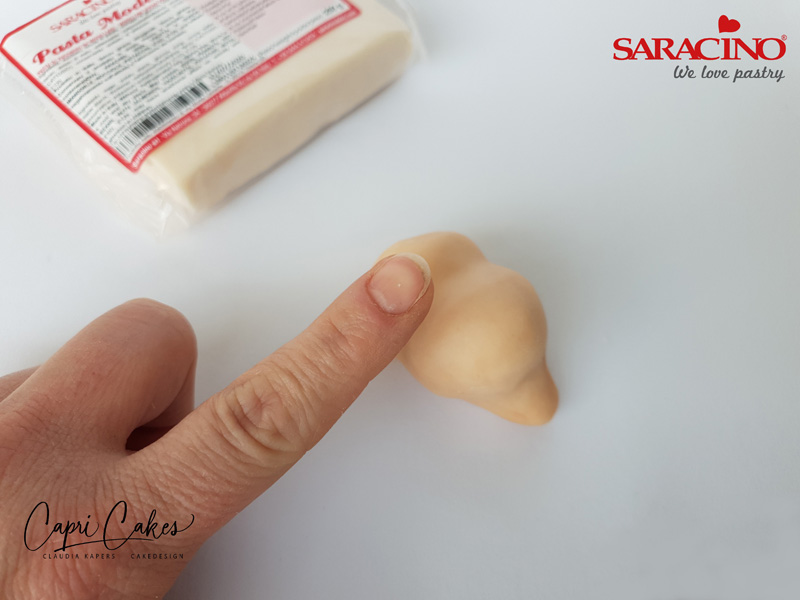
Step 25
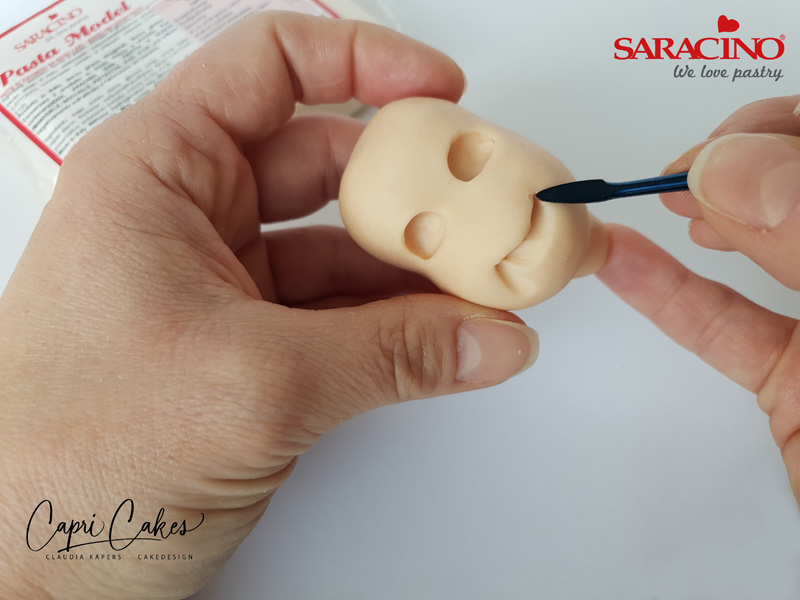
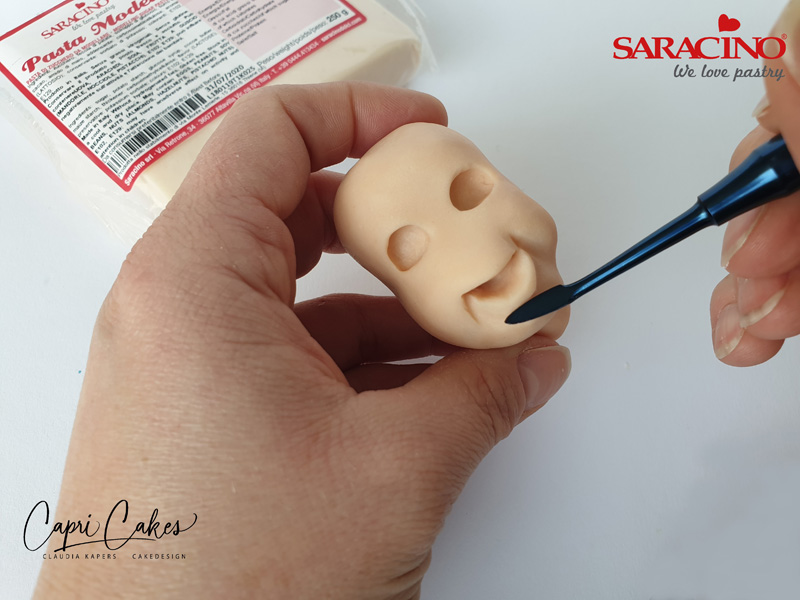
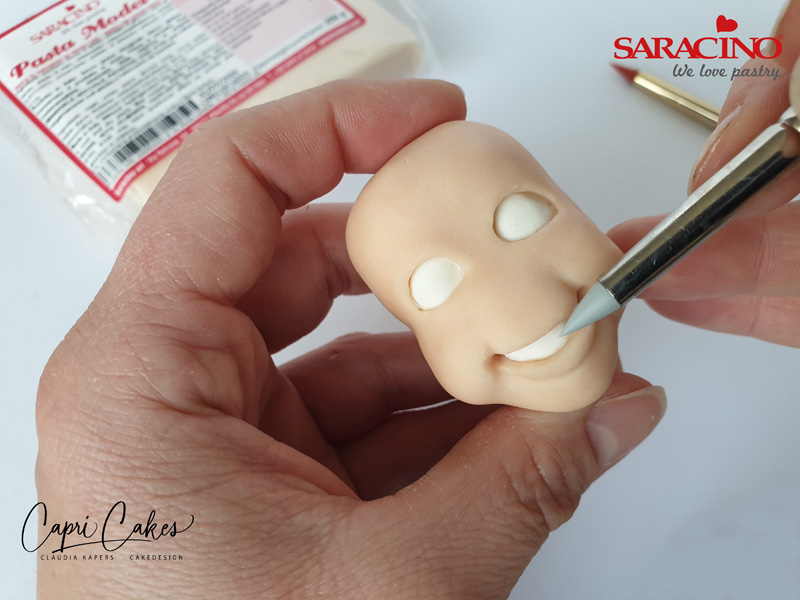
Flatten the centre of the ball slightly with your finger

Step 26
Make the eye recess with the ball tool
Step 27
Cut a 1.5cm slit for the mouth with a knife. Press with the Dresden tool from the corners of the mouth to form the chin.
Step 28
Make the lower lip
Step 29
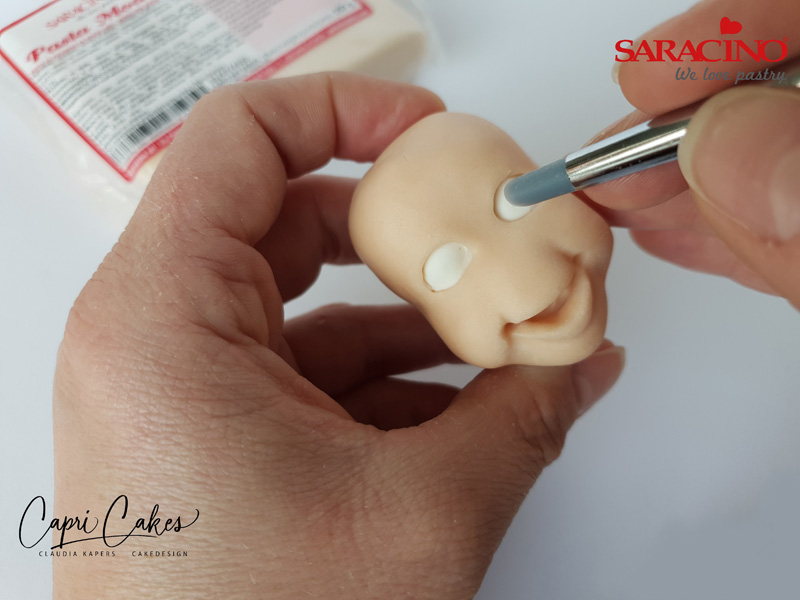
Take two 8mm balls of white modelling paste and press them into the eye sockets.
Step 30
For the teeth, make a small half moon shape of the white modelling paste and place it in the mouth. Smooth with the modelling tool.
Step 31
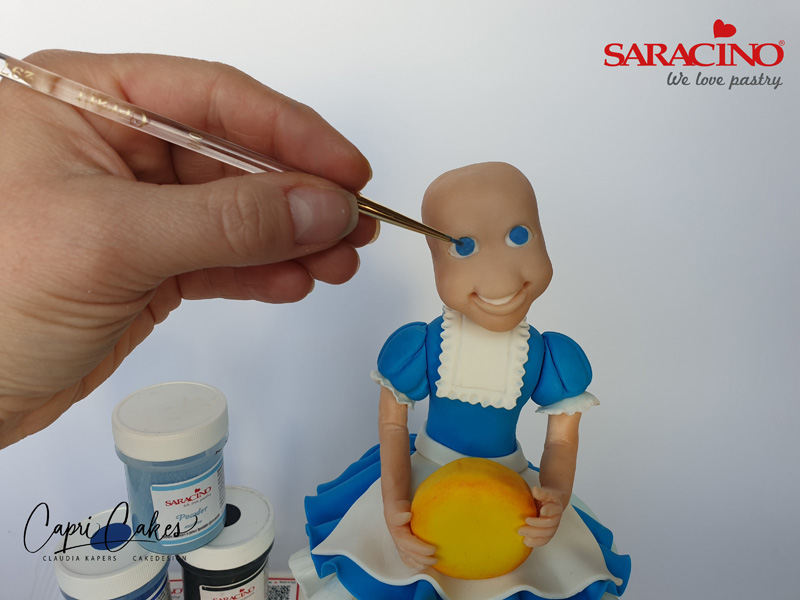
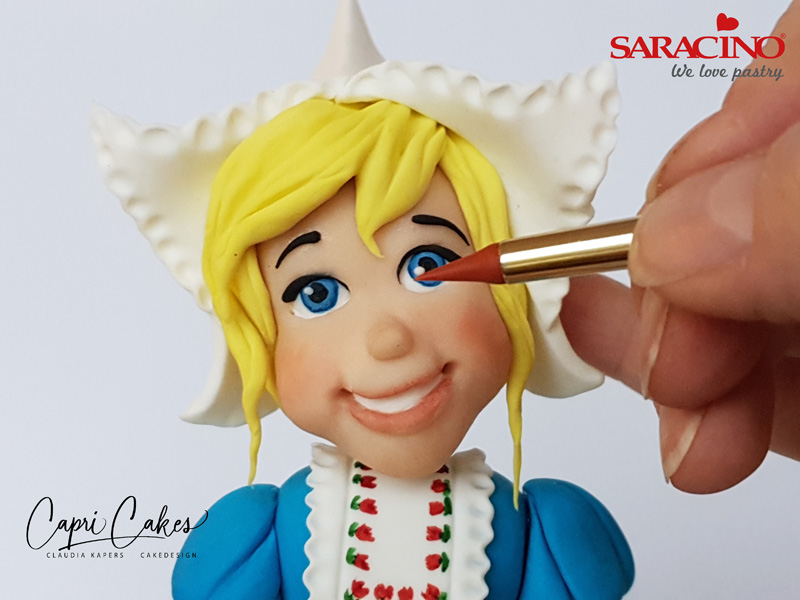
Mix blue dust powder with clear alcohol and paint the irises with a fine paintbrush.
Step 32
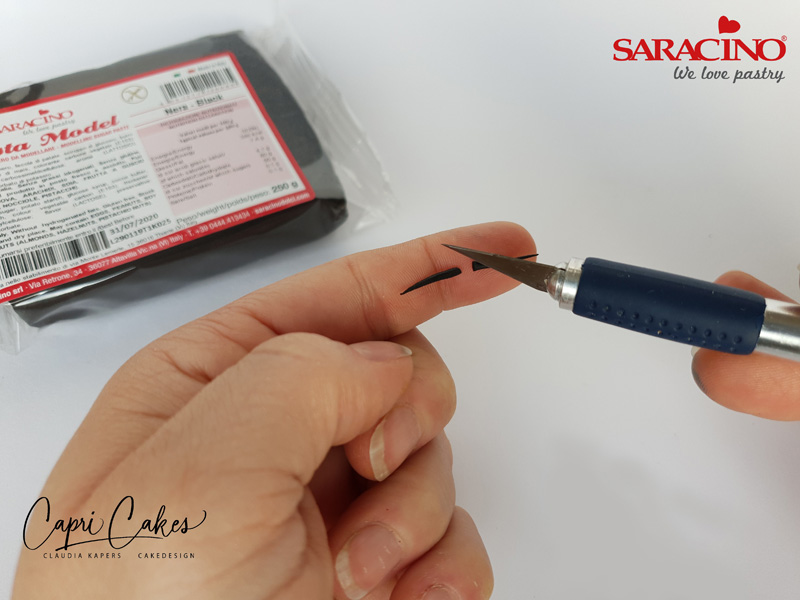
Take a small piece of black modelling paste and roll out to make the eyelashes.
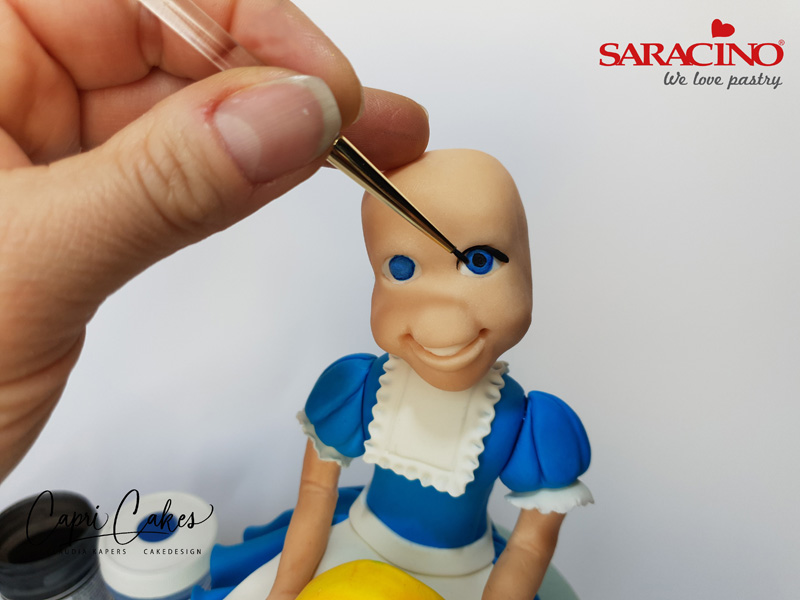
Step 33
Fix the eyelashes to the lid of the eyes. Take black dust mixed with clear alcohol and paint the pupils.

Step 34
Make a nose using a 5mm ball of skin tone modelling paste.
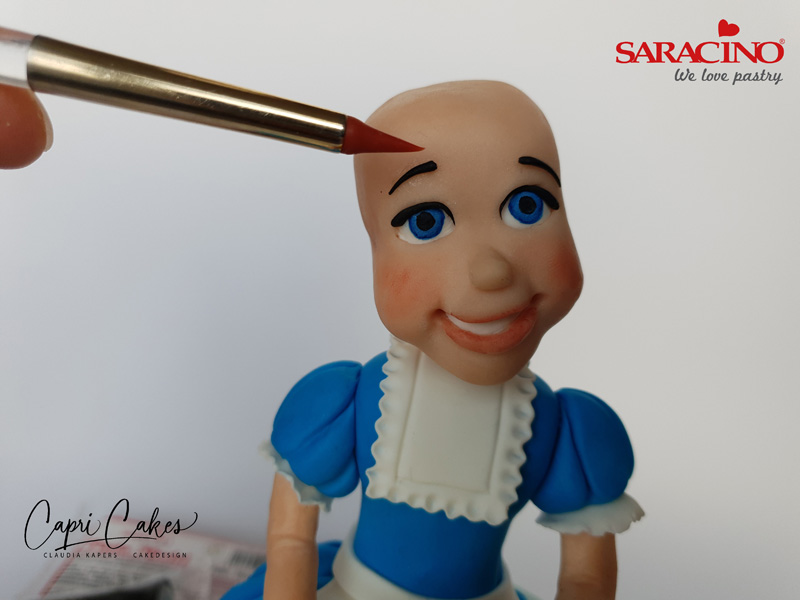
Step 35
Fix the nose to the face and blend using your tool. Repeat Step 32 with black modelling paste to make the eyebrows. Fix each brow to the forehead.
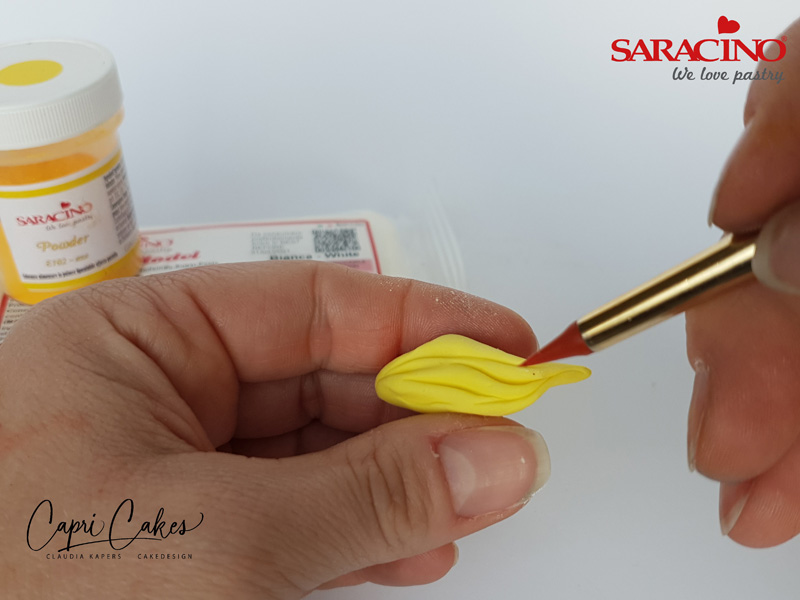
Step 36
Colour the white pasta model with yellow gel colour. Form tear drop shapes and mark the hair with the Dresden tool.
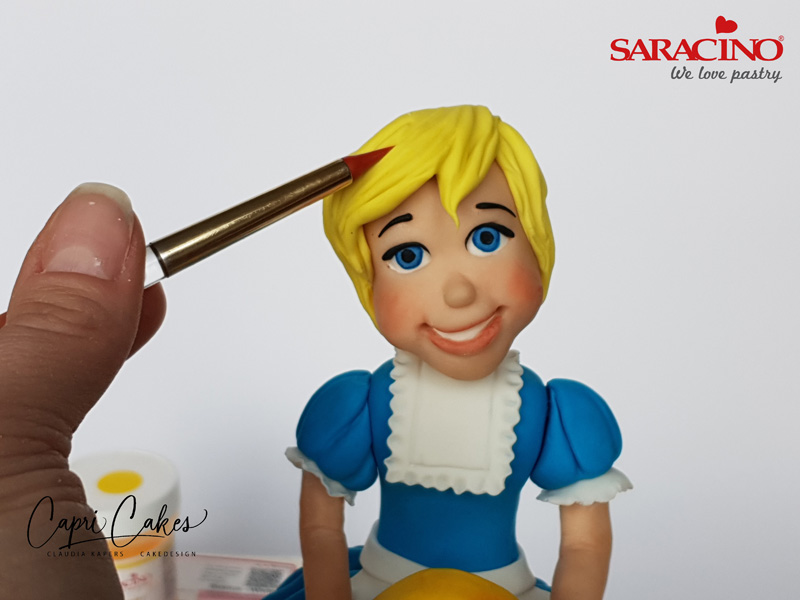
Step 37
Attach the hair to the head.
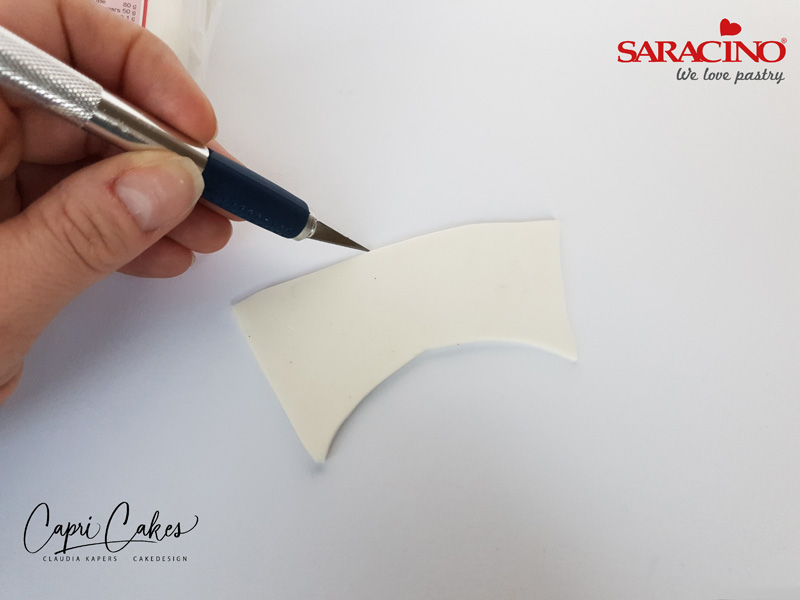
Step 38
Roll out thinly a 12cm x 4cm rectangular piece of white modelling paste for the hat. Cut out a semicircle on one side.
Step 39
Fold a seam in the middle.

Step 40
Stick the straight sides together. Fully at the back and a small section at the front.
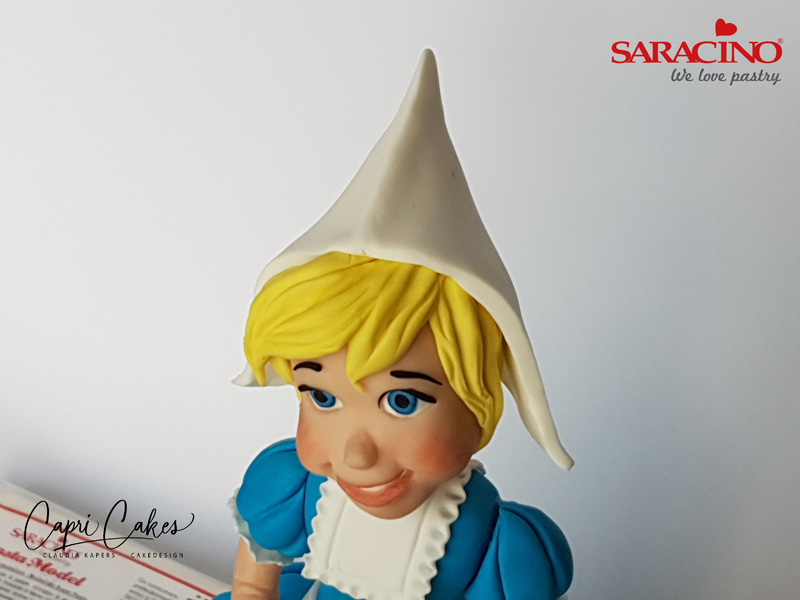
Step 41
Attach the hat to the head.
Step 42
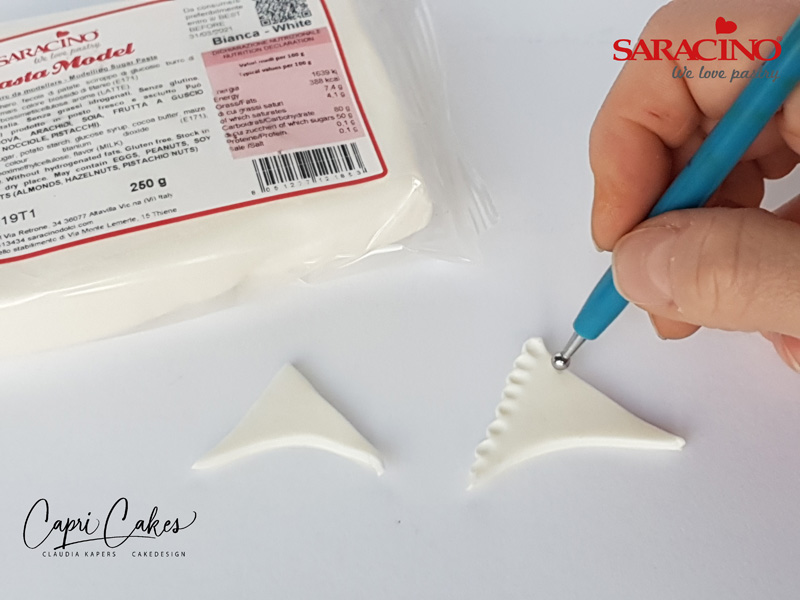
Cut out two triangles with sides of 4cm. Apply texture on both sides with the ball tool.
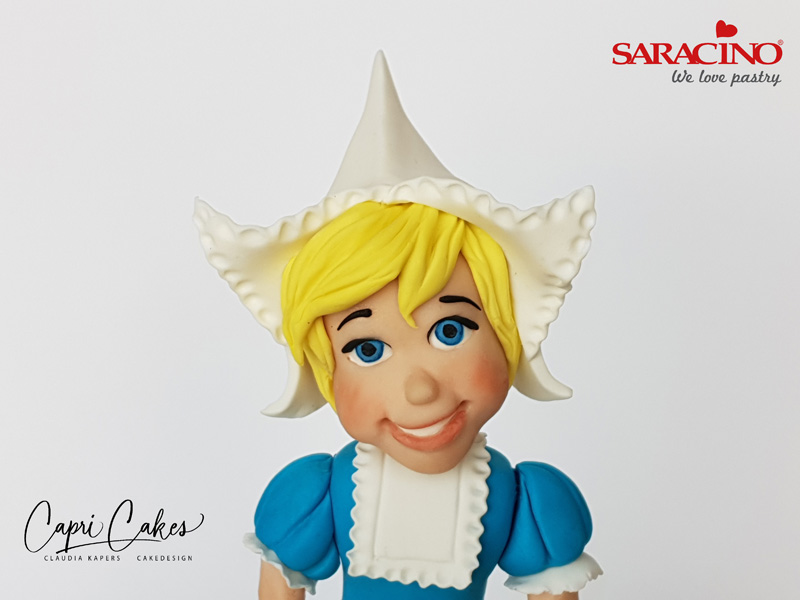
Step 43
Attach the triangles to the front of the hat.
Step 44
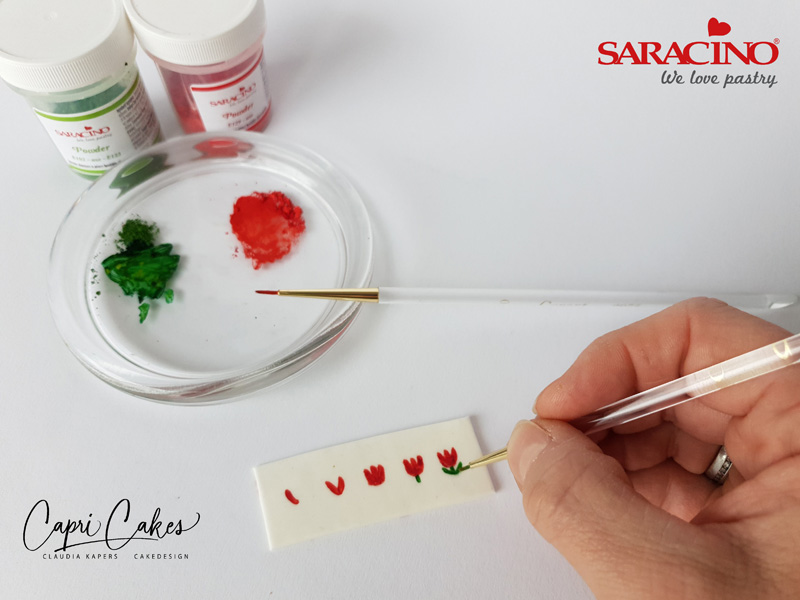
Using the steps shown on this example. We will paint tulips using Saracino green and red colour dust. Mix the powder colour with clear alcohol.

Step 45
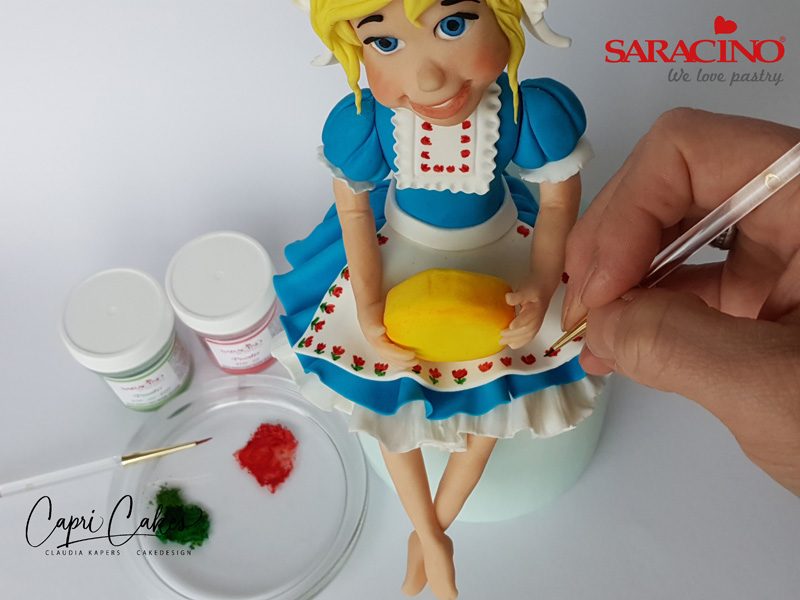
Paint tulips on the bib
Step 46
Paint tulips on the apron
Step 47
Using tiny white balls of white modelling paste apply highlight to the eyes.
Step 48
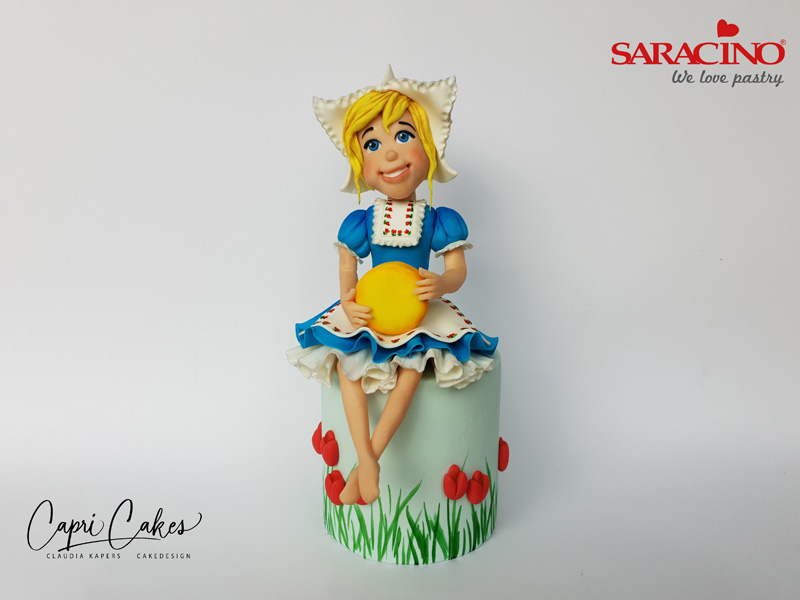
Tah Dah! Your pretty Dutch Girl is complete…….
