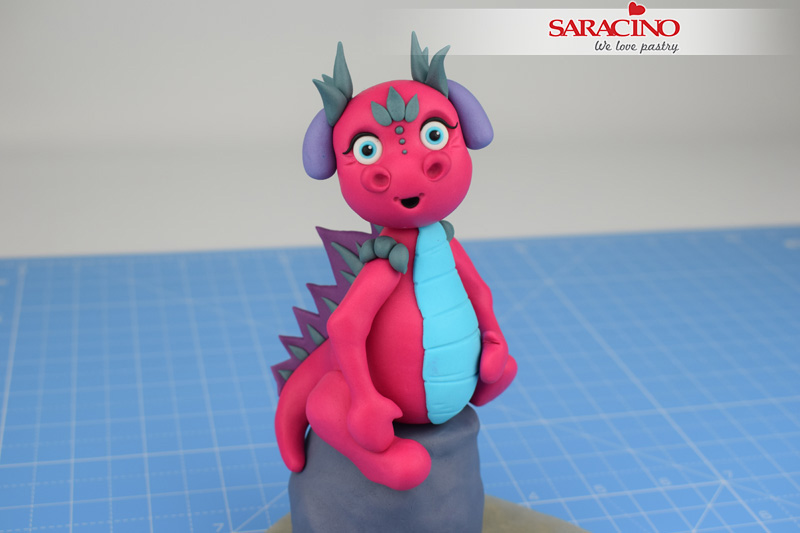
Author: Lynsey Wilton-Eddleston

FB: SUGARWHIZZ
Skill level: BEGINNERS
FROM LYNSEY:
Change the colour of your dragons to create multiple different figures.
To make your model completely edible, swap the polystyrene egg for 100g of RKT, and use a sugar stick to hold on the head.
Halve the quantities of paste to make tiny dragons.
You will need:
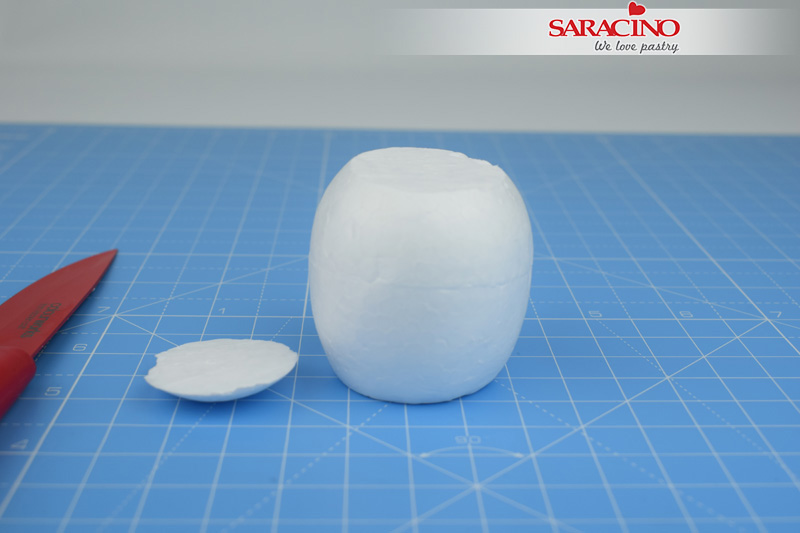
- 10cm Polystyrene egg
- Balling tools
- Dresden tool
- Sharp knife
- Small rolling pin
- Size 5 piping tip
- Silicon tip smoother
- Paintbrushes
- Paint palette
- Clear alcohol (for painting)
- Cool boiled water (for gluing)
- Cake pop stick / food safe skewer
- Modelling Paste:
- 130g Fuchsia
- 60g White – Coloured to grey
- 10g Light blue
- 6g Dark Purple
- 4g Green
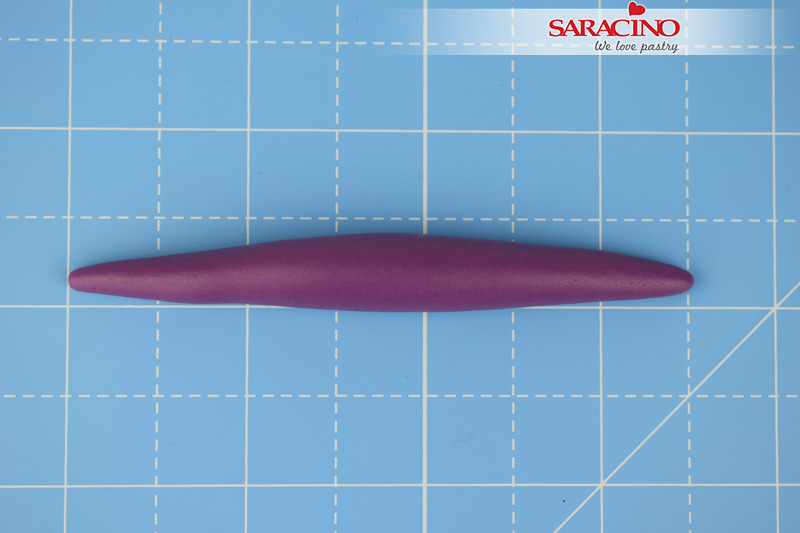
- 4g Light purple
- 3g Black
- 1g White
- Gel colours: Black , Blue, Purple, Green
Step 1
Using a sharp knife carefully slice off the very top and bottom of the egg, so that it stands up level on the work surface.
Step 2
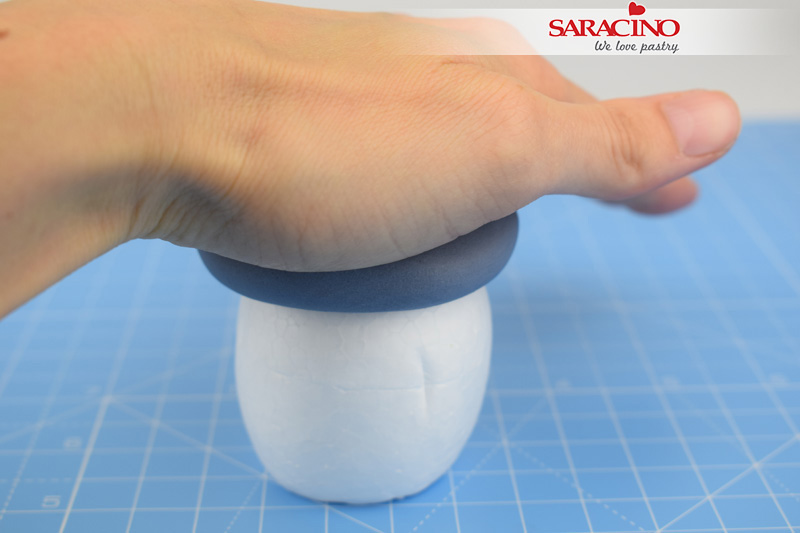
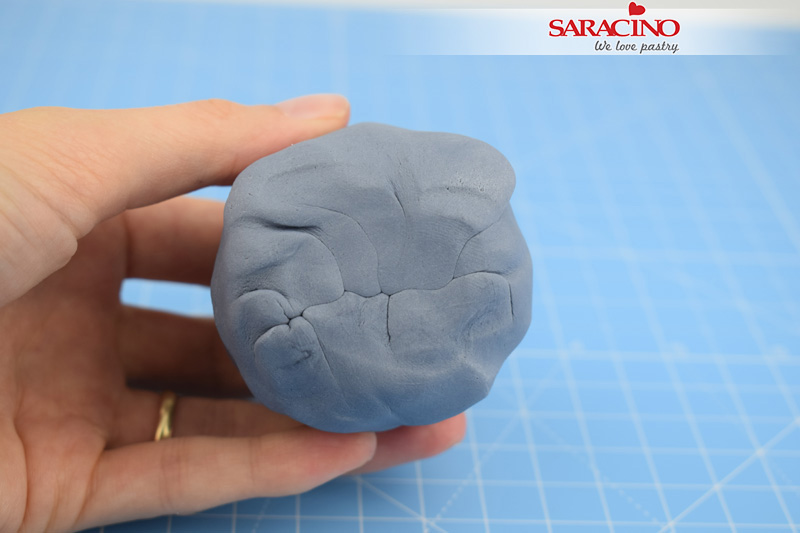
Add a small amount of the Saracino black gel to 60g of white modelling paste, knead until the paste turns grey. Roll the paste into a ball and gently press down on the top of the egg.
Step 3
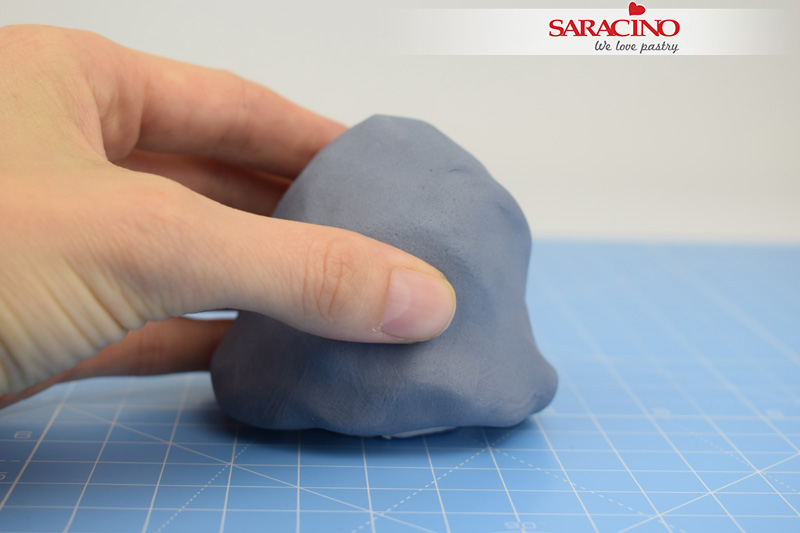
Gently work the paste down around the egg with your fingertips. Don’t worry about it being smooth. The bumps will add to the look of the rock.
Step 4
Gather the paste under the rock and smooth the joins together by rubbing gently with your fingertips.
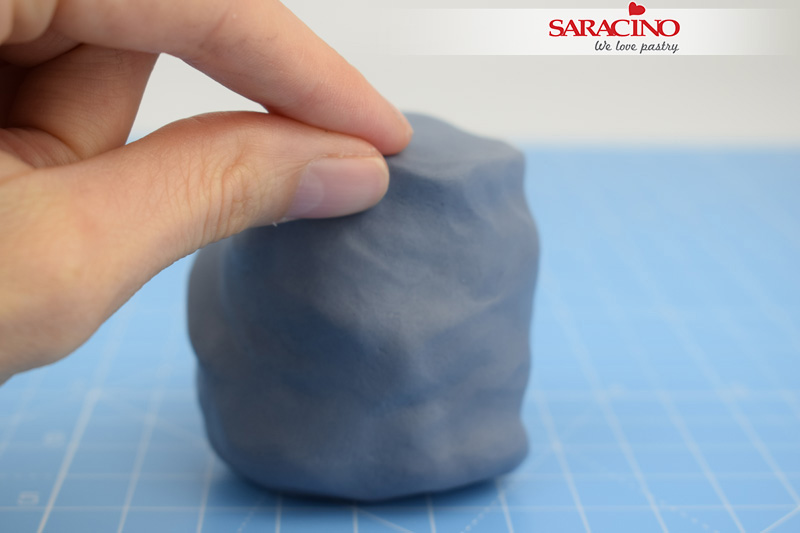
Step 5
Gently smooth and pinch around the top of the rock to create the edge. Randomly smooth and indent the remaining surface of the rock using your fingertips.
Step 6
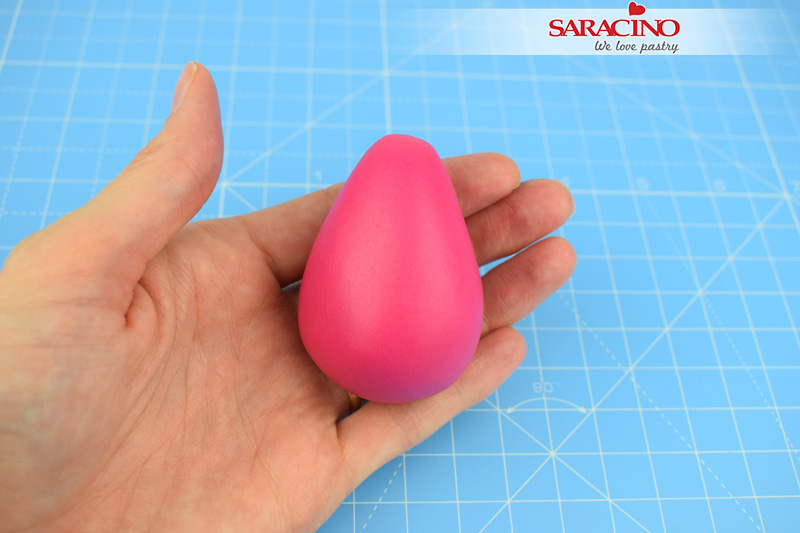
Roll 70g of Fuchsia modelling paste into a teardrop shape.
Step 7
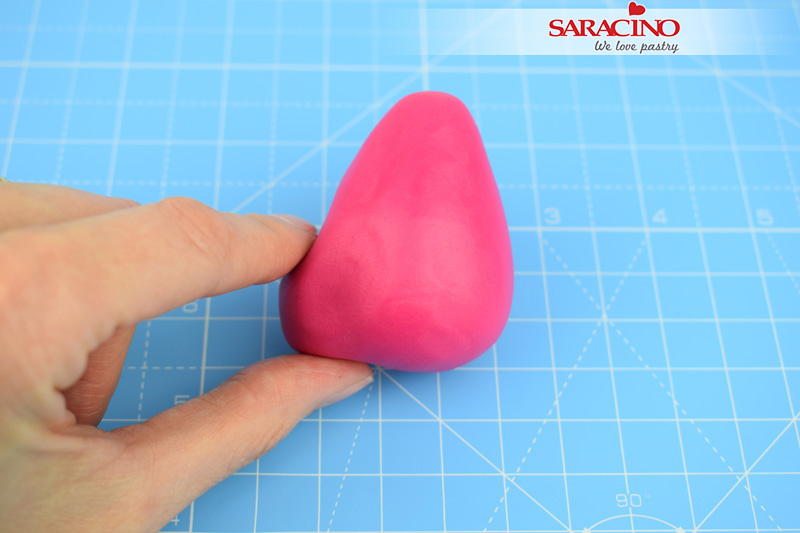
Using your thumb and forefinger gently begin to pinch out the tail at the base of the body.
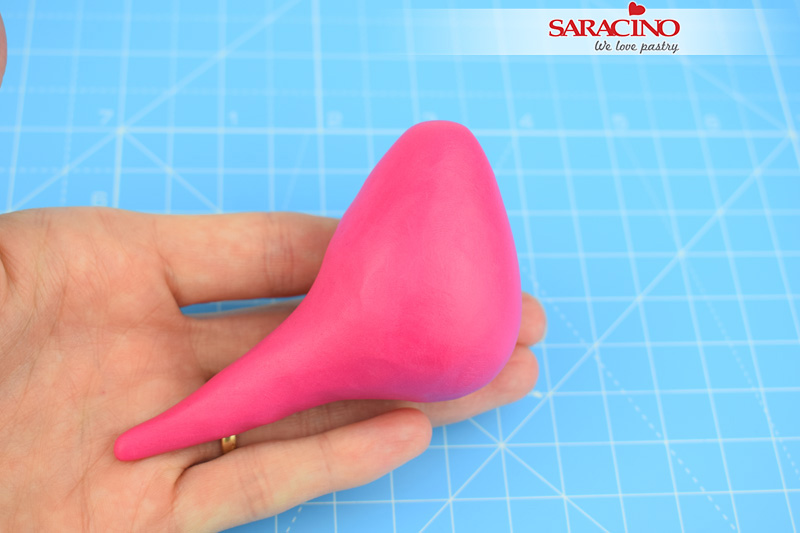
Step 8
Keep stretching and smoothing the paste, rolling it gently back and forth between your thumb and fingertips to elongate the tail.
Step 9
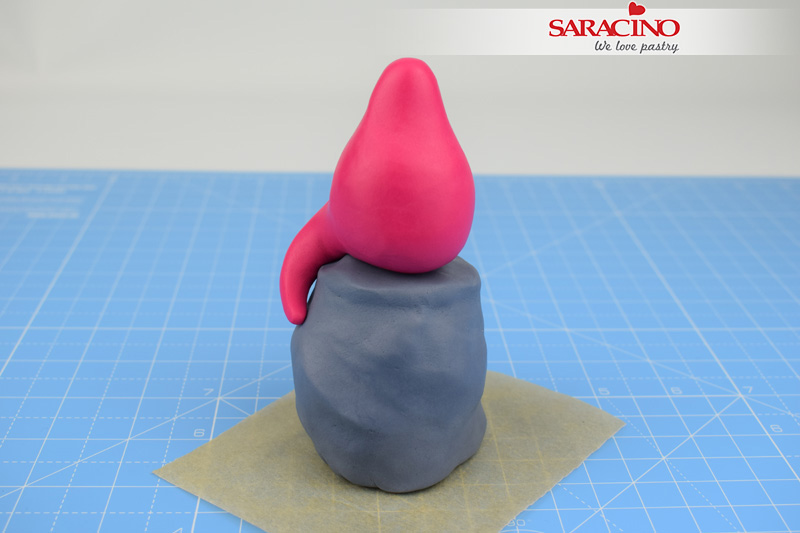
Stick the body into place on top of the rock using a small amount of water. Curl the tail around the side of the rock as shown.
Step 10
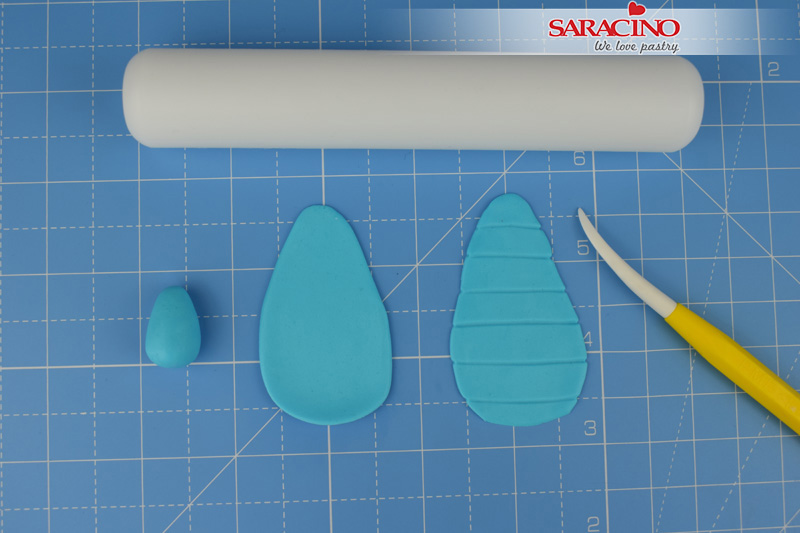
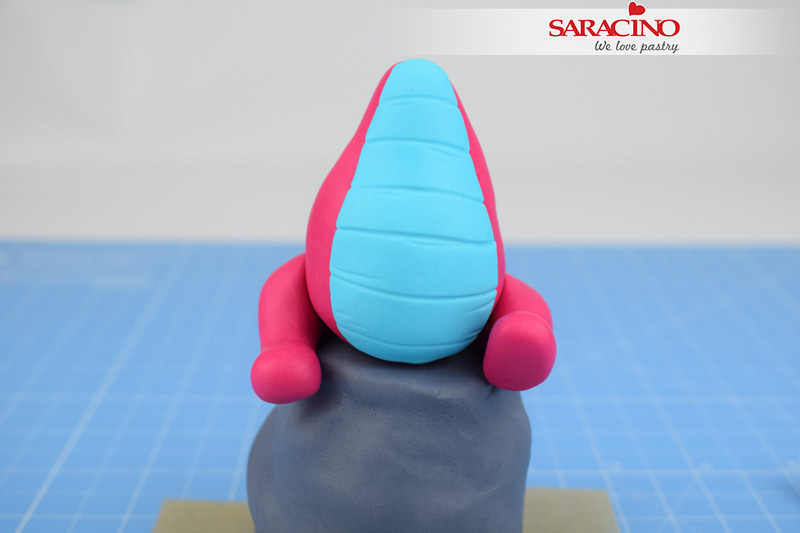
Roll 3g of light blue modelling paste into a teardrop. Roll out the paste with a small rolling pin so that it keeps the teardrop shape. Using the veining end of the Dresden tool mark small grooves across the paste.
Step 11
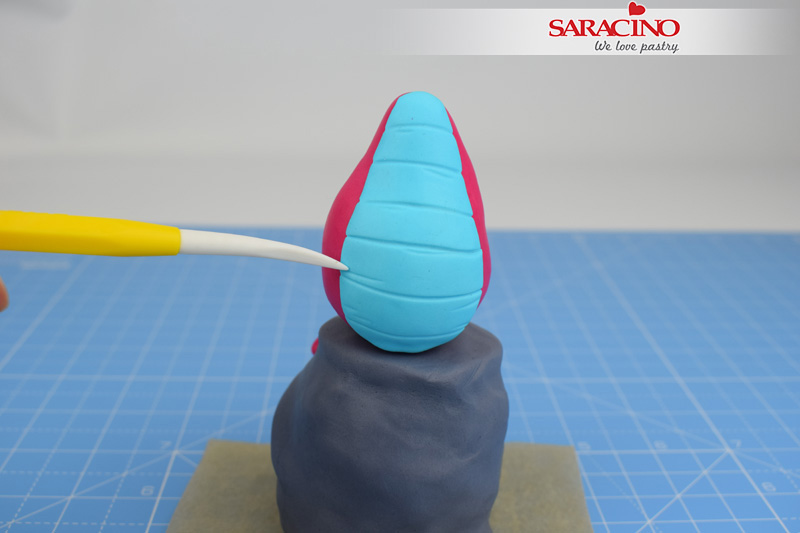
Keep going overlapping each layer until you get to the top of the body.
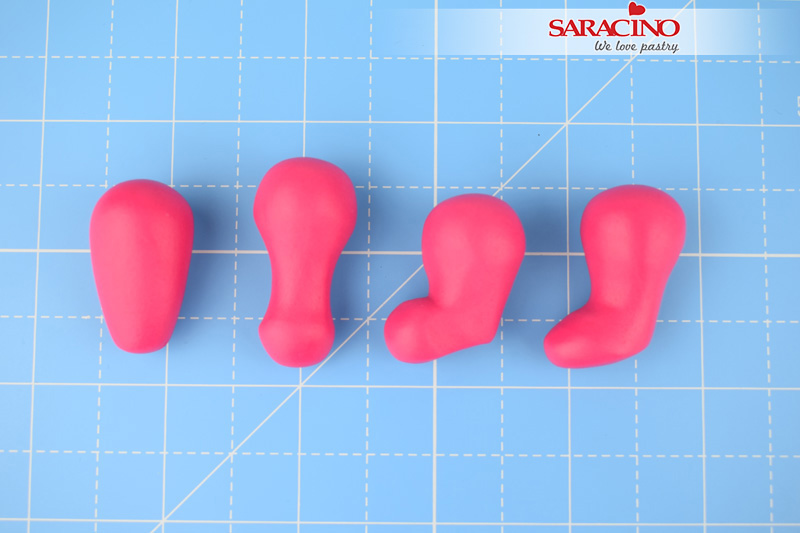
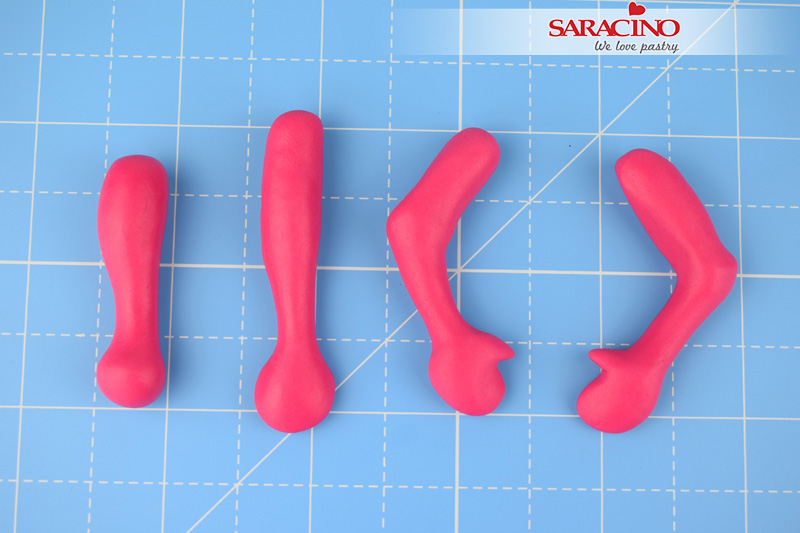
Step 12
Take 15g of fuchsia modelling paste and divide equally into two. Roll each piece into a short teardrop. Narrow slightly at one end by rolling the paste between your thumb and finger to create the foot. Bend the foot up. Push out the heel and smooth with your fingers. Again, roll the paste between your thumb and finger to narrow the ankle and lengthen the leg slightly as shown.
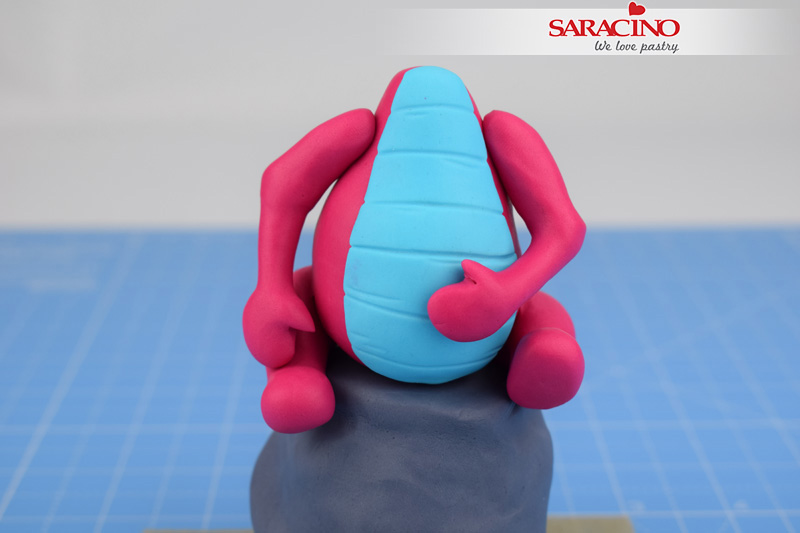
Step 13
Stick the legs to the body as shown.
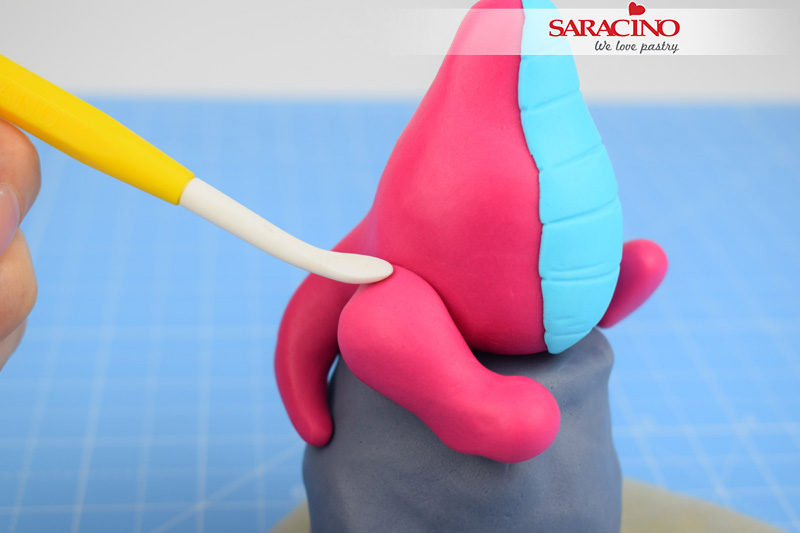
Step 14
Use the smoothing end of the Dresden tool to gently smooth the edge of the paste together.
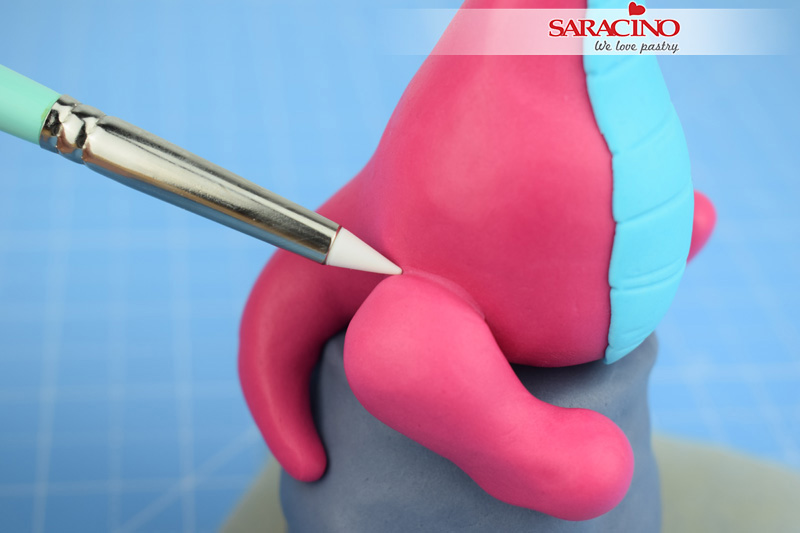
Step 15
Smooth the seems together completely by gently running the silicon tip back and forth across the paste.
Step 16
Take 10g of fuchsia modelling paste and divide equally into two. Roll each piece into a short teardrop. Narrow slightly at one end by rolling the paste between your thumb and finger to create the hand. Gently flatten and smooth the hand with your fingertips. Again, roll the paste between your thumb and finger to narrow the wrist and lengthen the arm as shown. Cut out a small triangle to create the thumb as shown.
Step 17
Stick the arms into place with a small amount of water as shown.
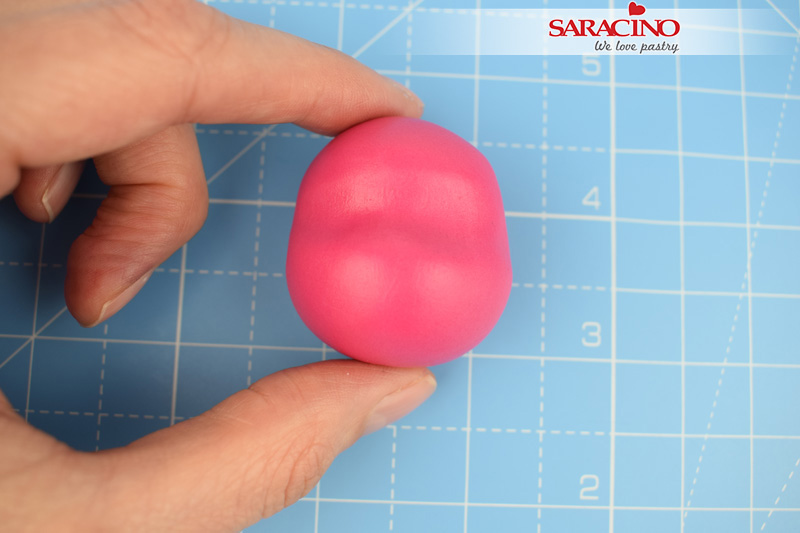
Step 18
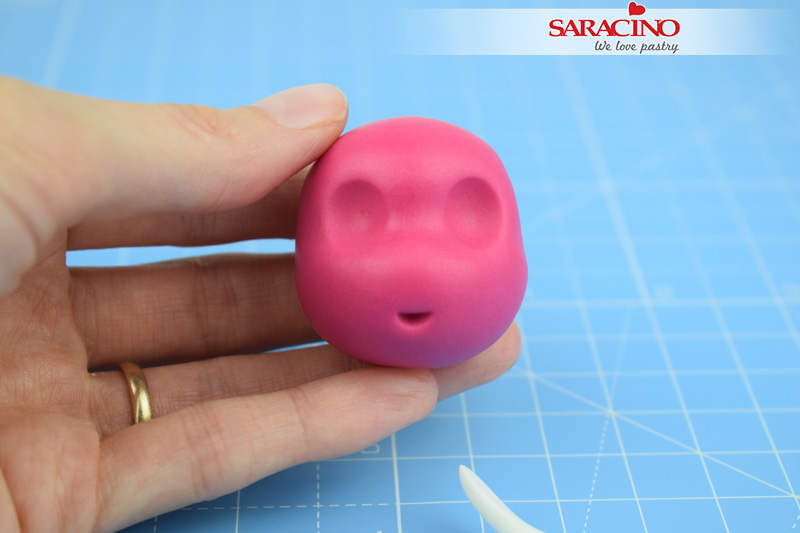
Take 30g of Fuchsia modelling paste roll into a ball. Then roll the top of the ball gently backwards and forwards between your finger and thumb to narrow the top of the head. Gently press your finger across the paste to indent where the eyes will sit and form the shape of the face.
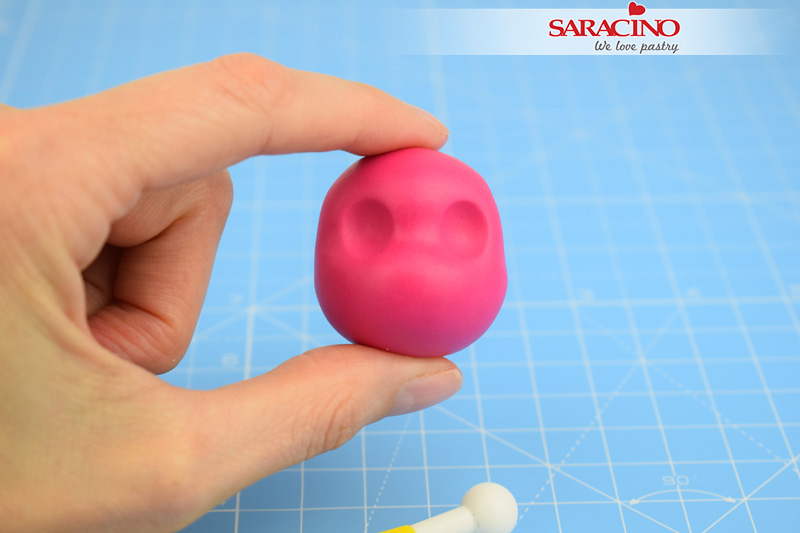
Step 19
Use a large balling tool to gently mark two shallow eye sockets as shown.
Step 20
Gently push the smoothing end of the Dresden tool into the paste to create the mouth.
Step 21
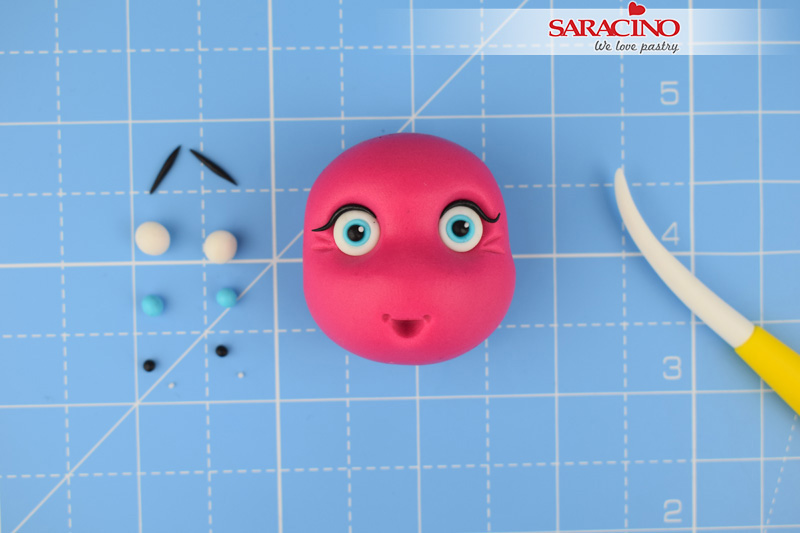
Roll two small white balls, two smaller blue balls and two tiny black balls and two teeny white balls from modelling paste. Gently flatten each one with your finger. Stick them into place as shown. Take two tiny balls of black modelling paste, roll them into two sausages tapered at each end. Gently bend them as shown to create the eyelids. Stick the eyes into place first, then stick the eyelids into place. Use the Dresden tool to mark two little creases at the bottom of each eye as shown. Use a small balling tool to indent each side of the mouth as shown.
Step 22
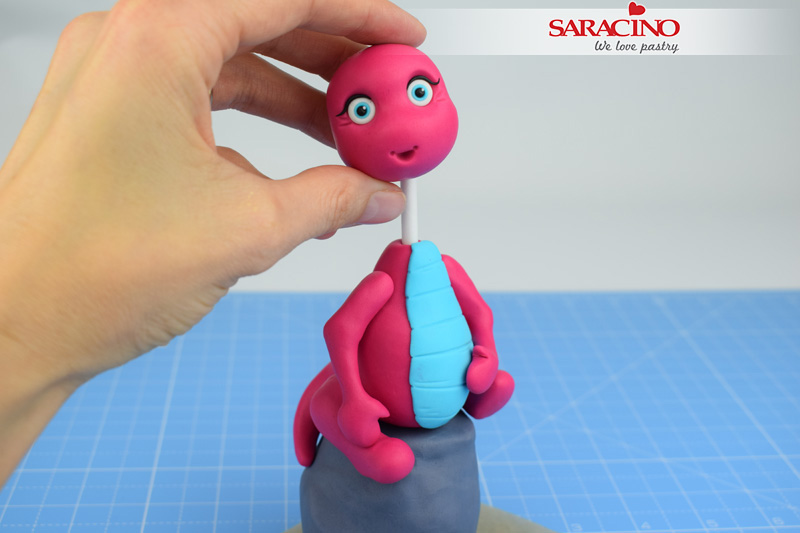
Gently push the cake pop stick down through the body, leave a small amount protruding from the neck to hold the head. Apply a small amount of water to the top of the neck and gently slide the head down the stick into place.
Step 23
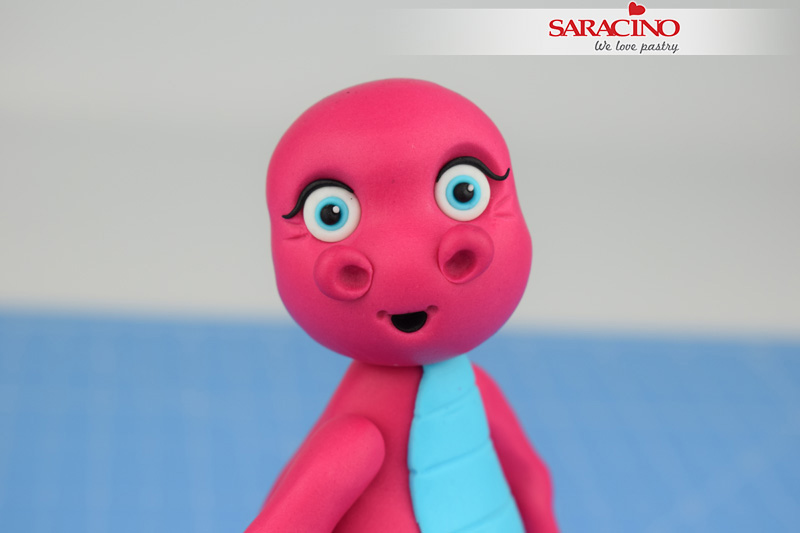
Roll two tiny balls of fuchsia paste and stick them into place as shown. Use the small balling tool to gently create the nostrils as shown.
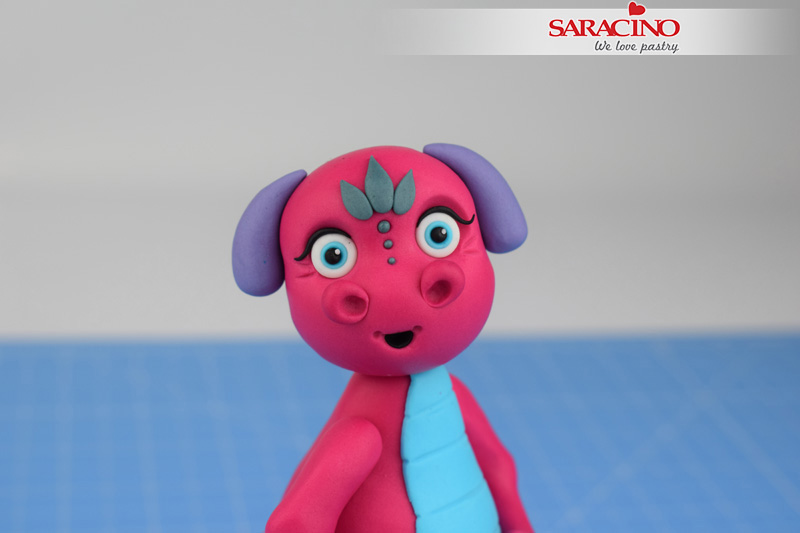
Step 24
Take 7g of the light blue paste and mix with 2g of black paste to create the dark blue paste. Roll three teardrops and flatten gently with your fingertips, stick to the centre of the head as shown. Roll three small balls and stick into place as shown. Keep the remaining paste to one side for later. Take 4g of light purple modelling paste, divide equally into two and roll each piece into a teardrop. Stick these into place on each side of the head as shown.
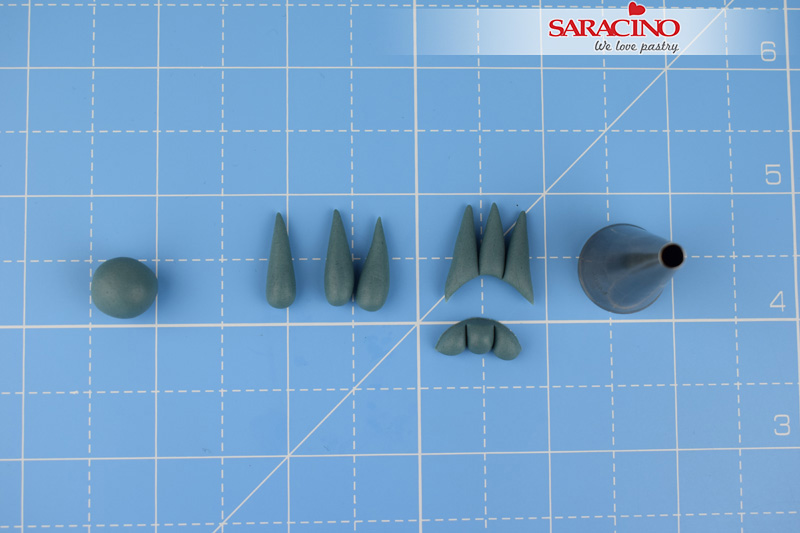
Step 25
Take 4g of the dark blue paste and divide equally into two. Roll 6 teardrop shapes. Gently gather three together and using the piping tip cut off the bottoms.
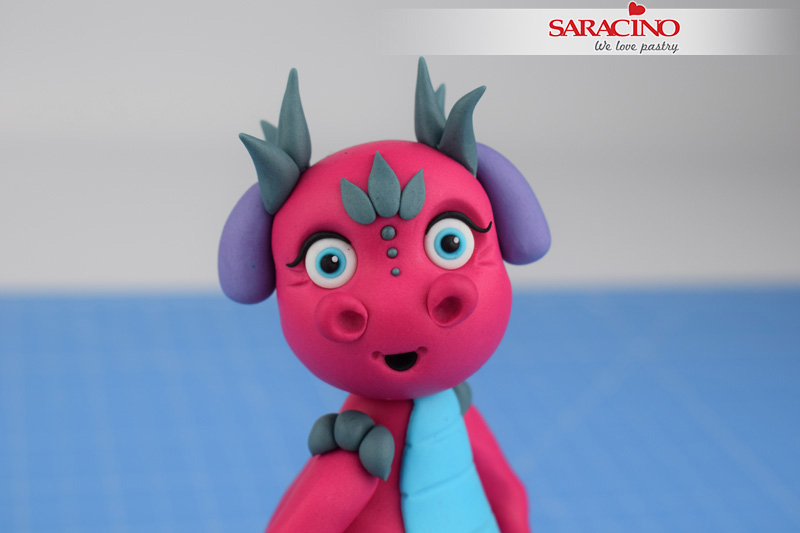
Step 26
Stick the spikes to the top of the head as shown, stick the bottom of the spikes to the top of the arms as shown.
Step 27
Take 6g of dark purple paste and roll into a sausage that is tapered at each end and roughly the length of the dragon from head to tail.
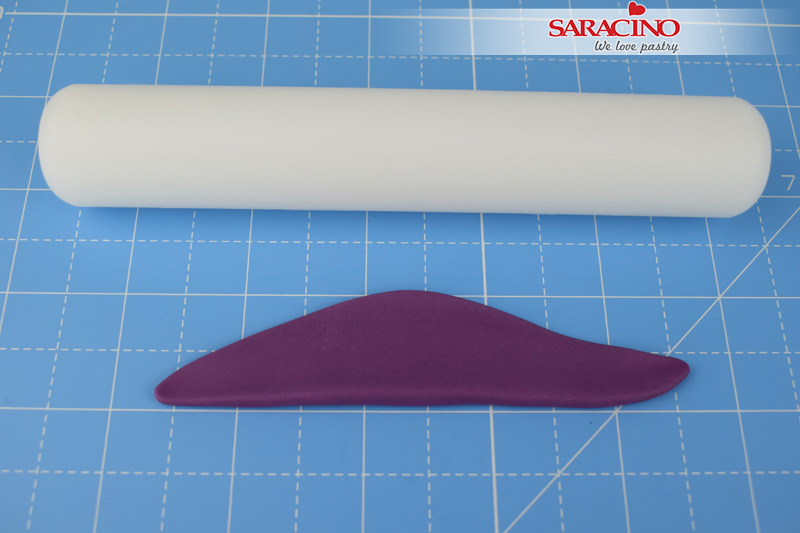
Step 28
Roll the paste thinner along the top edge with a small rolling pin.
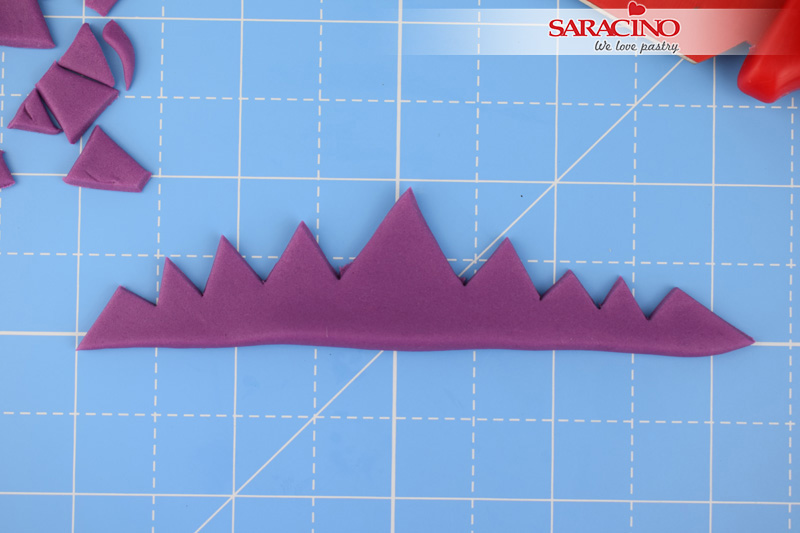
Step 29
Use a sharp knife to cut the paste into triangles.
Step 30
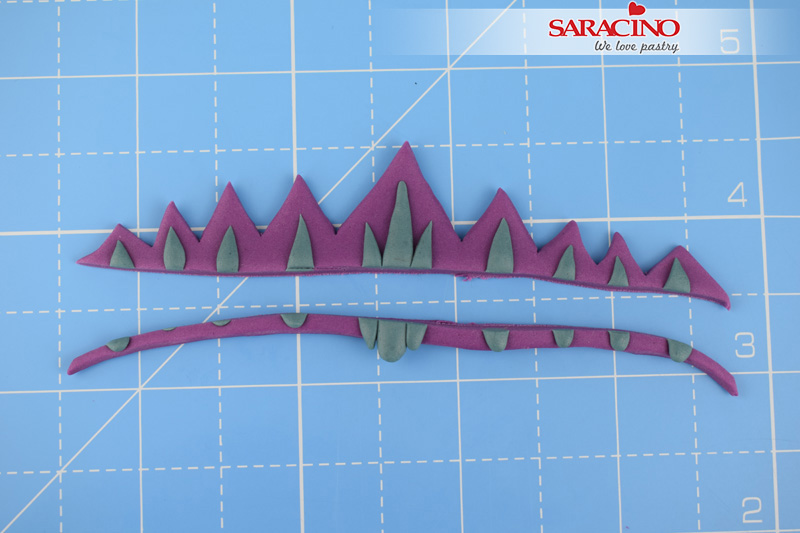
Take 3g of dark blue paste to roll some smaller teardrops and stick them into place as shown. Use a sharp knife to carefully cut along the bottom of the paste providing a flat edge
Step 31
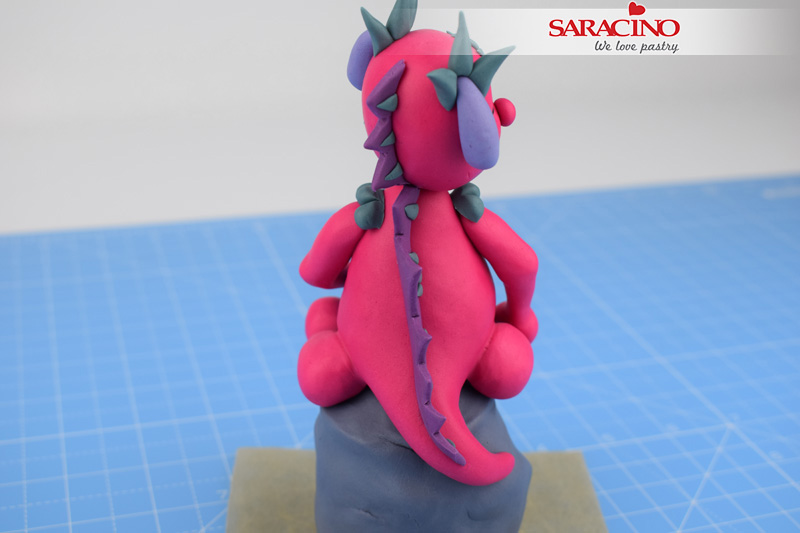
Apply a small amount of water to the flat edge and stick the paste into place down the back of the dragon.
Step 32
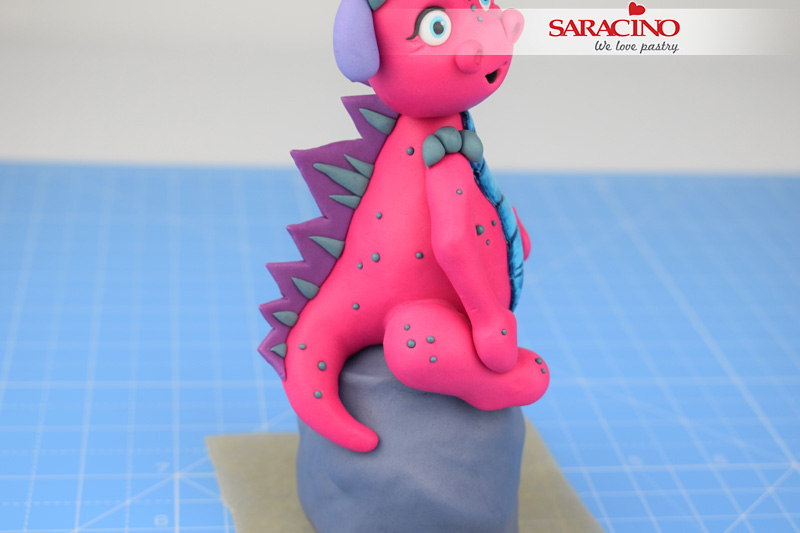
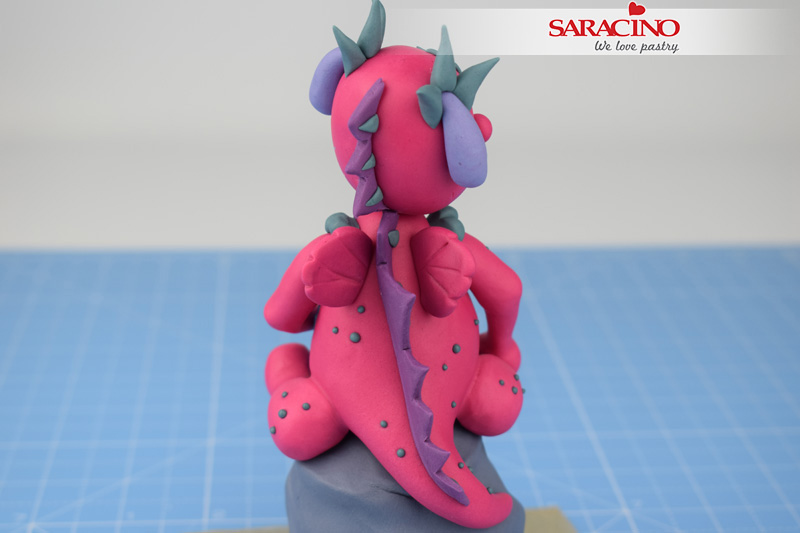
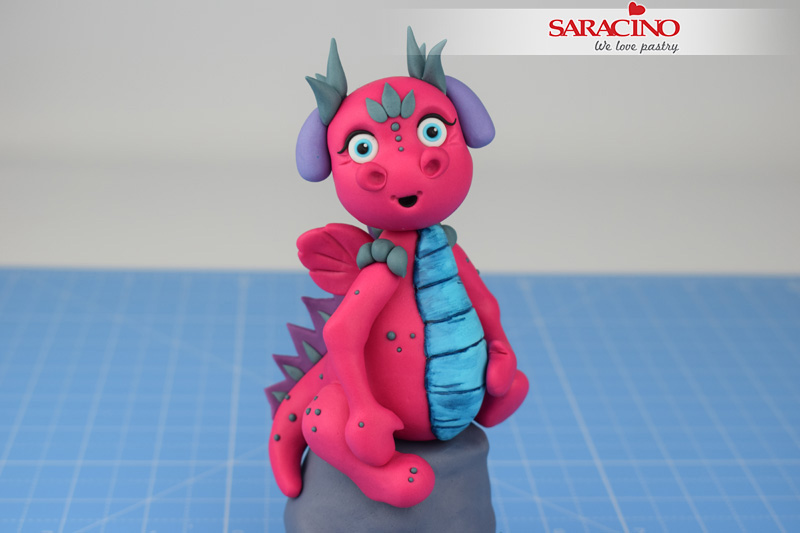
Once stuck into place, gently pinch the tops of the spikes to redefine any that were misshapen whilst sticking into place.
Step 33
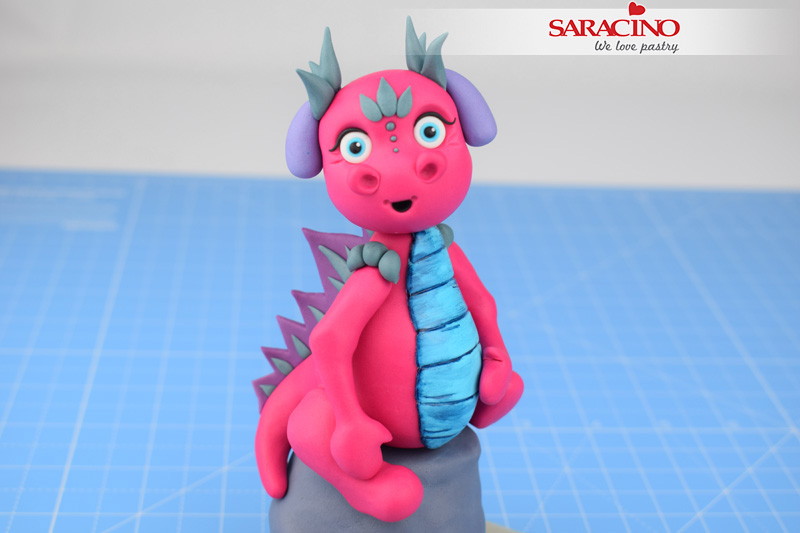
Mix a small amount of blue gel colour with a small amount of black gel colour and dilute slightly with the clear alcohol, to create a navy paint. Paint and shade the front of the dragon as shown. You can remove any excess colour with a clean paintbrush and some clear alcohol.
Step 34
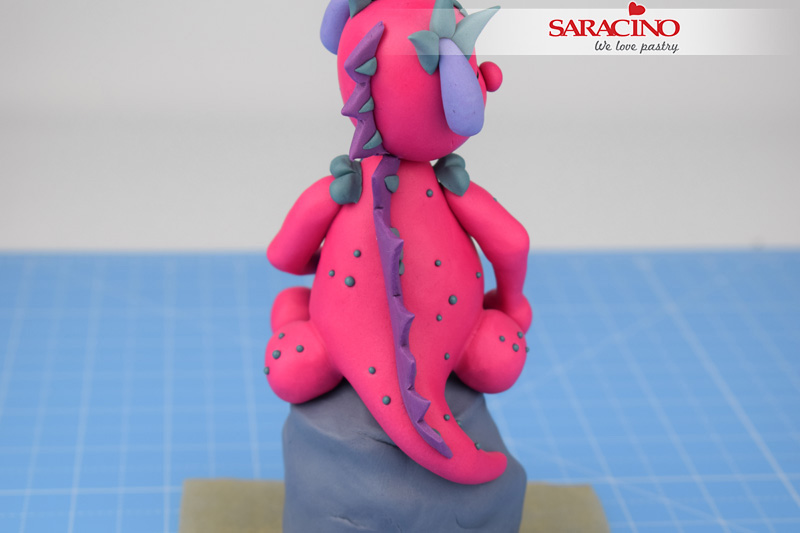
Take the remaining dark blue paste and roll tiny balls of various sizes. Stick them in patches to the sides, arms and legs.
Step 35
Stick more to the back of the dragon.
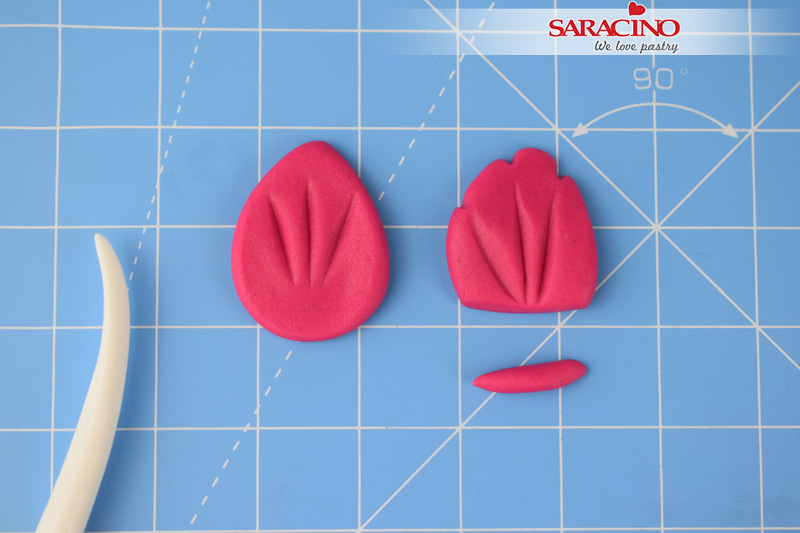
Step 36
Take 5g of fuchsia modelling paste and divide equally into two. Roll each piece into a teardrop and flatten gently with your fingertips. Use the veining end of the Dresden tool to mark the wings as shown. Trim the edge flat with a sharp knife.
Step 37
Apply a small amount of water to the flat edge and stick the wings into place on the back of the dragon.
Step 38
Gently bent the tips of the wings over from the front.
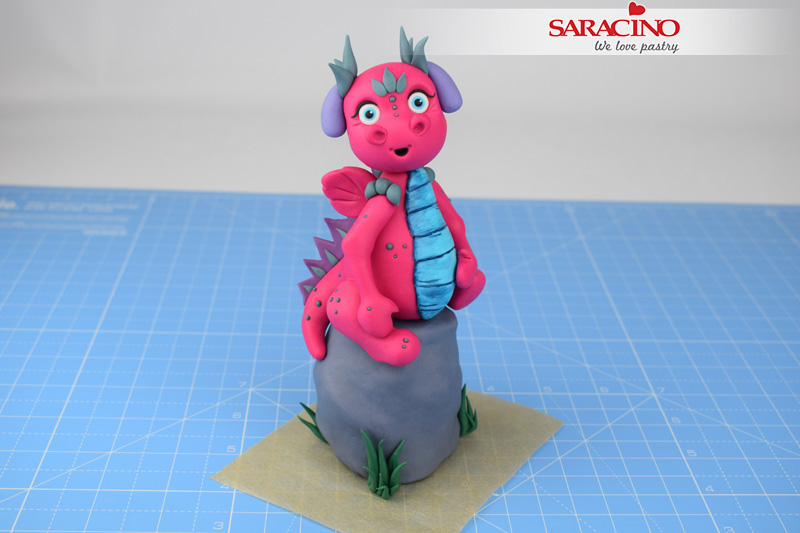
Step 39
Take 4g of green modelling paste and roll various sized teardrops. Group several together and stick to the bottom of the rock, to create grass.
