You will need:
- Saracino White Modelling Chocolate
- Saracino White Modelling Paste
- Edible Glue
- White Florist Wires: Gauge 18,22,24
- Brown or Green FLorist Tape
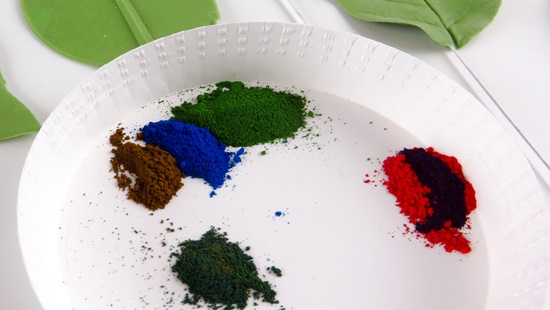
- Saracino Colour Dusts: Red, Pink, Purple, White, Yellow, Green, Brown
- Saracino Green Paste
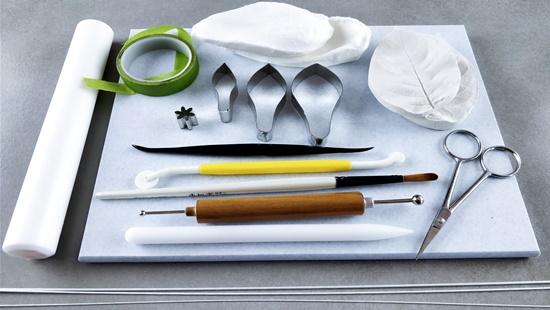
- Cel Board
- Foam Pad
- Non Stick Rolling Pin (preferably 9”)
- Dresden Tool
- Cel Stick
- Wire Cutter
- Small scissors
- Cutting Tool
- Soft Paint brushes (Teflon or real hair, like sable)
- Balling Tool
- Magnolia Cutters (3 sizes)
- Leaf Veiner
- Magnolia Veiner
- Small daisy/blossom cutter
- Tin Foil or kitchen paper sheets
- Corn Flour for dusting if needed
- Plastic sleeve

Mix the two pastes together, approximately 2 parts modelling paste to one part modelling chocolate
Centre:
- Mix the two pastes together, approximately 2 parts modelling paste to one part modelling chocolate
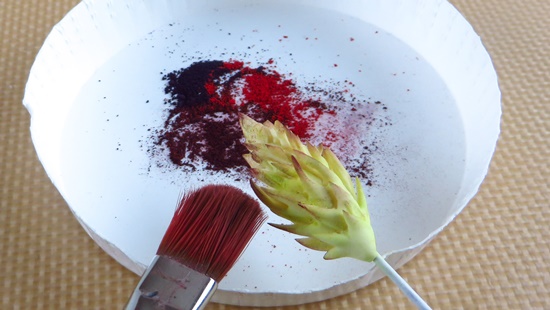
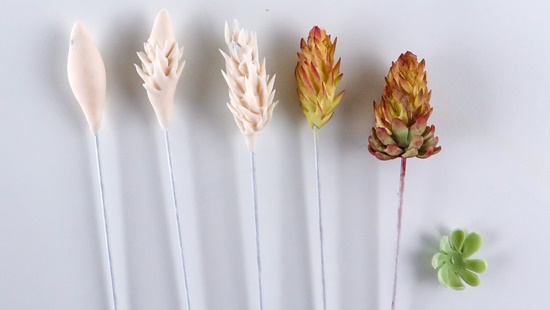
- Take an 18 gauge wire, dipped in edible glue, and place small amount of paste on the end and taper into a tear drop shape with point at the top and base.
- Taking small scissors, snip spikes into the paste to form spikes all the way down. Leave to dry.
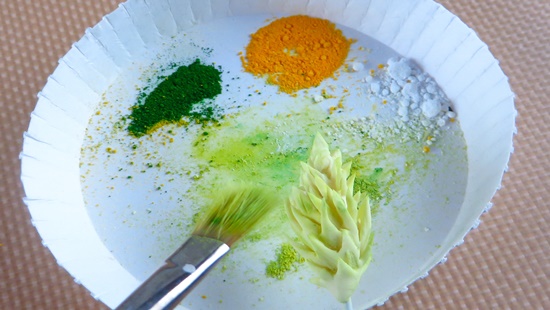
- Mix yellow, white and green dust colours together and using a soft paint brush, dust all over, then using a little of the darker green add darker areas and finish off with dusting tips with a mix of red and purple colour dusts.
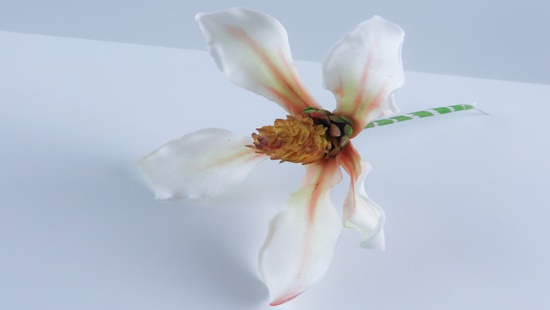
- Colour your mixed paste, green. Roll out and using daisy cutter, cut out three daisies. Ball out the edges and slide up wire to base of magnolia centre, using a little edible glue. Dust a little, using the same red and purple mix. The picture below shows the stages from start to finish.

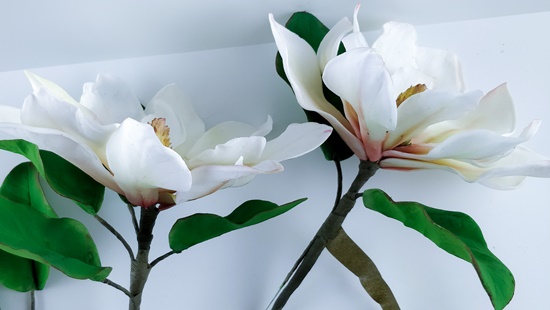
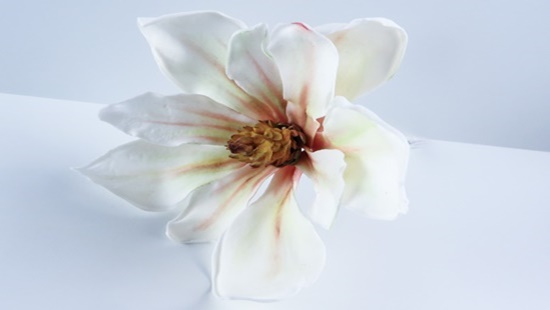
Magnolia Petals
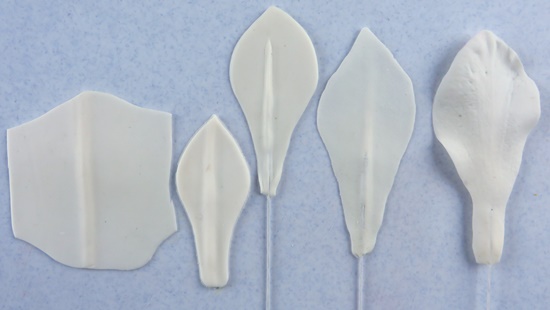
- Roll out the white paste, then using your cel stick, roll centre of paste to form a ridge.
- Cut out petals with your magnolia cutters. You will need three of each, nine in total. Keep them in a plastic sleeve to stop them from drying out. OF do them is sets of three
- Insert wires into the ridge, using a little edible glue: 24 gauge wires for two smallest, 22 gauge wire for largest. Place back in plastic sleeve. Or do in sets of three.
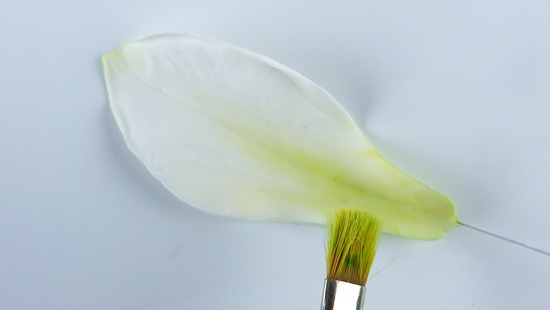
- Thin edges of petals with your balling tool, then press in veiner. To create a ridge on edges, drag your dresden tool right at the petal edge.
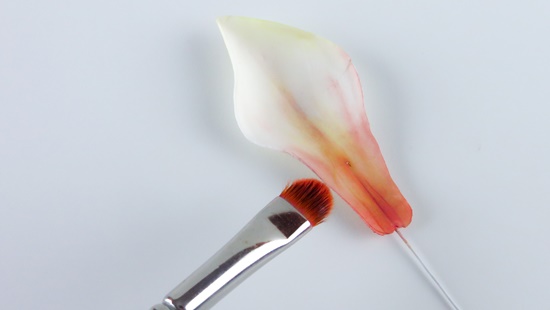
- Once dry, or nearly dry, lightly brush green/yellow dust mix at base of each petal, then over brush lightly with red and purple dust mix, at base.
- Once completely dry, start to assemble/tape to magnolia centre, starting with smallest three, then next size up, finishing with largest.
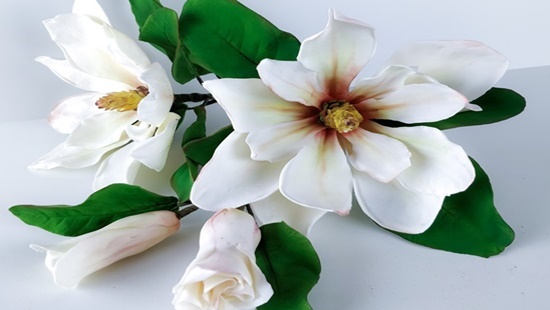
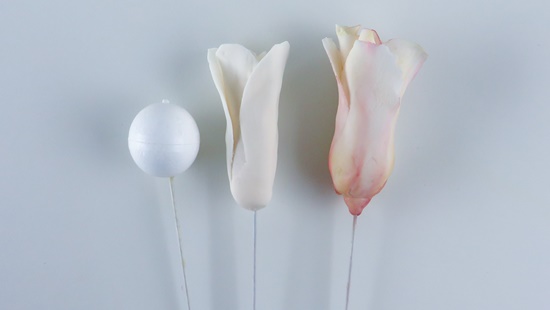
Magnolia Buds
- You can use paste, but to keep it light, I’ve inserted an 18 gauge wire into a small styro ball (approx 1” diameter).
- Cut out a few petals (about three of five) freehand with cutting tool, or use magnolia cutters. Thin edges and fold around ball.
- Once dry, brush colour on, same as ones used for the petals.
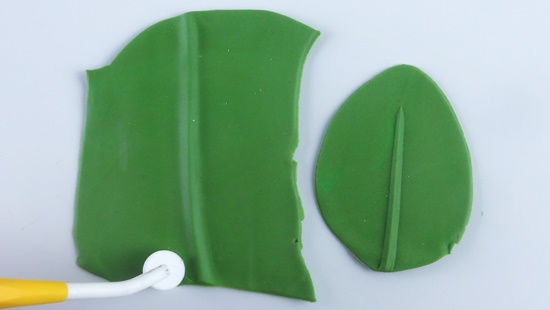
Leaves:
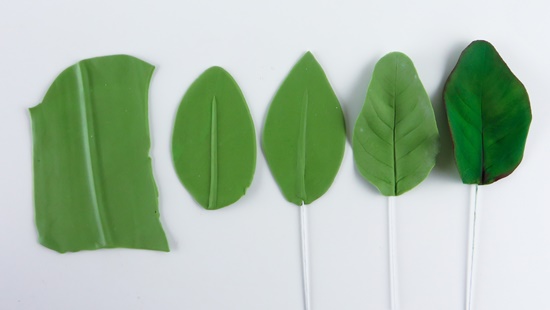
- Roll out Green paste and form a ridge (see steps used for petals). #
- Reehand cut out a leaf shape with your cutting tool (or knife) leaving ridge in centre. Insert a 22 gauge wire, tipped with a little edible glue.
- Thin out edges with balling tool, then press into veiner. Cut out several sizes (about 6 or seven or more if you wish) and leave to dry.
- Brush green over the top of leaf and keep colour on back light. Then over dust with some yellow in places and a little white. Brush the edges with a mix of red and purple dust.
Assembly:
- You can fix the colour by swaying carefully, the posy, over the steam from a kettle or boiling pot of water on stove.
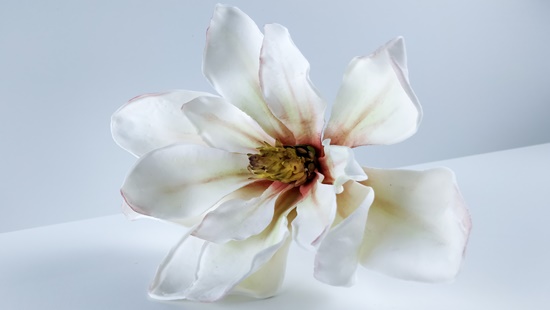
- Using brown or green florist tape, assemble the flowers, buds and leaves together carefully. Remember these dry petals and leaves are very fragile and brittle.
- 3. You can now use to decorate your cake. I hope you enjoy this tutorial and find is useful.