Author: Hayley Wisken
Skill level: BEGINNERS
Hayley Wisken – Owner of Hayley Wisken Cakes, Hayley is a multi-award winning cake artist she has 22 competitions under her belt, her best achievements are 14 Gold medals, 3 x First Place’s and Best in Show at Cake International Manchester 2015. Hayley and her husband Mike own Fabricake Sugarcraft Limited a Sugarcraft retail store in Southend, Essex. Fabricake also has a popular online shop www.fabricake.co.uk
Hayley Wisken Cakes – https://www.facebook.com/Hayleywiskencakes/
.
You will need:
Ingredient
- 3 x 8” Square Cake (3.5 Inches Deep)
- 3 Kg White Saracino Sugarpaste
- 250g Duck Egg Blue Sugarpaste
- 250g Saracino Blue Modelling Paste
- 250g Saracino Yellow Modelling Paste
- 250g Saracino Blue Modelling Paste
- 250g Saracino Lilac Modelling Paste
- 250g Saracino Cerise Modelling Paste
- 250g Saracino Green Modelling Paste
- 250g Saracino White Modelling Paste
- 100g Saracino Black Modelling paste
- 100g Saracino Red Modelling paste
- 500g Golden Celebration Sugarpaste
- 500g Saracino Isomalt
- 500g Buttercream
- 100g Saracino Royal Icing
- Piping Gel
- Edible Glue
- Edible Spray Glaze (Dinkydoodle Shell & Shine)
- Jam
- Black Extra
- 100g Golden Caster Sugar
Equipment
- Non-Stick work board
- Rolling Pin 16”
- Rolling Pin 9”
- 2mm Spacers
- 5mm Spacers
- Smoother
- Flexi-Smoothers
- Wide Artist Brush
- No. 6 Artist Brush
- 14 x 18” Rectangle Cake Drum (12mm thick)
- Saucepan & Hob
- Silicone spatula
- Heatproof Jug
- Large Kitchen Knife
- Disposable Piping bag
- Scissors
- Wire Cake Leveller
- Bread Knife
- Palette Knife
- Side Scraper
- Hard Bristle brush for texturing
- Wood Texture Mat or Rolling Pin
- Strip Cutter 2 (Jem)
- Strip Cutter 3 (Jem)
- Teaspoon
- Double Sided Tape
- 2m White 15mm Thick White Satin Ribbon
- Silliputty (www.fabricake.co.uk)
Step 1
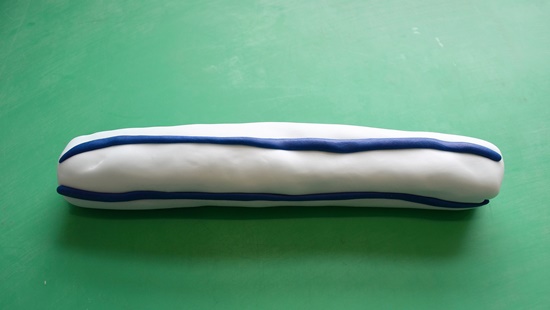
Knead the duck egg blue sugarpaste and roll into a large thick sausage shape and form 4 thin sausages of the darker blue modelling paste. Push the modelling paste onto the sugarpaste equal distances apart.
Step 2
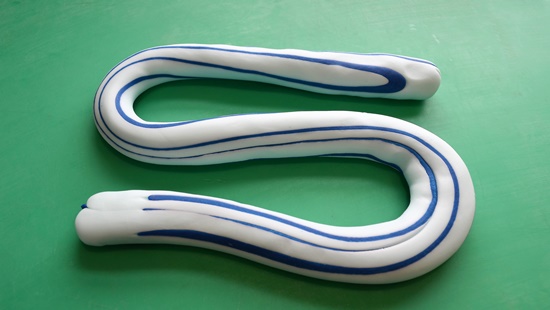
Roll the sausage and bend into an S shape, reform into a sausage. Repeat this step around 4 times taking care not lose the marbled effect.
TIP – TRY NOT TO TWIST THE SAUSAGE AS THIS WILL MAKE THE LINES WIGGLY
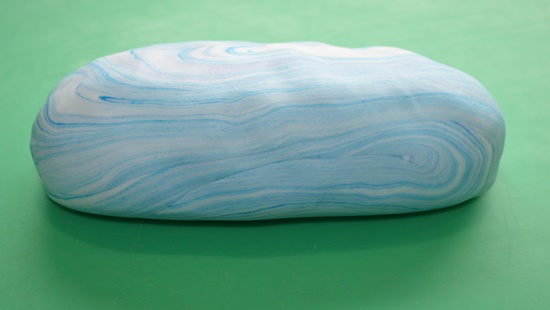
Step 3
The sugarpaste and modelling paste should have beautiful marbled straight lines running through it.
Step 4
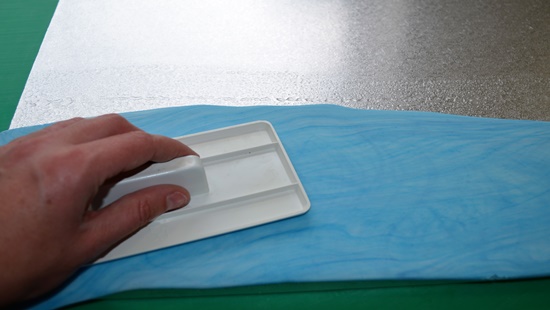
Brush a thin layer of piping gel over the cake drum. Roll out the blue blend sugarpaste to a thickness of 2mm, 18 inches long and around 5 inches wide. It doesn’t have to have a straight edge as this will be the water so a wavy effect is good. Smooth away any bumps with a smoother.
TIP – USE THE SMOOTHER TO MANIPULATE THE SUGARPASTE IT WILL SLIDE EASILY ON THE PIPING GEL. IT CAN BE SMOOTHED INTO THE POSITION NEEDED
Step 5
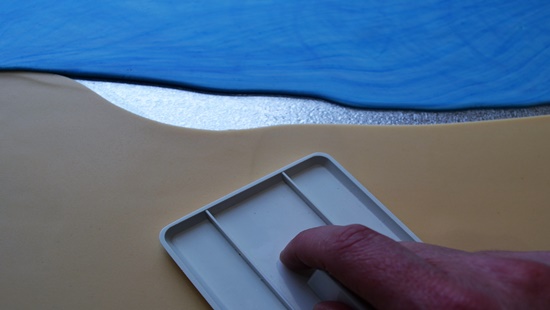
Roll out the golden celebration sugarpaste to a thickness of 2mm, 18 inches long by approximately 9 inches wide. Lay this on the cake drum bringing the edges of both sugarpastes together but not over lapping each other.
Step 6
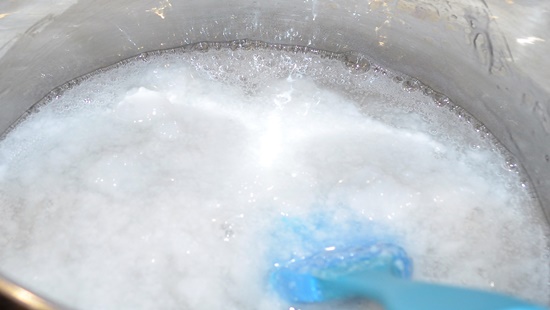
Melt Saracino isomalt over the hob stirring continuously with a silicone spatula.
.
Step 7
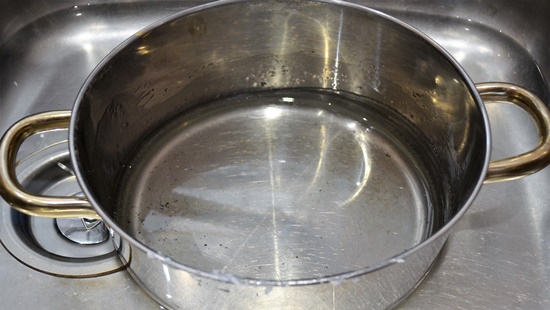
As soon as the isomalt has dissolved fully transfer immediately to a sink pre-filled with cold water to stop the isomalt from burning and turning brown.
.
.
Step 8
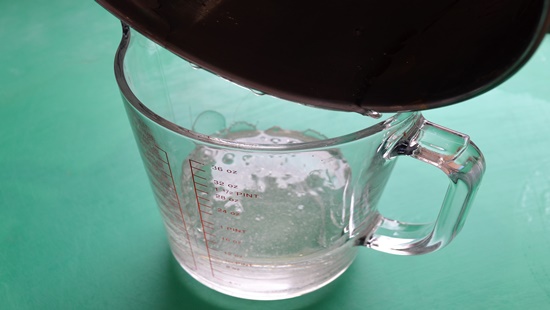
Carefully transfer the cooked isomalt from the saucepan to a heat proof jug.
.
.
Step 9
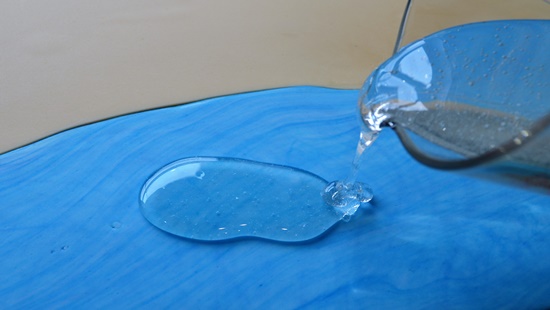
Slowly poor the isomalt over only the blue part of the covered drum, if its pored carefully enough it should not run over the edges of the board.
TIP – IF THE ISOMALT DOES RUN OVER THE EDGE OF THE BOARD IT CAN BE EASILY FIXED BY HEATING A LARGE KITCHEN KNIFE AND CUTTING IT AWAY. ALWAYS GLAZE ISOMALT TO PREVENT IT FROM GOING CLOUDY
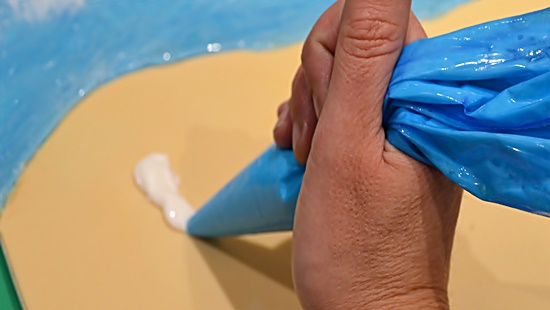
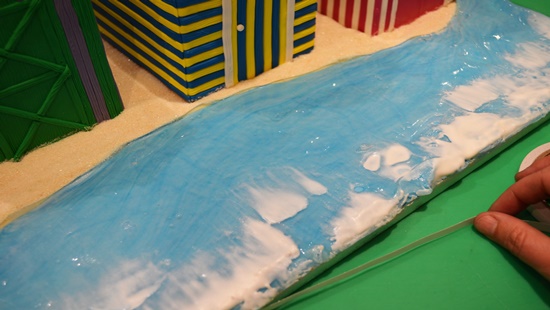
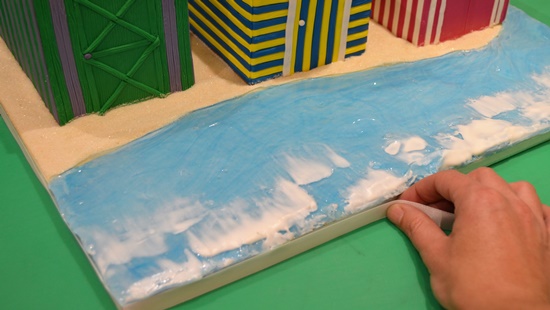
Step 10
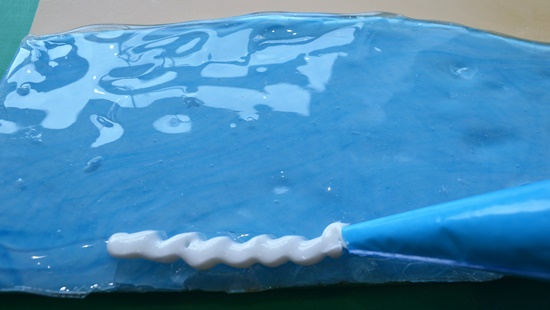
Once the isomalt has set (No longer than 5 minutes). Fill a piping bag with Royal Icing, there is no need for nozzle just snip the top off with scissors and pipe wavy lines randomly along the front of the board.
.
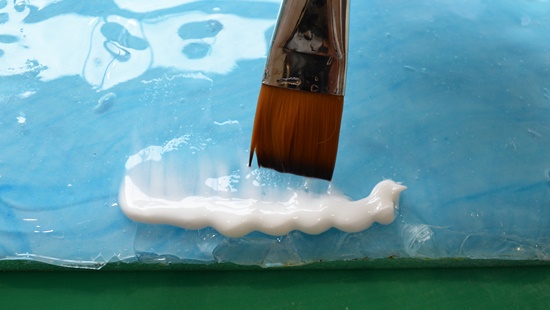
Step 11
Dampen a wide artist brush with cool boiled water and brush the royal icing away until it fades to nothing.
.
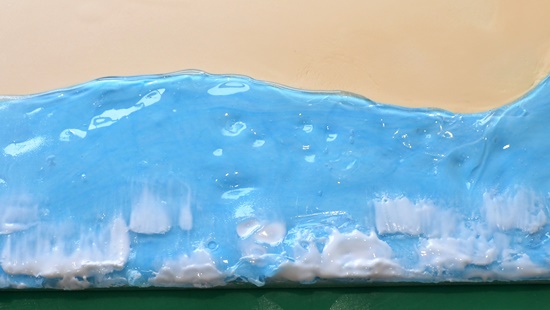
Step 12
Continue to brush all the royal icing waves creating a rough sea effect. Put the completely board to one side to dry.
.
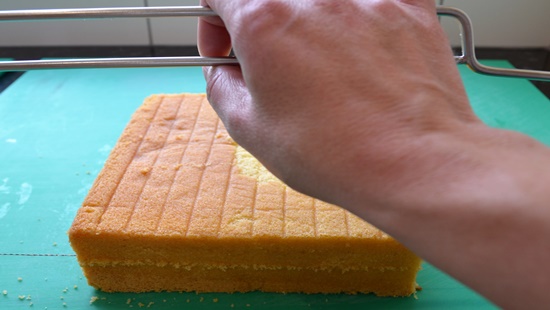
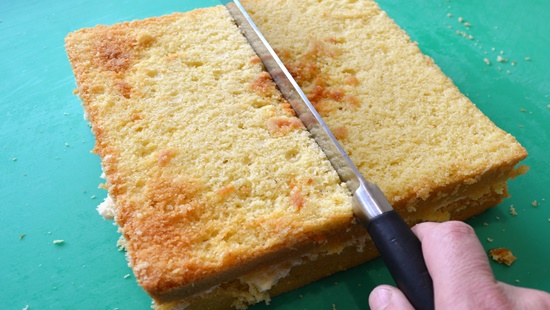
Step 13
Using a wire cake leveller cut each of the 3 cakes in half.
.
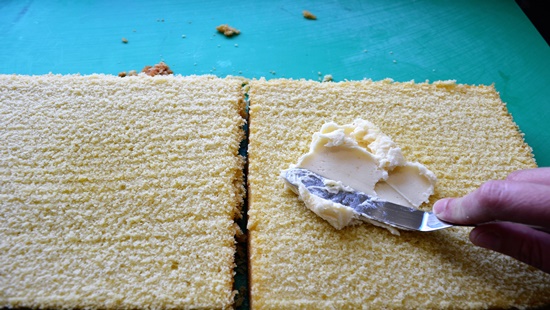
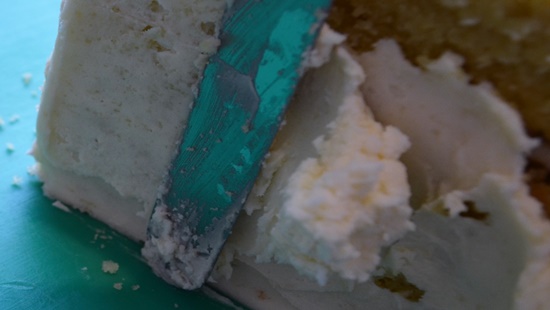
Step 14
Spread buttercream and jam and sandwich together.
.
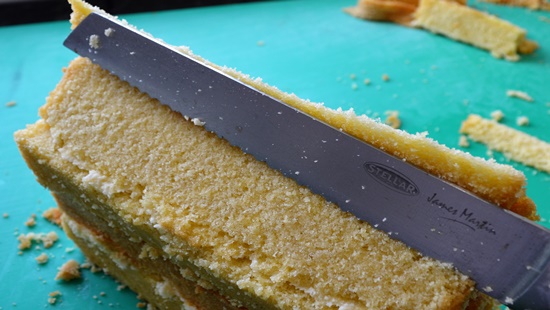
Step 15
Cut each of the cakes directly in the half, buttercream and jam again and stack on top of one another, resulting in 3 cakes each 4 inches wide by 8 inches deep around 7 inches high.
.
Step 16
Using the templates provided and a serrated bread knife carve the cakes to the shape of beach huts.
.
Step 17
Crumb coat each cake with buttercream, ganache can also be used. Apply a generous layer with a palette knife and smooth with a straight edged side scraper.
.
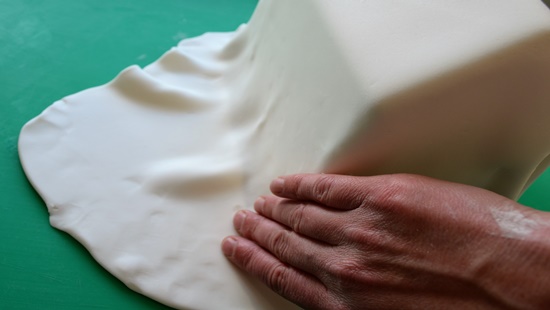
Step 18
Roll out the white sugarpaste to a thickness of 5mm and drape over the freshly crumb coated cake. Fit the corners first then the sides. Trim away the excess paste with a Sharpe knife.
.
Step 19
Using a smoother, smooth away all imperfections.
.
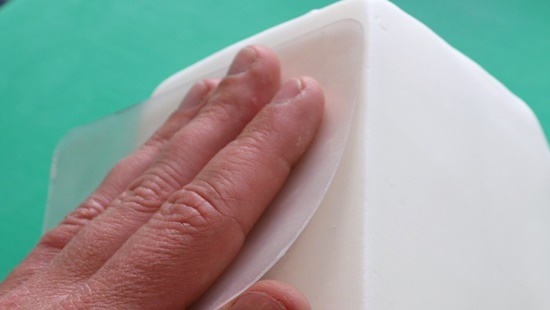
Step 20
Create Sharpe edges, using flexi-smoothers, apply light pressure with your fingers and work in long slow movements, avoid using too much pressure and short sharp movements as this can cause gouges in the paste.
TIP – WHEN WORKING ON 3 CAKES. CRUMB COAT, COVER AND SMOOTH EACH ONE ENSURING THAT YOU ARE COMPLETELY HAPPY BEFORE MOVING ONTO THE NEXT CAKE.
.
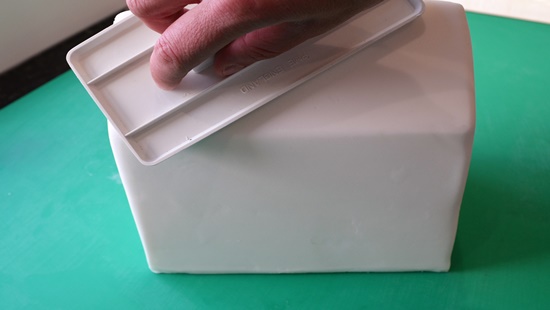
Step 21
Mix together 25g Black, 25g Green & 100g White modelling paste and knead well to achieve a khaki colour for the beach huts roof. Roll the modelling paste out to a thickness of 1mm.
.
.
Step 22
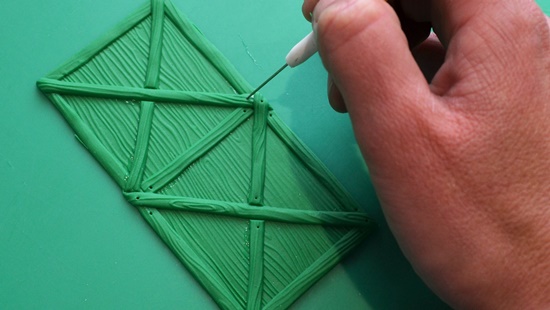
Brush the roof with edible glue and apply the rolled paste, trim away any excess paste with a Sharpe knife.
.

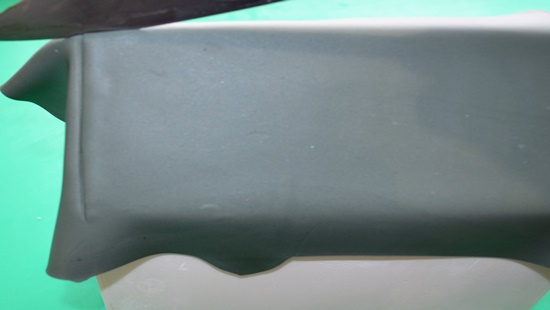
Step 23
Texture the roof with a hard-bristled brush. You can use a variety of different things to texture the roof. A strip cutter creates a flat woof type effect.
.
.
Step 24
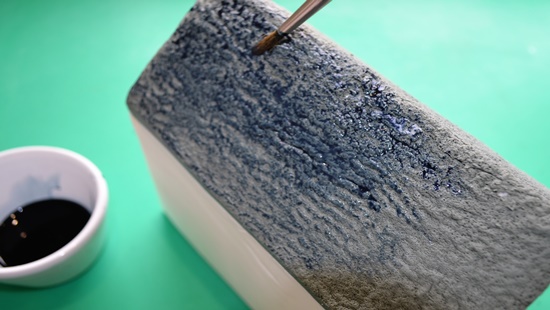
Make a paint solution using a little black extra and water. This should be very watery. Brush over the roof and the solution should naturally gather in the texture grooves to create a 2-tone effect.
TIP – IF TOO MUCH PAINT SOLUTION IS APPLIED, BLOT WITH KITCHEN PAPER IT REMOVED THE EXCESS AND LEAVES A SLIGHT PATTERN BEHIND WHICH ADDS TO THE EFFECT.
.
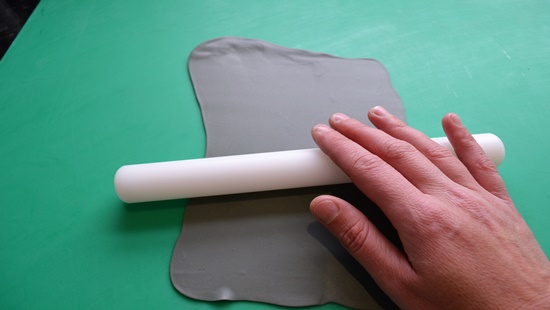
Step 25
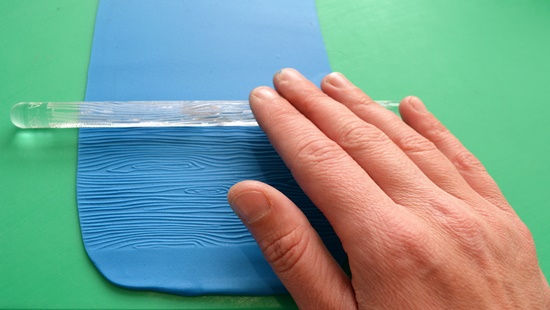
Roll out chosen colour modelling paste to a thickness of 1mm, using a textured rolling pin or texture mat, emboss a wood grain texture onto the modelling paste.
.
.
Step 26
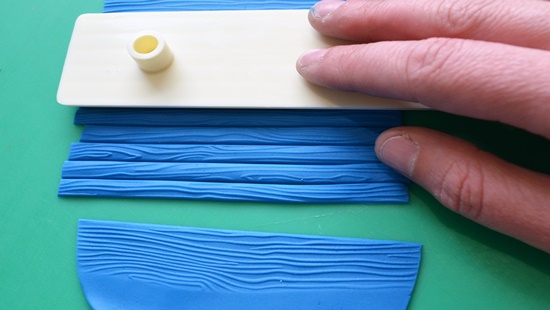
Using a strip cutter, multiple strips can be cut at once making it faster. This can also be done with a sharp knife but great care is needed to ensure that all the strips are of equal thickness.
.
Step 27
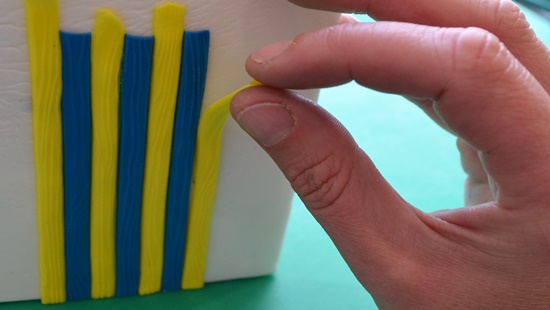
Brush one side at a time of each of the prepared cakes with edible glue or piping gel. Begin applying the strips of the modelling paste to create a door first.
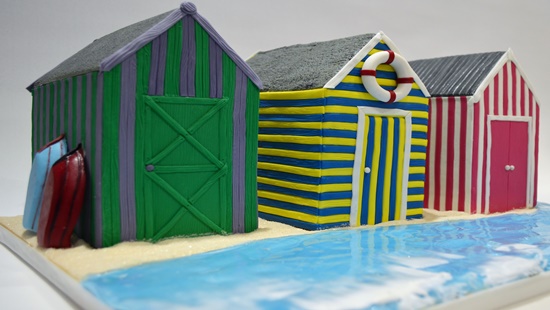
.
.
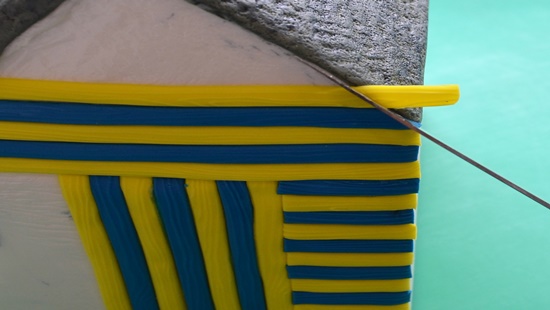
Step 28
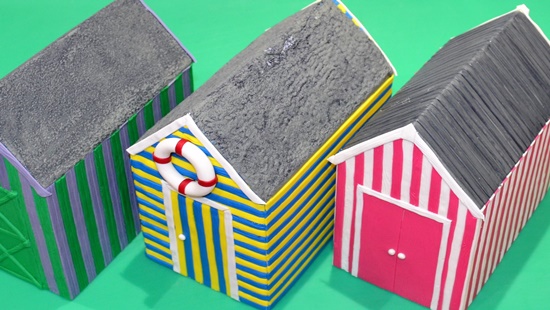
Keep adding strips of paste in the chosen colours until the 3 beach huts are complete, use a Sharpe knife to trim away excess paste. 6 colours are the minimum but more can be used to create a stunning colourful summer cake.
TIP – USING DIFFERENT SIZED STRIP CUTTERS WILL CREATE VARIETY IN THE DESIGN
.
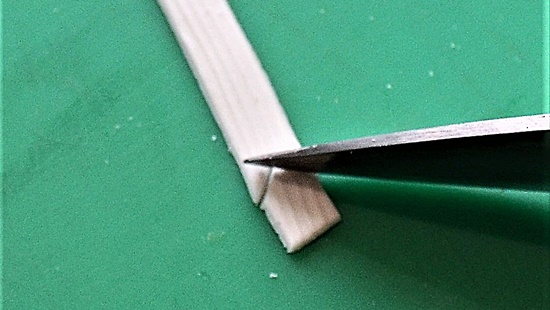
Step 29
Cut small finishing touches from modelling paste to really finish off the design, roof edging strips are very effective.
.
.
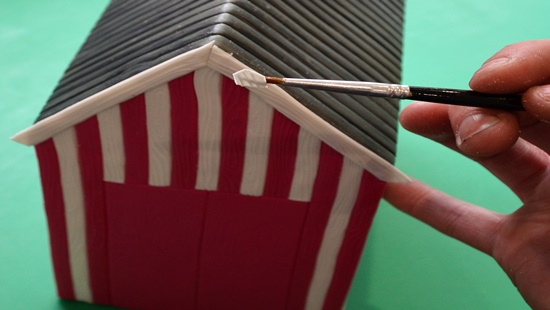
Step 30
Use edible to glue to apply the finishing touches, small items can be picked up using a little edible glue on an artist brush.
TIP – REMEMBER TO TEXTURE THE MODELLING PASTE TO CREATE REALISTIC BEACH HUTS
.
Step 31
Use a ball tool to create indentations for the door handles to fit, apply a small amount of edible glue to stick the door handles in place
.
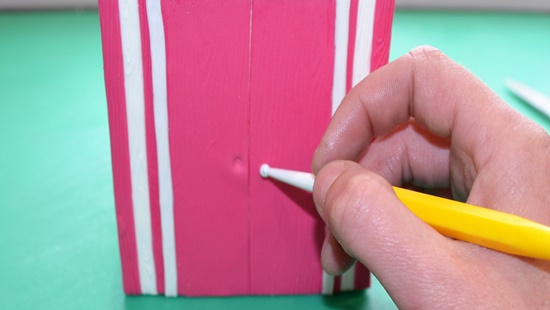
.
Step 32
A scriber needle can be used to create small (Nail Holes) onto the wooden planks.
.
Step 33
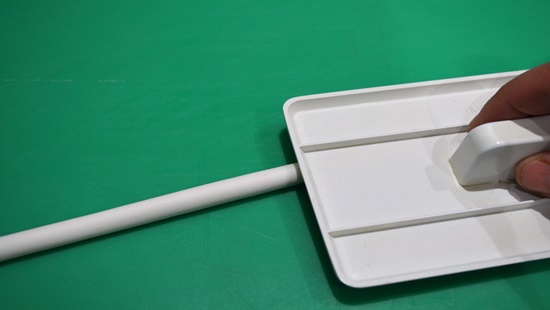
Using a smoother Roll out a long sausage around 1cm thick.
.
.
Step 34
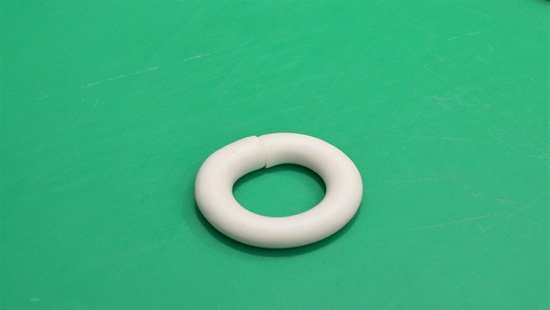
Cut both ends completely straight using a Sharpe knife and bend round to form a ring, stick together with a little edible glue. Don’t worry about the join this can be covered by applying thin strips of red modelling paste to create the life ring.
.
Step 35
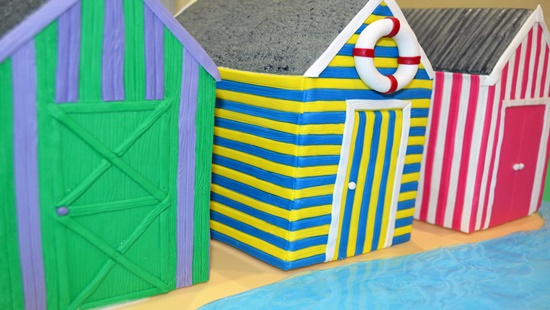
With all 3 beach huts complete in a variety of colours with a variety of finishing touches it’s time to attach them to the pre-prepared cake drum.
.
.
Step 36
Use Royal Icing to attach the cakes to the board.
.
Step 37
Slide each cake into position so they are at equal distances apart and slightly staggered.
.
.
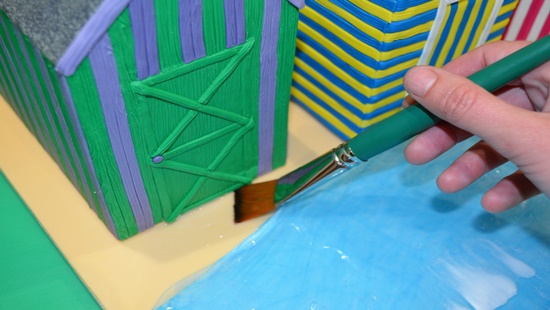
Step 38
Brush any visible “Sand” coloured sugarpaste with piping gel.
.
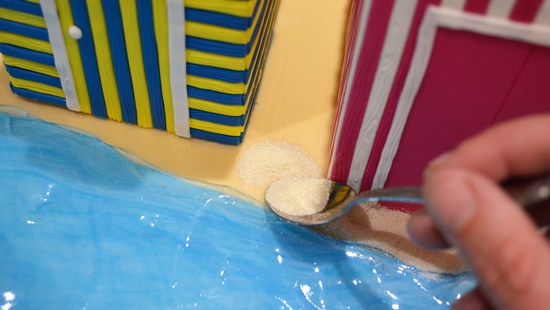
Step 39
Using a teaspoon careful sprinkle golden caster sugar over to create realistic looking sand.
.
.
Step 40
Run double sided tape around the cake drum making sure the join is at the back.
.
Step 41
Remove the back from the double-sided tape and apply the ribbon.
.
.
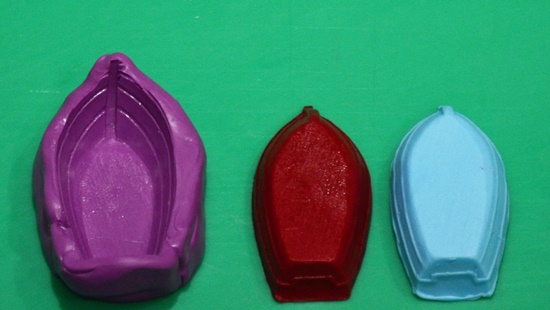
Step 42
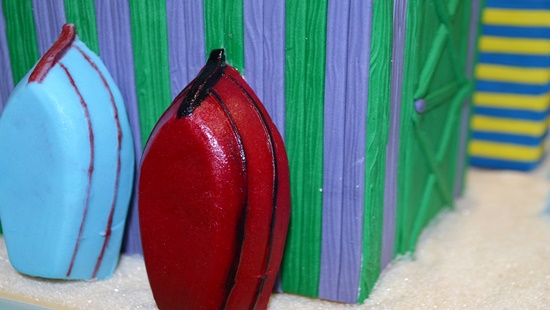
Accessories can be added. Boats, surf boards or even a bucket and spade. Mould Making kits are very handy to make moulds from children’s toys.
.
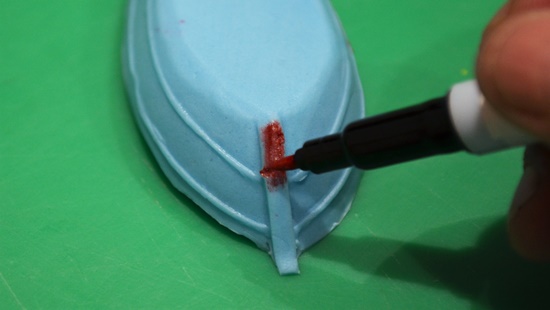
Step 43
Use edible pens to add detail. Detail can also be added by hand painting or even adding edible oriented images.
.
.
Step 44
Apply any heavier finishing touches with Royal Icing as it dries a lot firmer than edible glue.
.
