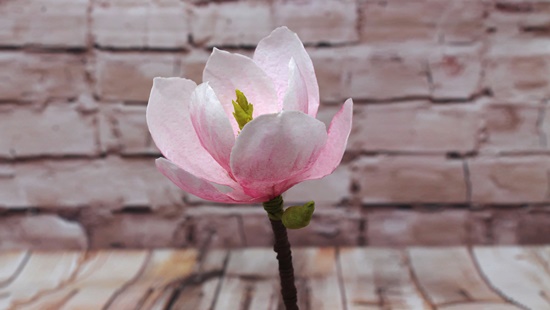
WAFER PAPER MAGNOLIA
Author: RHIANYDD WEBB

Skill level: BEGINNERS
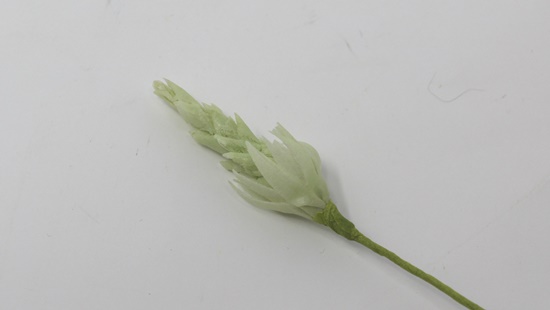
I have one of these beautiful Magnolia trees in my garden and can’t wait until those buds appear because I know the tree will be covered in stunning flowers.
.
You will need:
- Saracino 1 sheet wafer paper A4 0.27mm
- Saracino Wafer Glue
- Fabriliquid
- Saracino dust colours: yellow, green, pink, plum
- Small sharp scissors
- No.2 brush for glue
- No.8 filbert brush
- 28g white wire
- Florist tape half width: nile green, brown, white
- Aldaval Magnolia petal silicone veiner
- Culpitt Magnolia cutter set
- Steamer

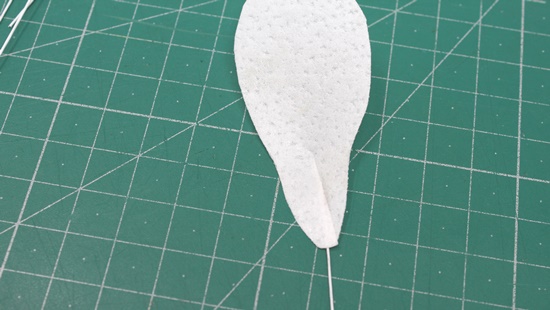
Step 1
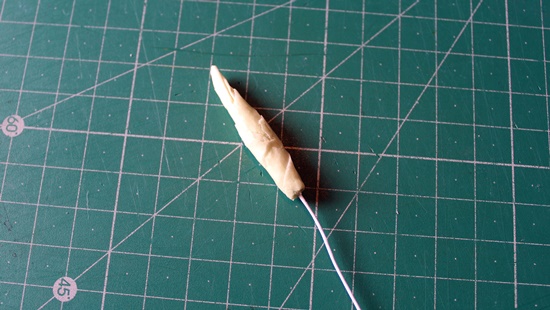
To create a shape to represent the Carpels, Cut a strip of wafer paper 18cm by 4cm. Lightly spray with fabriliquid, disperse the excess liquid with your finger, or shake to disperse.
Step 2
Cut a 28g white wire in half, bend a hook in one end. Wrap the wafer paper strip round the wire to just over 4cms long, leaving it thicker at the base. Keep the excess.
Step 3
Use a small sharp scissors to cut snips into the wafer paper centre.
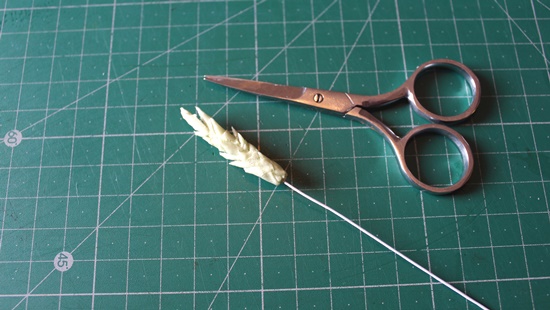
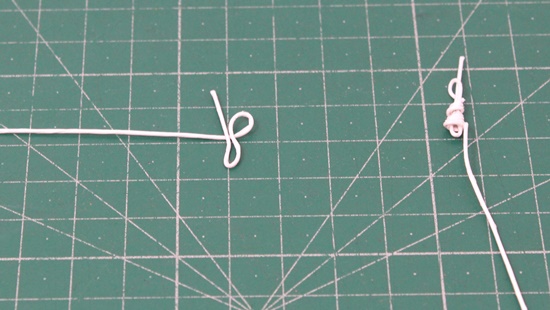
Step 4
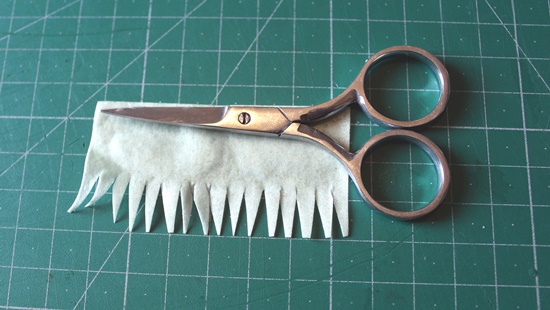
Using the remainder of the wafer paper strip (7cm long), cut 1cm deep “v” shapes into the wafer paper using a small sharp scissors.
Step 5
Wrap round the base of the centre to represent the stamen. Tape the very base into place with half width nile green tape.
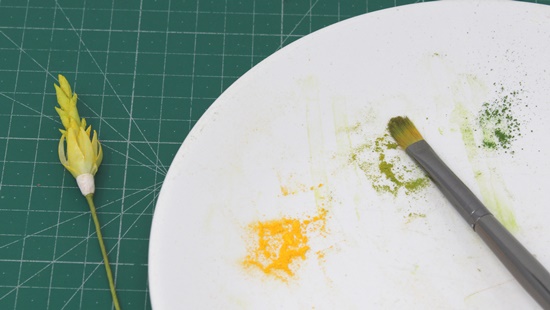
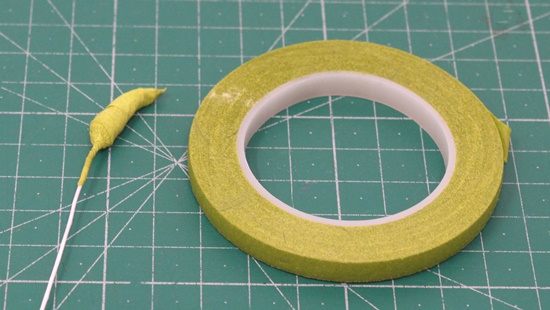
Step 6
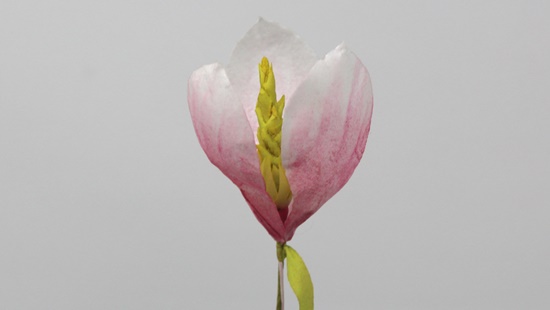
Thicken the base of the centre by taping with white half width tape. Dust the centre first with yellow, then mix yellow and green and over dust in parts.
.
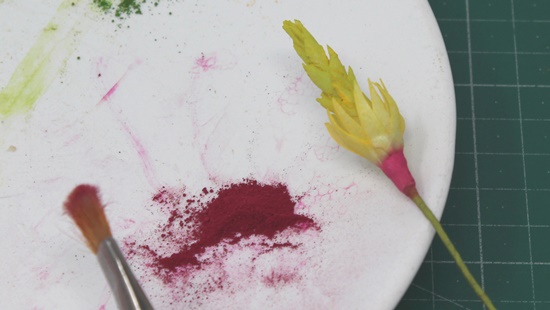
Step 7
Dust the white tape with plum dust.
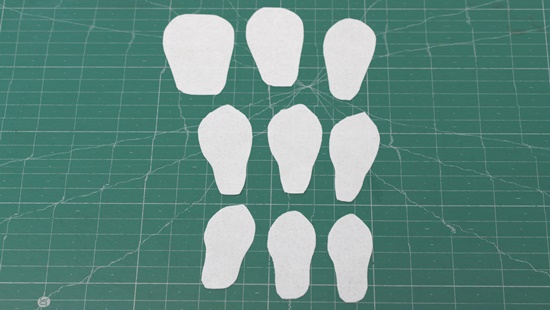
Step 8
Cut out three large, three medium and three small of the shapes using a sharp scissors.
.
Step 9
Place the shapes dimpled side up so that we can dust the smooth side as the outside of the flower. Cut a 2cm slit up the base of the petal. Paint wafer glue down one of the cut edges and place a half length of 28g white wire onto the glue. Press to fix then overlap with the other side of the slit.

Step 10
Hole the first shape against the female (inverted side) of the petal veiner and hold in the steam for three seconds. Press the petal between both sides of the double sided veiner and hold for ten seconds to cool. Repeat for the rest of the shapes.
.
Step 11
Take a half length of 28g white wire and bend at 2cm. Bend the wire back up and bend at 1cm (as the left hand wire) then wrap around to thicken the base. Finally pull the rest of the wire down as shown on the right hand wire.
Step 12
Tape the wire repeatedly until you have a smooth bud shape. Curve slightly. (I used 30cm of tape)
.
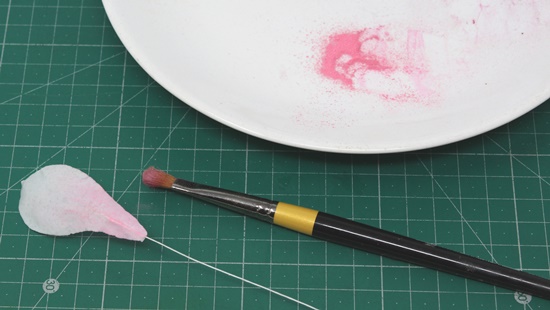
Step 13
Dust the back of the petal/tepal shapes first with pink starting at the wired end using the filbert brush. Then dust the lower half with the plum and swipe the brush upwards to create faint lines in the dust.
Step 14
Tape three medium size equally around the centre. (Observe the faint stripes of plum on the back of the shapes. .
.
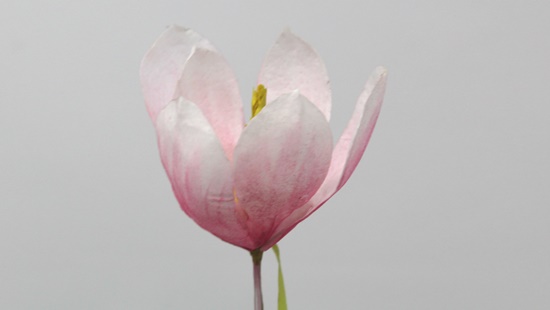
Step 15
Next tape the three large shapes as a second whorl (row) in the gaps between the first.
Step 16
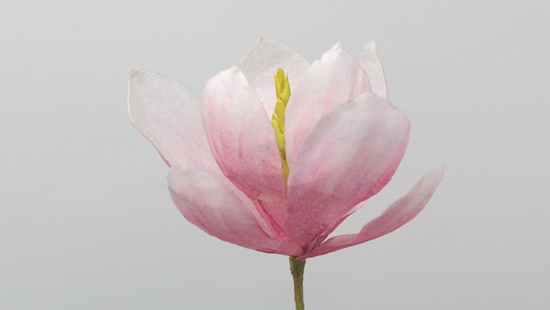
Tape the three smallest shapes next. Tape down to the bottom of the stem twice.
.
Step 17
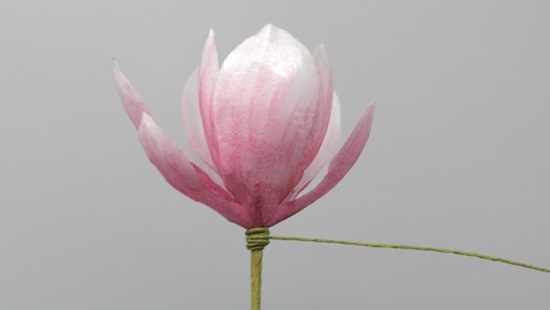
Twist a length of half width nile green tape back on itself to form a rope. Wrap around the magnolia as in the image. Keep approximately 8cm.

Step 18
Tape the two leaf buds beneath the roped area as in the image and add the remaining tape rope. Tape over the stem twice with brown half width tape.
.
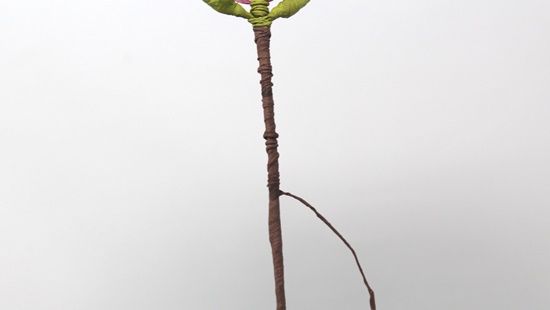
Step 19
Twist half width brown tape into rough rope and bind the stem to finish.
Hey Presto
.
